For guaranteed success, follow these steps to ensure that you finish your project professionally and successfully.
While the 5/8-inch seam is the second line, the 3/8-inch seam is the first. Depending on your specific machine, when it comes to piecing quilts, a ¼-inch seam is primarily used; however, when sewing apparel, the 5/8-inch seam is the standard allowance.
Considering that most presser feet are about 3/8-inch-tall, you should measure from the needle to the edge of the presser foot when using a standard presser foot. It is recommended that you adjust your machine’s needle position where necessary to ensure that you have the proper seam allowance at all times.
For an accurate and sturdy finish on the seam, it is recommended that you use a seam ruler or gauge to keep the width of each stitch at exactly ¼ inches. Since the tiniest of mistakes can cause issues further down the line, you should cut all pieces accurately before they are sewn together.
What does 3/8″ mean on a sewing machine?
When measuring or sewing apparel it is essential to know how to change fractions into inches.
Inch markers are used in sewing machines to make it possible for users to measure thread length. Fractions represent the distance from one point to the next on a line – you can use simple math skills to convert the measurement into inches.
Specifically, when converting decimals to fractions, it is important to understand what is represented by every number on the number line – fractions and whole numbers from 1 to 10.
To change a fraction into inches, you must divide the top (numerator) by the number at the bottom (denominator). To demonstrate 2/5 as the fraction in question, you must divide 2 by 5 to convert this measurement into inches.
On the other hand, to convert a measure like .75 to inches, you would take that number (decimal value) and multiply it by 12 – as an inch is 1/12th of a foot – giving you around 3 to 4″ as the answer, or 7 to 8 centimeters.
Alternatively, you can subtract the top number from the bottom one – which in the above example would be .25 – .75 = 0 – this gives you 0 on one side and –inch on the other, equaling 3″ (counting both sides as a negative measure does not exist).
The above can be written down as: Decimals ÷ 100 = Inches
Finding the 3/8″ mark on a ruler
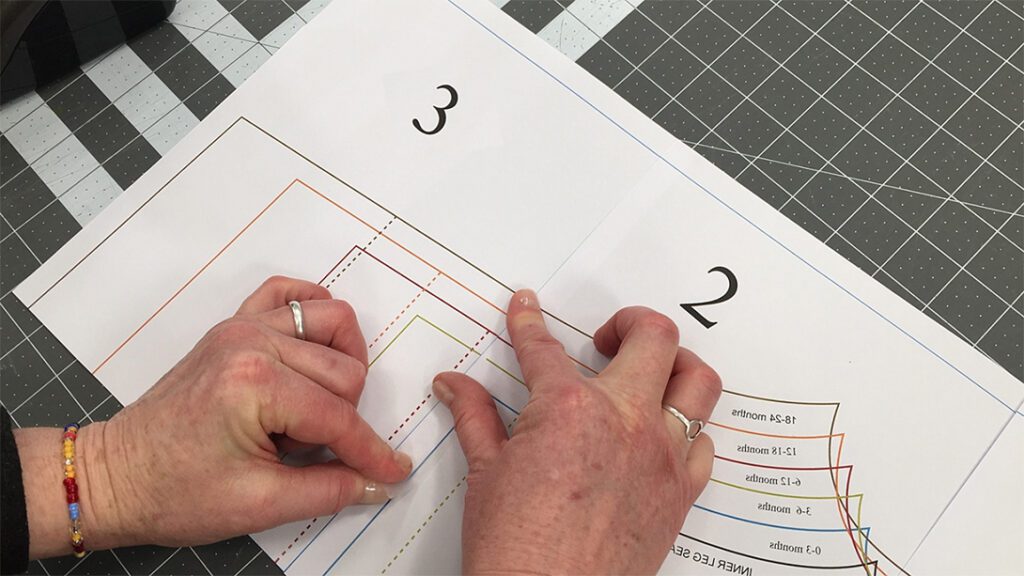
Begin on the first line on the left side of the ruler, and proceed to the right as you measure when using a ruler as your measuring tool.
Before making any measurements or cuts, identify each mark on a ruler representing 1/16 of an inch. Round your object to the next integer if it is not between these marks. For instance, you can round off an object’s width to 9/16″ if it is 3/8″ in width but isn’t on any of the marks on a standard 8 by an 11-inch ruler.
Make sure you use landmarks along both edges of your rulers – the first and last lines – keeping them straight when taking measurements across curved surfaces at all times to ensure that you only make the most accurate measurements or cuts. Regular use can wear out rulers quickly, so be sure to have replacements on hand.
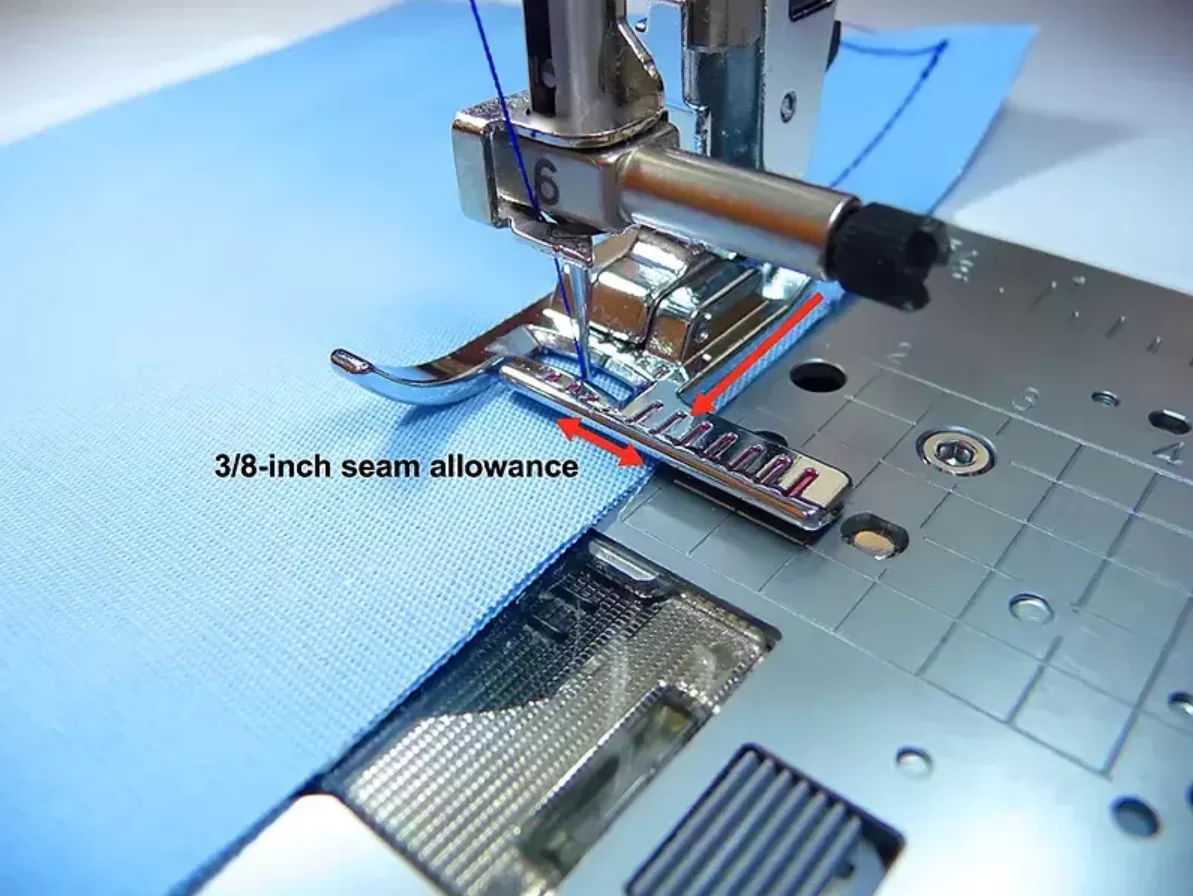
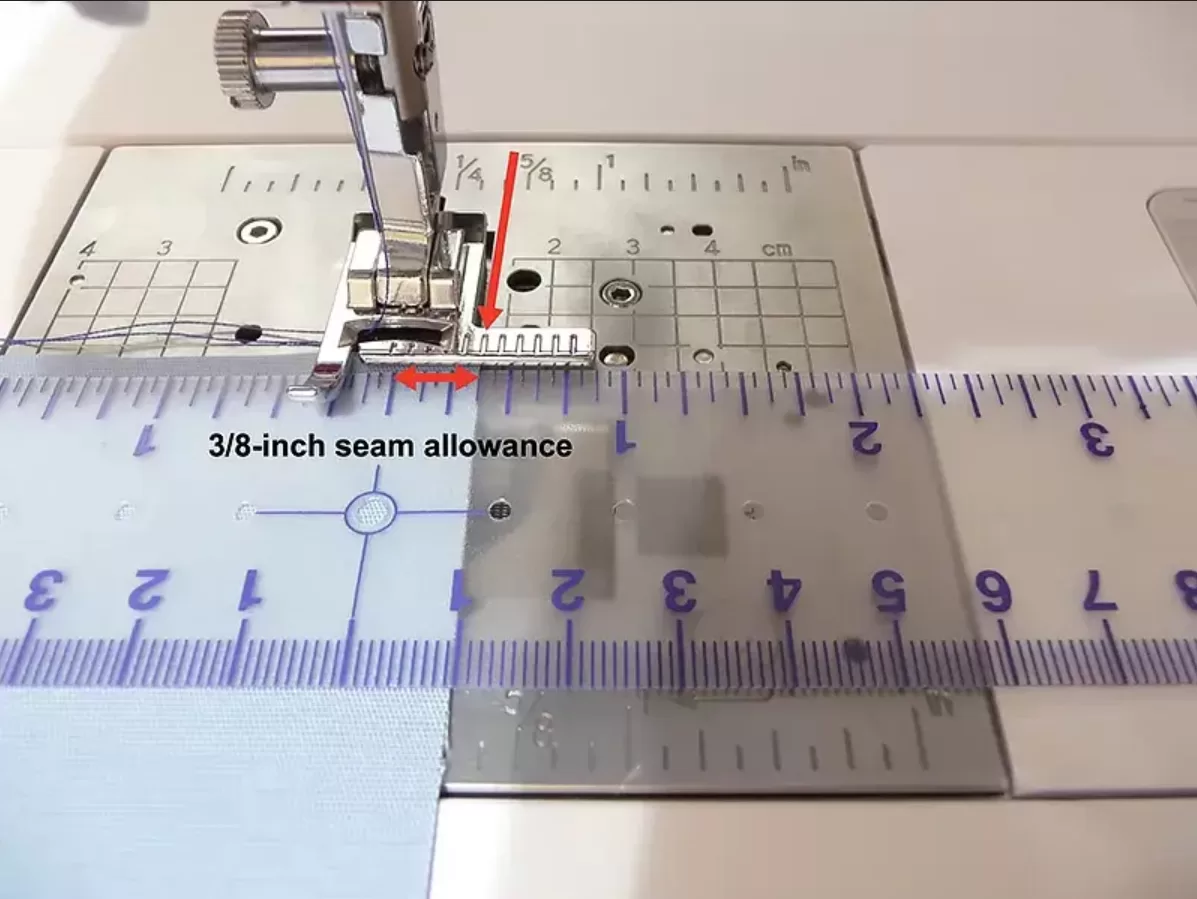
The bobbin is separated from the top thread by a cover on the sewing machine referred to as a throat plate. The throat plate has a series of lines that can be seen with close inspection. You can see whole numbers at the front and fractions at the back of the throat plate of this sewing machine.
Fractions represent the distance from the needle to the line. The needle will be 3/8’s of an inch away at the first line – which is the 3/8″ mark. From there, you go to the 4/8 or ½ inches from the needle, and so forth.
The number of millimeters from the needle is indicated by the whole numbers – which are metric. The “10” on the first line represents 1 centimeter or 10 millimeters from the needle.
You can adjust the positioning of the needle using a function on your machine. There are two ways of doing this on a sewing machine: swung (used in topstitching) or central. The throat plate measurements only apply to a central position of the needle.
You can use a permanent marker or pencil and ruler to create these useful lines on the throat plate of your machine if they are not already included. You can make marks for important measurements like 1 and 1.5 centimeters by placing a ruler or tape measure between the presser foot and throat plate.
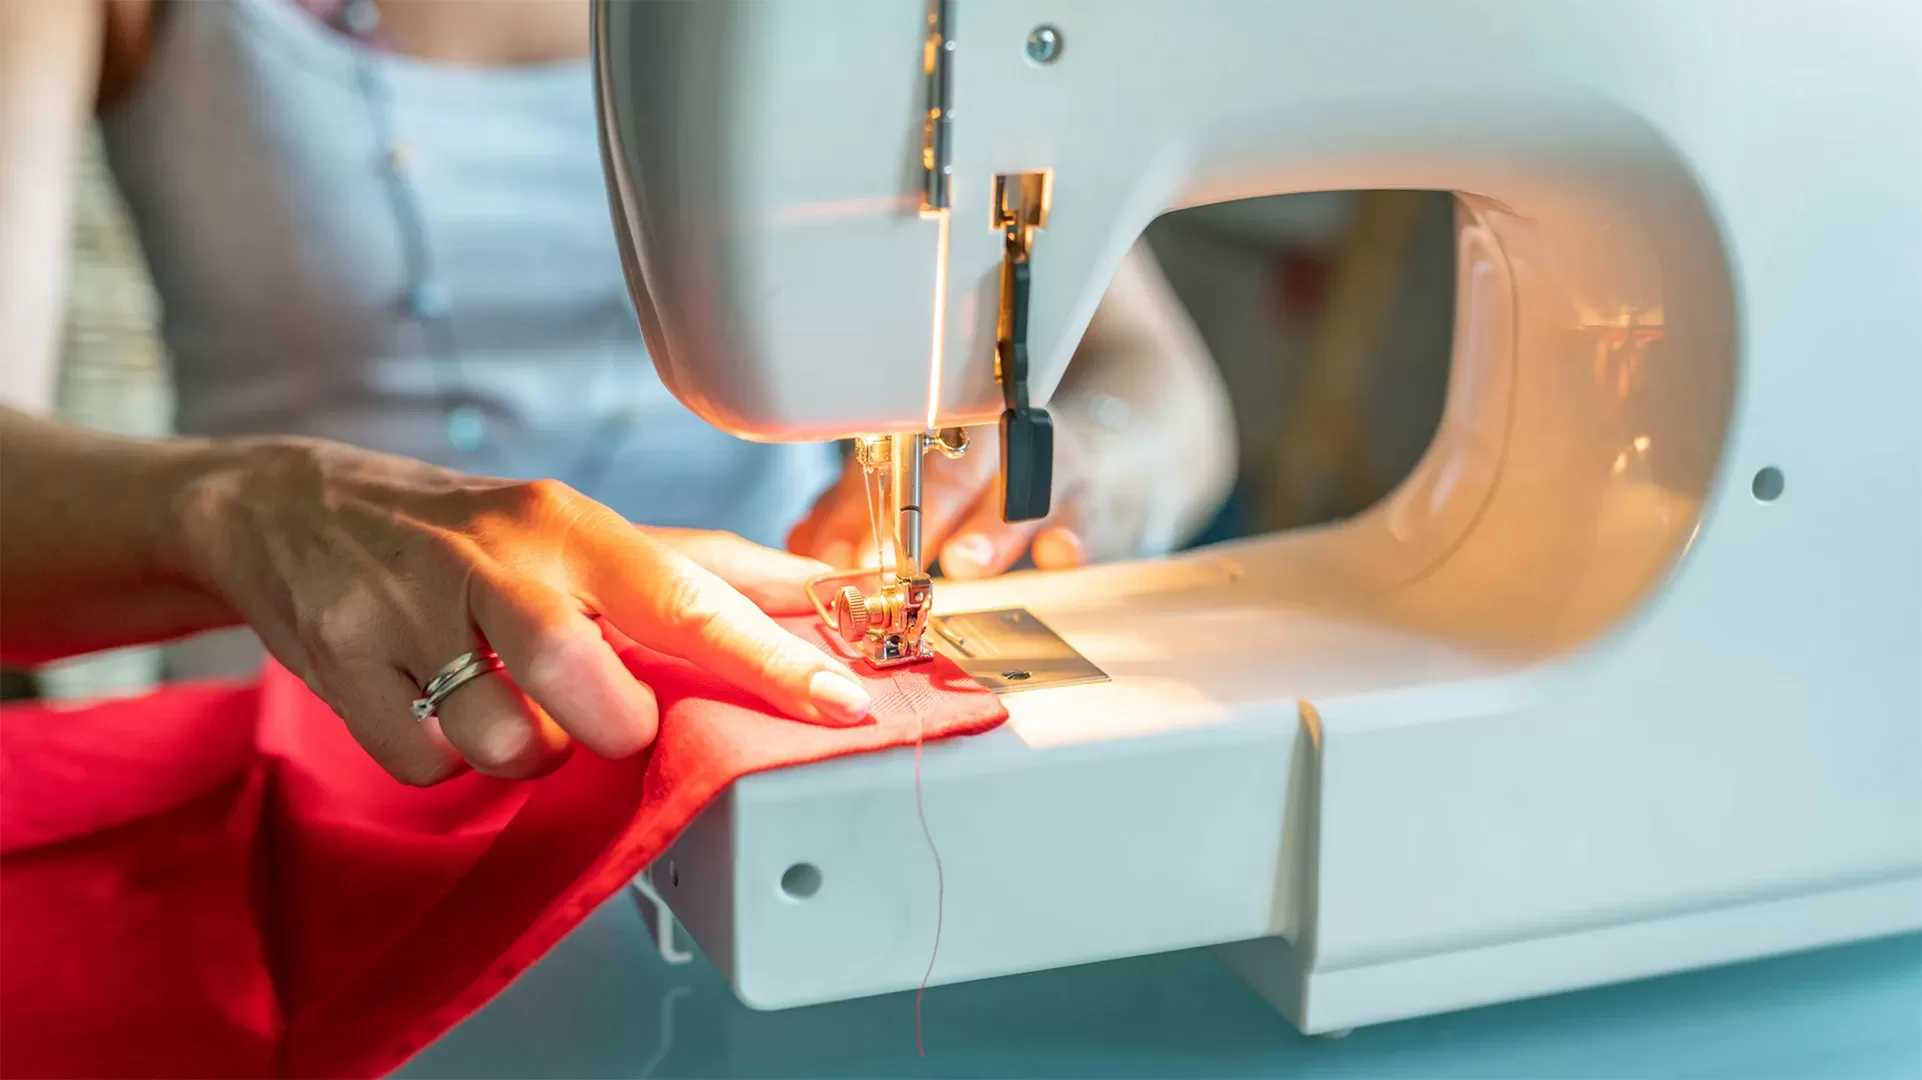
Place the fabric in alignment with the seam allowance you intend to sew when you are about to start sewing. Instead of looking at the up and down movement of the needle, focus your eyes on feeding the fabric next to the seam allowance line.
Summarizing
When determining the size of seam allowances and fabric, you can use the various measurements on sewing machines.
3/8 inches is the most common measurement, 4/8 or ½ inches comes next, then the industry standard 5/8 inches and 6/8 or ¾ inches come last. Since it is right at the edge of your throat plate, right next to the needle, the ¼ inch seam isn’t labeled.
To avoid having to take multiple measurements to get things right, pick a machine with accurate measurements, and enjoy durable and high-quality seams. It is essential to check the manual before commencing a project because various changes or adjustments may be necessary when using different fabrics on a specific machine.
Always follow all instructions carefully when using any machine, making sure that safety comes first.
FAQs
Where is 3/8″ on a ruler?
Between marks six and seven, you will find 0.375. 3/8 is positioned at 1 inch on the ruler because it comes between 8 and 9.
How do I choose the best stitch length for machine quilting?
Depending on what you are quilting for and the type of thread, it is recommended that you set stitch length to about 8 to 12 stitches per inch or 2.5 to 3.0 when using a machine for stitching. While a longer stitch length would be more suitable in some cases – such as in the case of Sparkle Thread – the previously mentioned range is perfect for most machines.
How do I identify a seam allowance?
Every pattern you purchase from KittyPatterns will show any seam allowances where present.
What is the right seam allowance size?
Before starting a project, you should start by measuring your fabric because there is no one-size-fits-all regarding seam allowances. And to get a clear idea of the amount of space required between each piece of fabric, use hemming tape.