
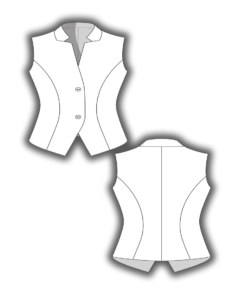
Looking for a sleek, fitted vest that’s both classic and modern? The Kennedy vest has a close-fitting silhouette, fully lined for a polished look.
The front and back feature sculpted princess seams, shaping the vest beautifully. A narrow set-in collar and contoured lapels add a sharp touch, while the angled, off-center button closure keeps things stylish.
Clean finishing details? Armholes are lined with undercut facings, and the hemline dips slightly lower in the front for a flattering shape. Length hits just above the hip, making it a perfect layering piece.
Let’s sew something amazing—ready to get started?
Best Fabrics for the Vest
Fabric choice? Yeah, it makes all the difference. Pick the right one, and your vest will be sleek, structured, and comfortable. Pick the wrong one, and… well, let’s not go there.
For the Kennedy vest, you’ll want shape-stable fabrics with a bit of stretch—something structured but not stiff. Here’s what works best:
- Suiting Knits (Flexible & Polished)
Just the right amount of stretch for comfort while keeping that tailored look. - Stretch Denim (Classic & Durable)
Holds its shape, adds a bit of edge, and works with almost anything. - Micro Corduroy with Lycra (Soft & Textured)
Gives subtle dimension while staying structured. - Barbie Fabric (Smooth & Sleek)
A medium-weight option that drapes well and keeps its shape.
Whatever fabric you choose, make sure it’s comfortable, holds its structure, and makes you excited to sew. Ready? Let’s keep going.
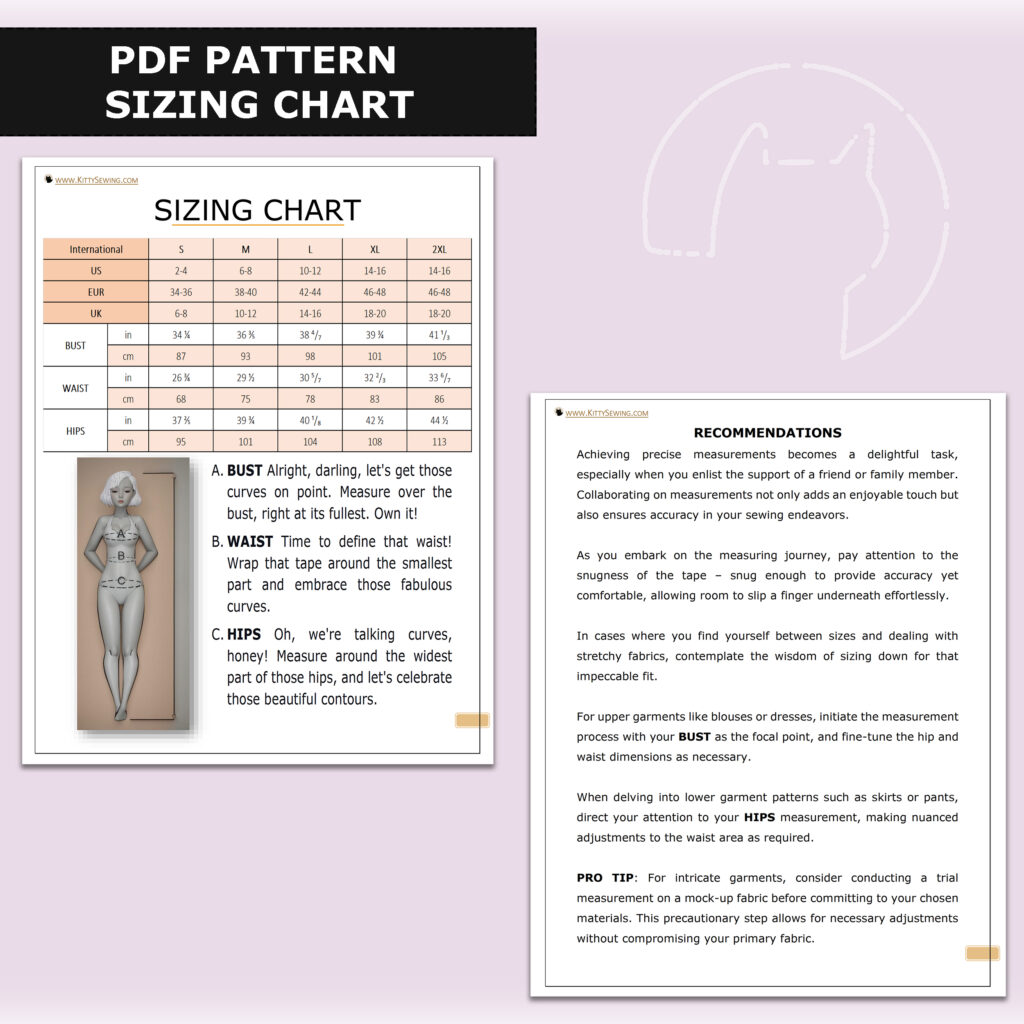
Fabric Consumption

Cutting Your Fabric
Alright, time to start cutting! Here’s what you’ll need:
Main Fabric:
- Back center – 2 pieces
- Back side – 2 pieces
- Front center – 2 pieces
- Front side – 2 pieces
- Collar – 2 pieces (cut with a fold)
- Facing – 2 pieces
- Back neckline facing – 1 piece (cut with a fold)
- Front armhole facing – 2 pieces
- Back armhole facing – 2 pieces
Lining:
- Back – 2 pieces
- Front – 2 pieces
Interfacing:
- Collar – 1 piece (cut with a fold)
- Facing – 2 pieces
- Front armhole facing – 2 pieces
- Back armhole facing – 2 pieces
- Hem piece – 1 piece (cut on the bias, 2 cm wide, with the length equal to the hem)
Seam Allowances:
All parts come with the necessary seam allowances, so just cut and start sewing!
Equipment & Tools
Before you dive in, make sure you have these essentials:
- Household sewing machine – A standard machine will do just fine.
- Iron (with or without steam) and ironing board – Pressing is key for a professional finish.
- Hand and machine needles – Choose the right ones based on your fabric type.
- Pins or small fabric clips – To hold everything in place while you sew.
- Paper scissors for your patterns and fabric scissors for the fabric.
- Ironing net or cotton scrap – Handy for pressing delicate fabrics.
Additional Materials & Accessories
- Dublerin (interfacing) – For adding structure to certain parts of the vest.
- Household machine thread – Match it to your fabric for the cleanest look.
- 2 medium-sized buttons – To finish off your vest with style.
Sewing Instructions
Step 1: Cutting the Fabric
Cut out the fabric pieces according to the pattern specifications.
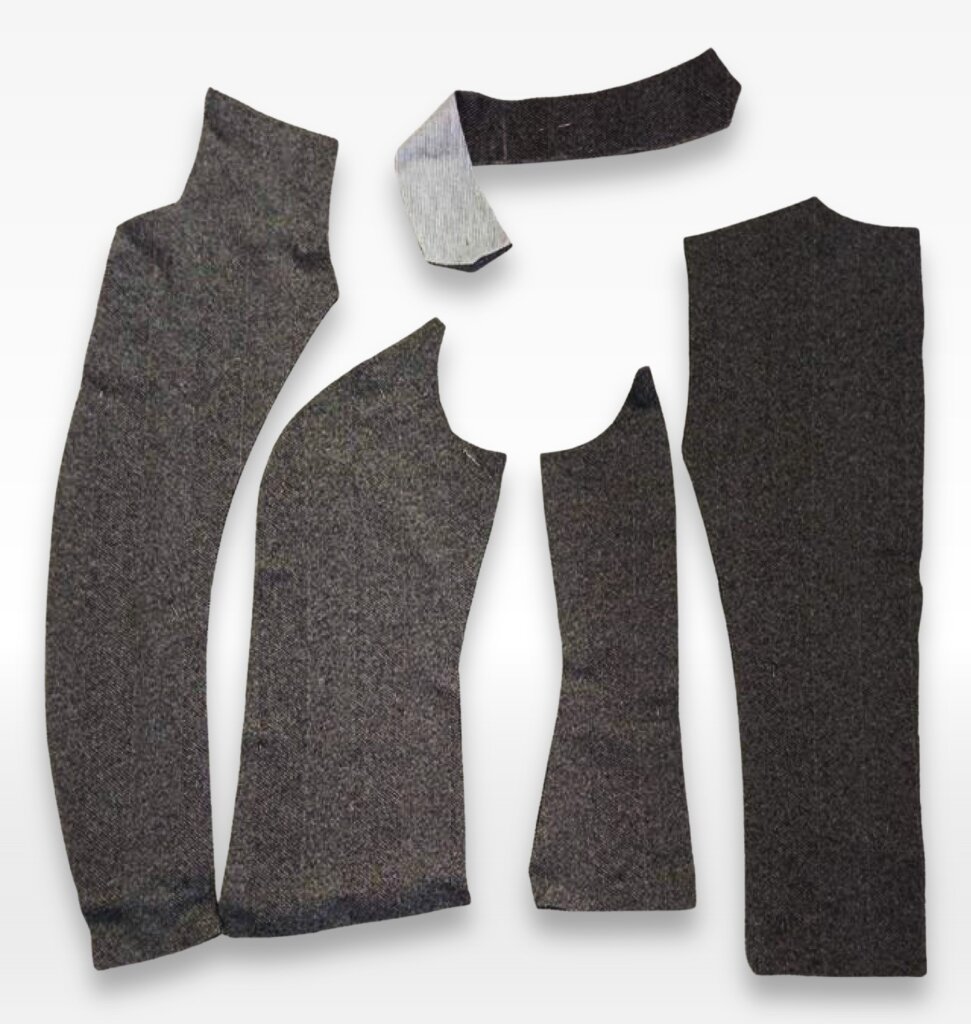
Step 2: Assembling the Main Body
Sewing the Front and Back Pieces
Sew the front pieces together. Trim the seam allowances in the curved areas, stopping 0.2 cm from the stitch line, and press them open.
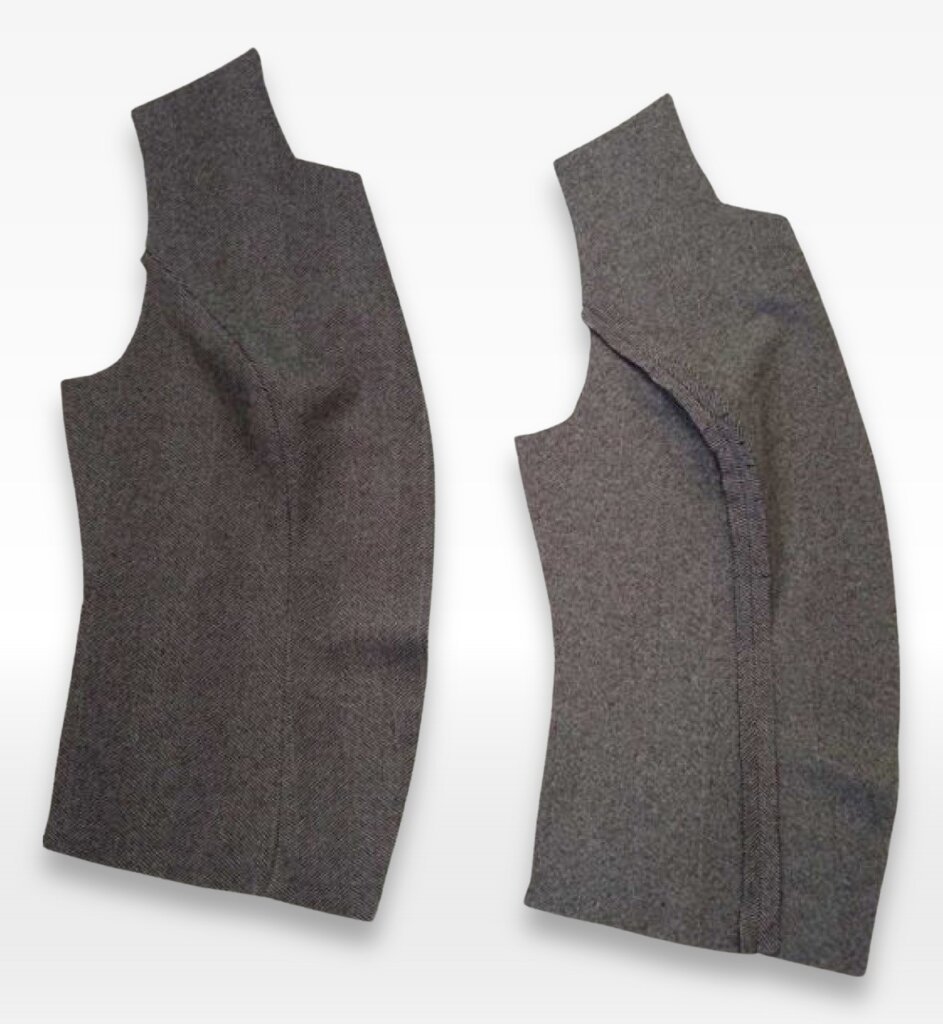
Sew the back pieces together. Trim the seam allowances in the curved areas, stopping 0.2 cm from the stitch line, and press them open.
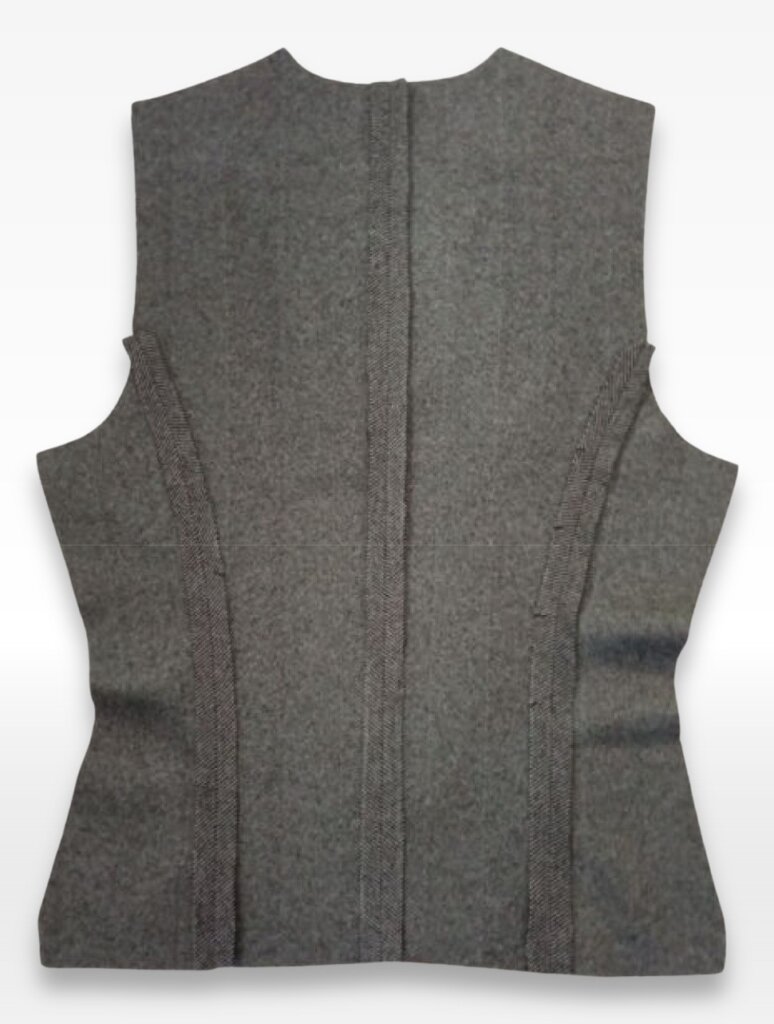
Joining the Front and Back
Place the front and back pieces right sides together, align at the shoulder seams, pin, and stitch. Press the seam allowances open.
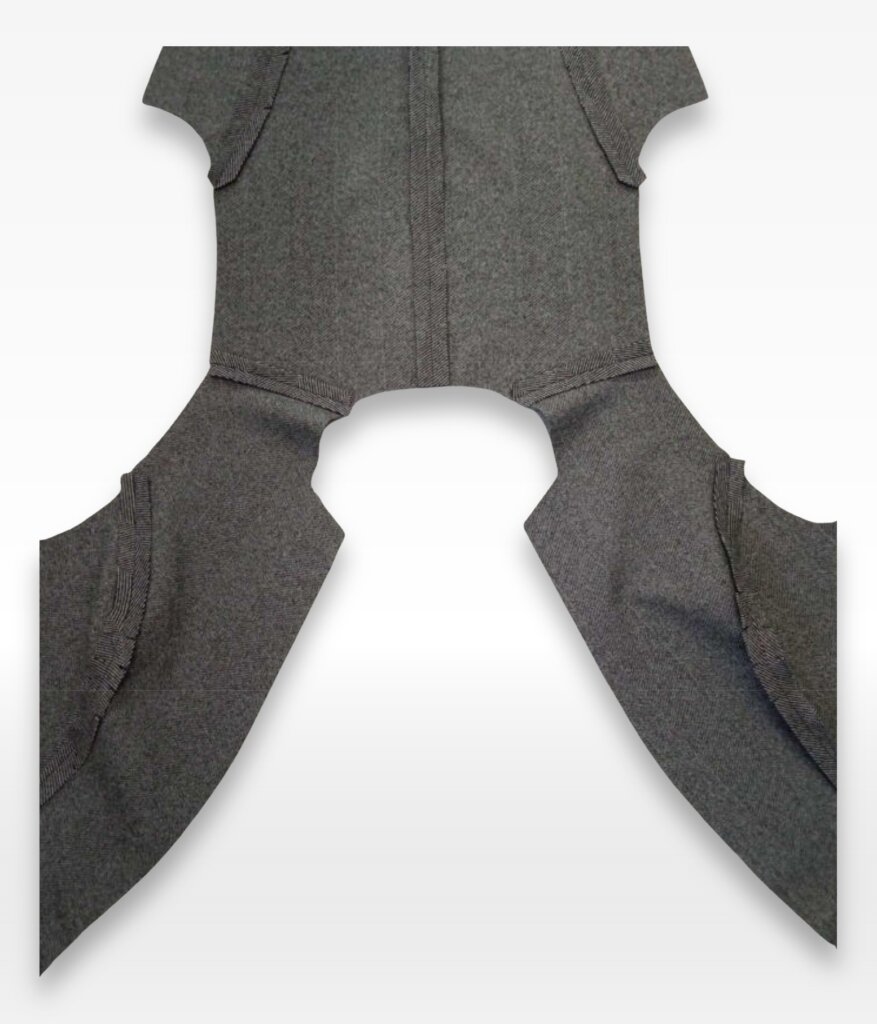
Step 3: Attaching the Collar and Facings
Sewing the Collar
Stabilize and baste the upper collar piece.
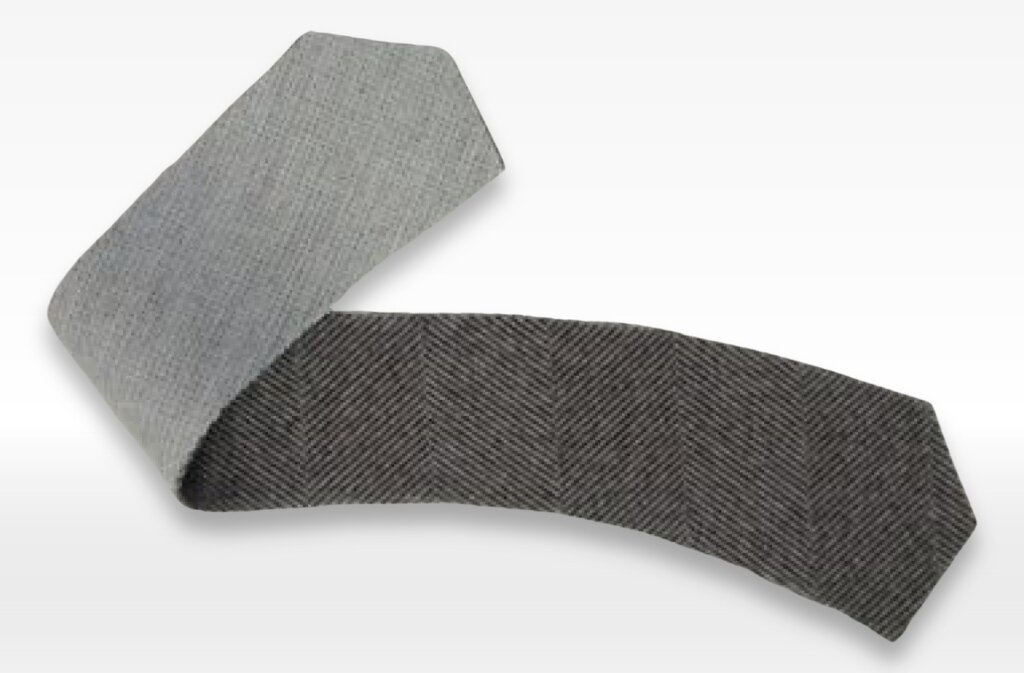
Pin or baste the collar to the neckline, sew it in place, trim the seam allowances, and clip the corners of the collar.
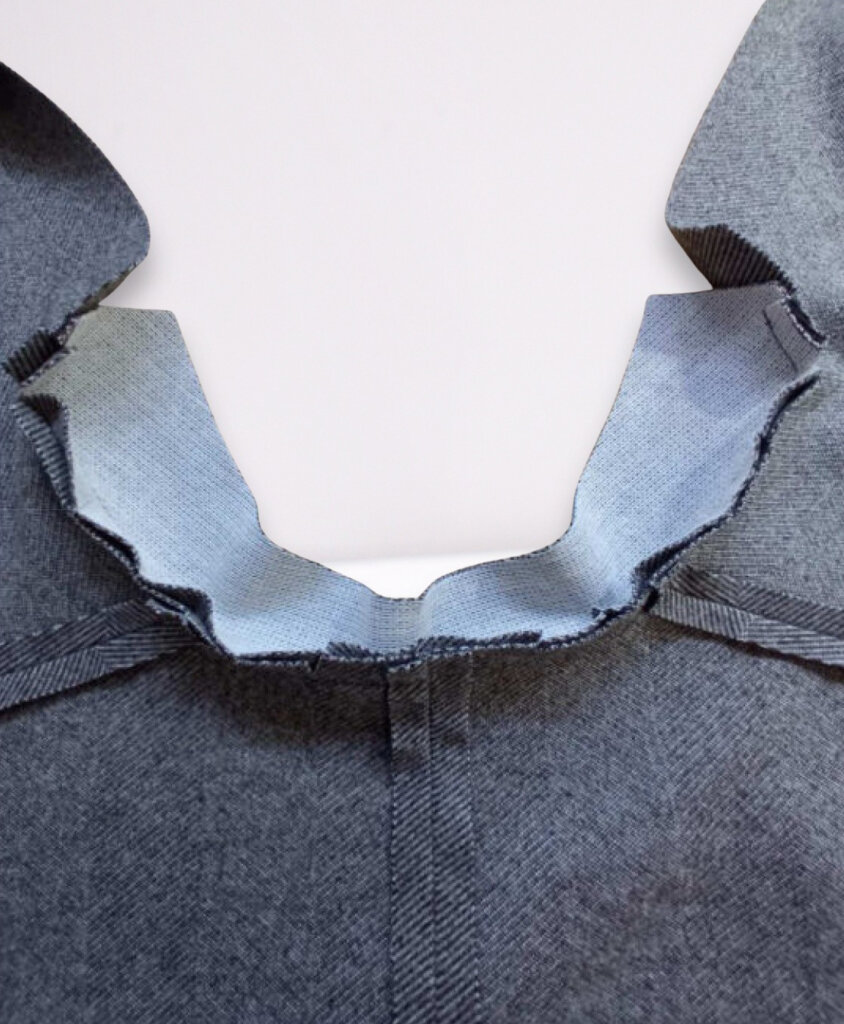
Clip the seam allowances, stopping 0.2 cm from the stitch line.
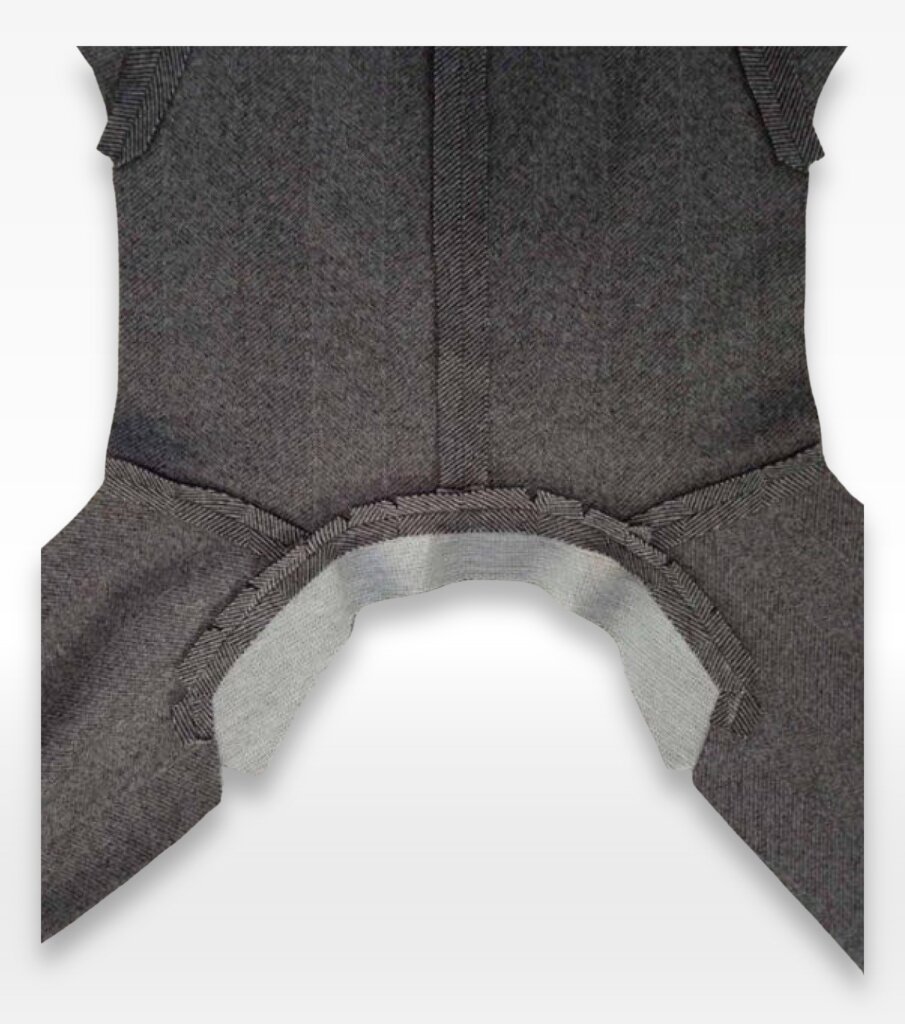
Preparing and Attaching the Facings
Stabilize and baste the facings.
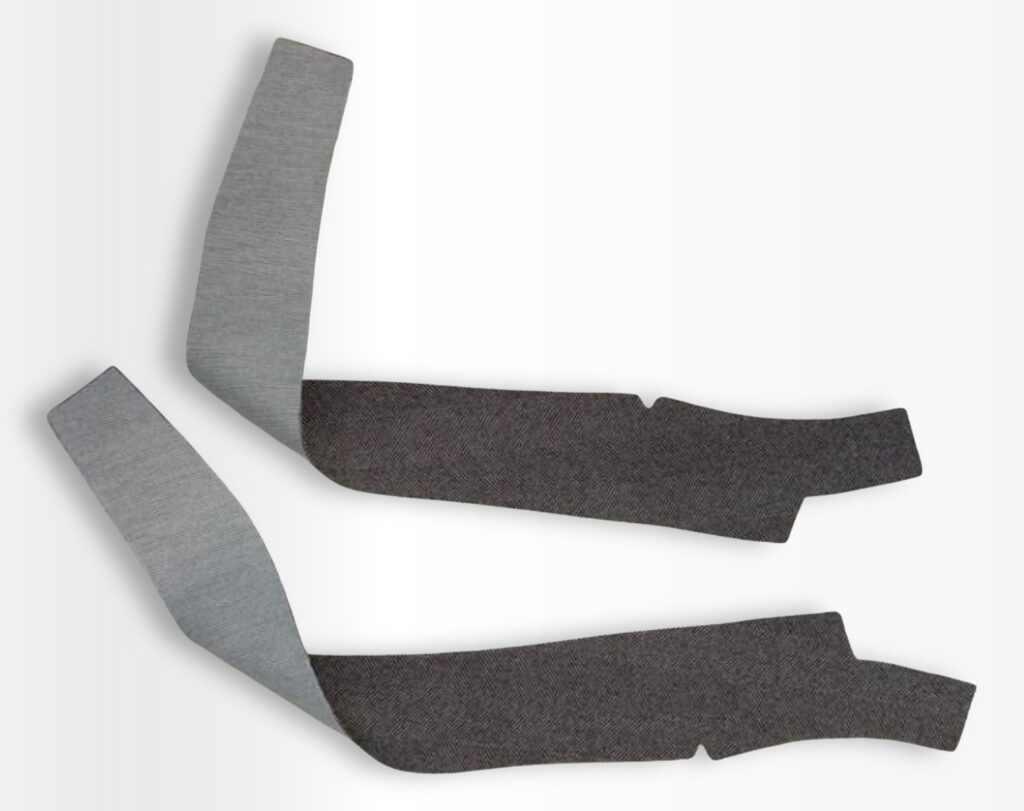
Sew the facings together and press the seam allowances open.
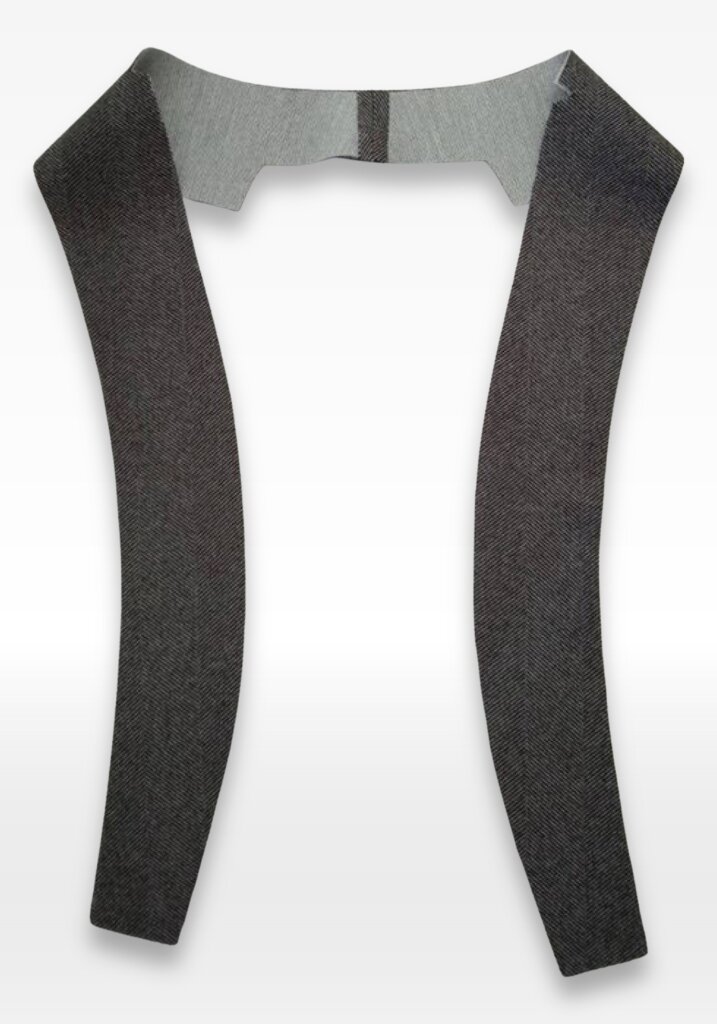
Place the facings on the garment, align the edges, and pin in place.
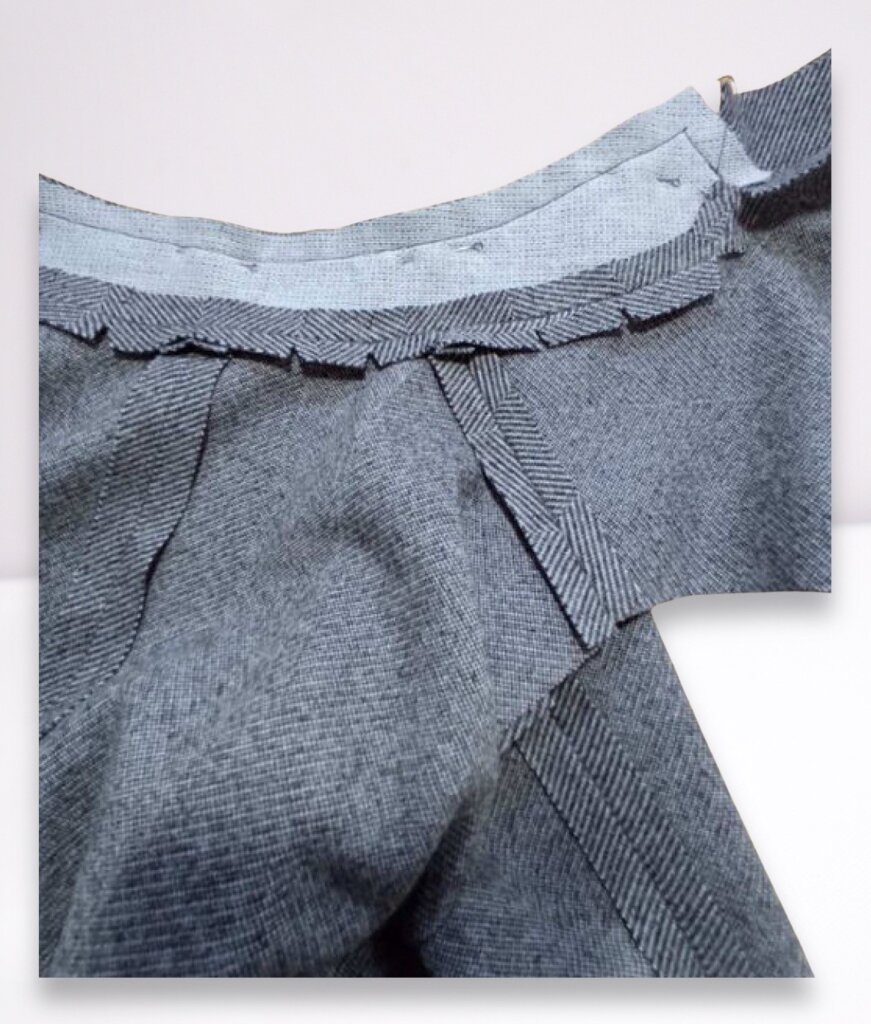
Sew along the collar from one end of the opening to the other.
Turn the garment right side out and topstitch the facings down, beginning at the end of the collar stitching line.
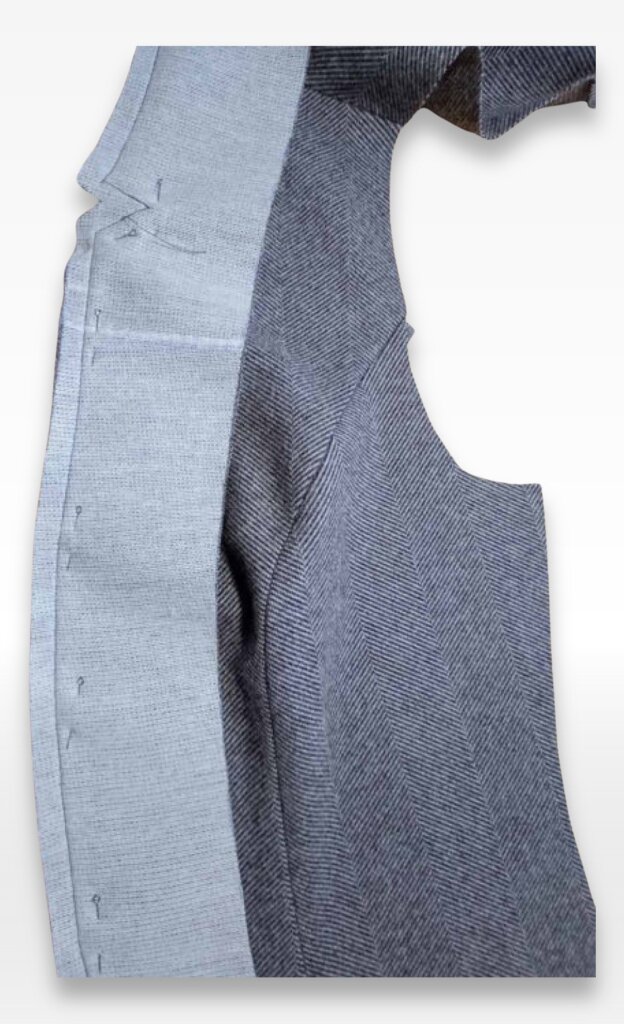
Finishing the Collar and Facings
Clip the seam allowances with interfacing close to the stitch line. Trim the seam allowances diagonally at the corners, stopping 0.2 cm from the stitch line.
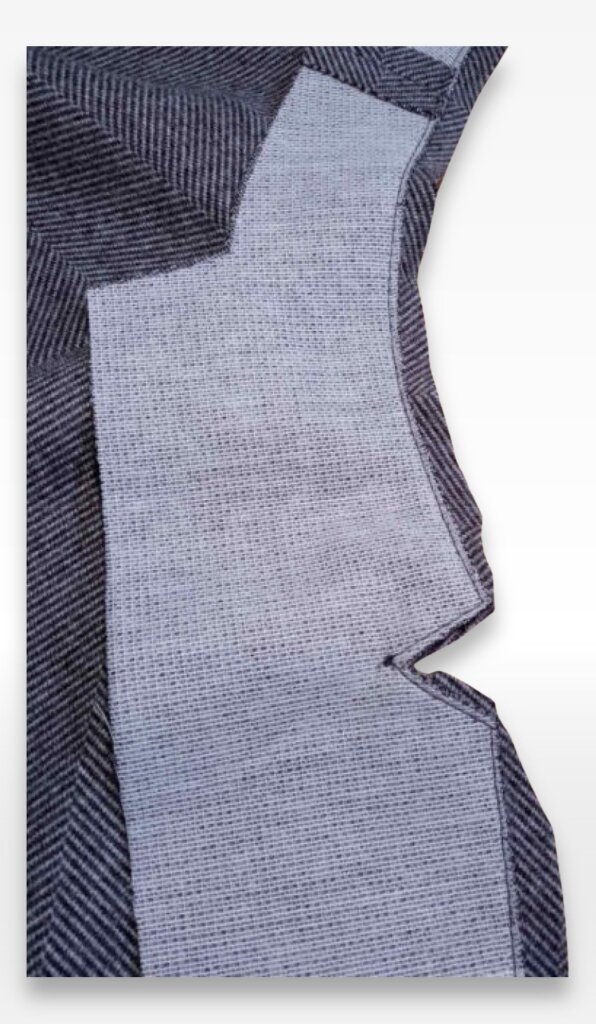
Turn the garment right side out, smooth out the facings, baste in place, and press, making sure the seam edge rolls slightly toward the inside (0.1–0.2 cm).
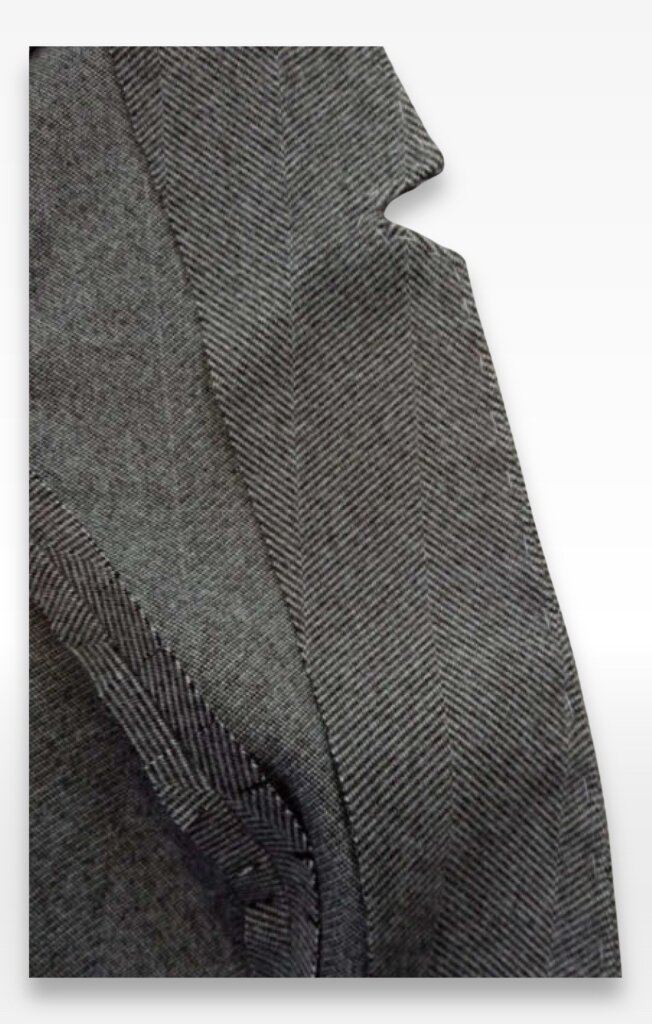
Step 4: Sewing the Neck and Armhole Facings
Attaching the Back Neck Facing
Stabilize and baste the back neckline facing.
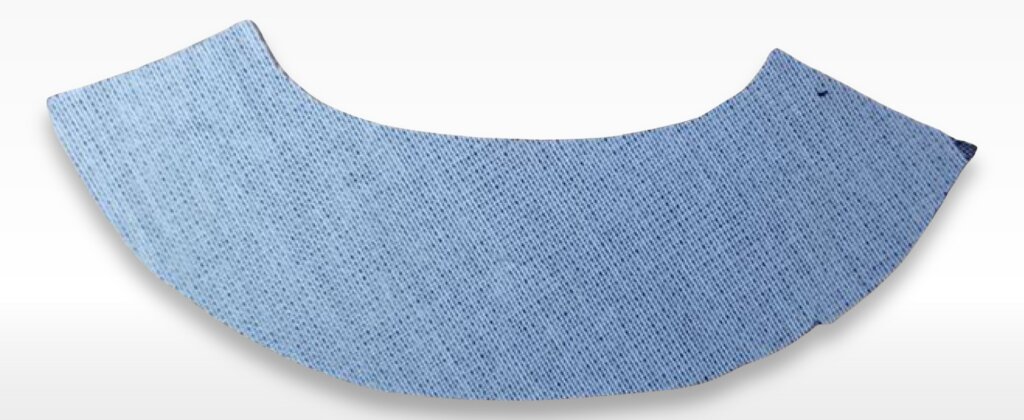
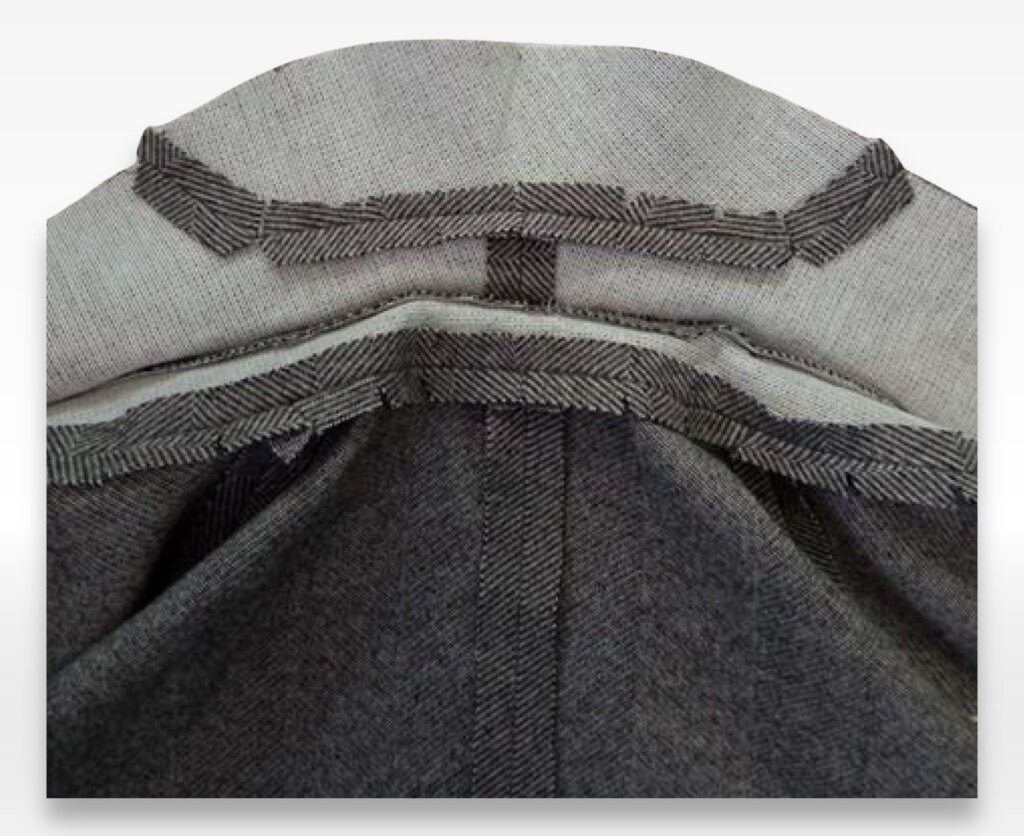
Pin or baste the neckline facing to the facings, stitch, and trim the seam allowances at the corners.
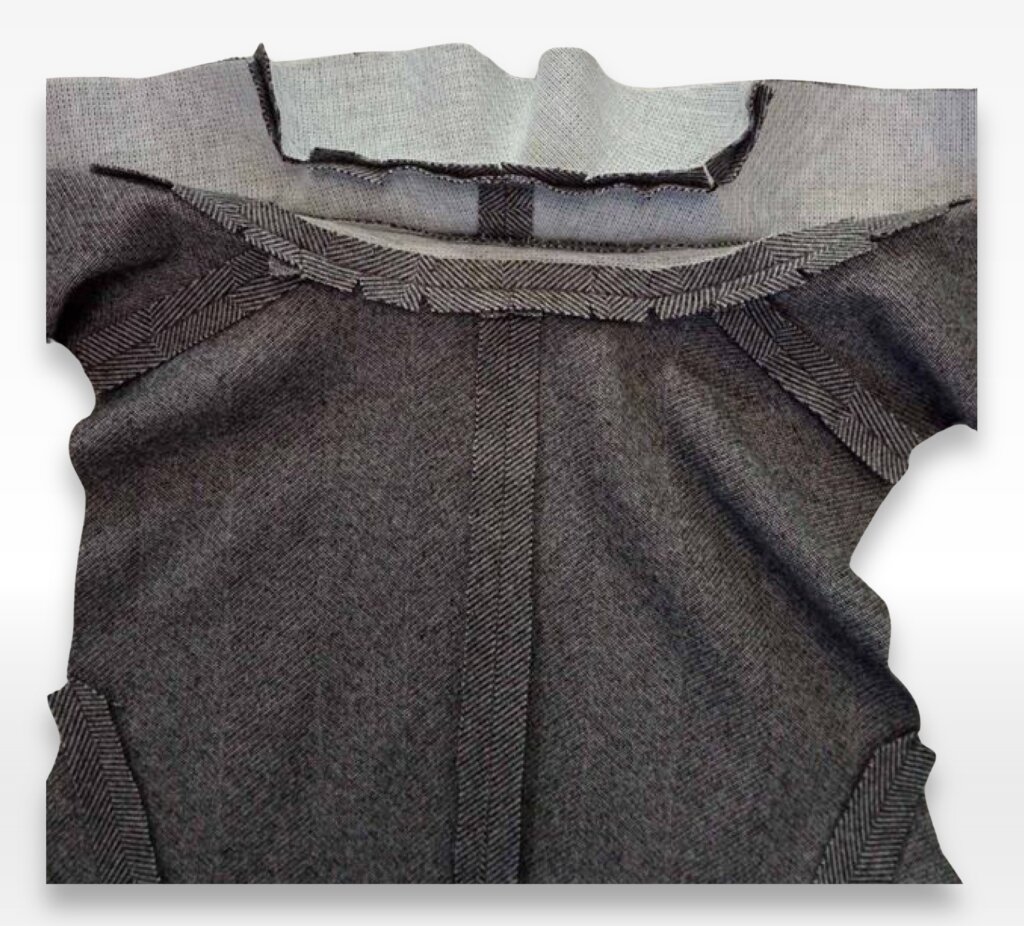
Trim the seam allowances in the curved areas, stopping 0.2 cm from the stitch line, and press them open.
Attaching the Armhole Facings
Stabilize and baste the front and back armhole facings.
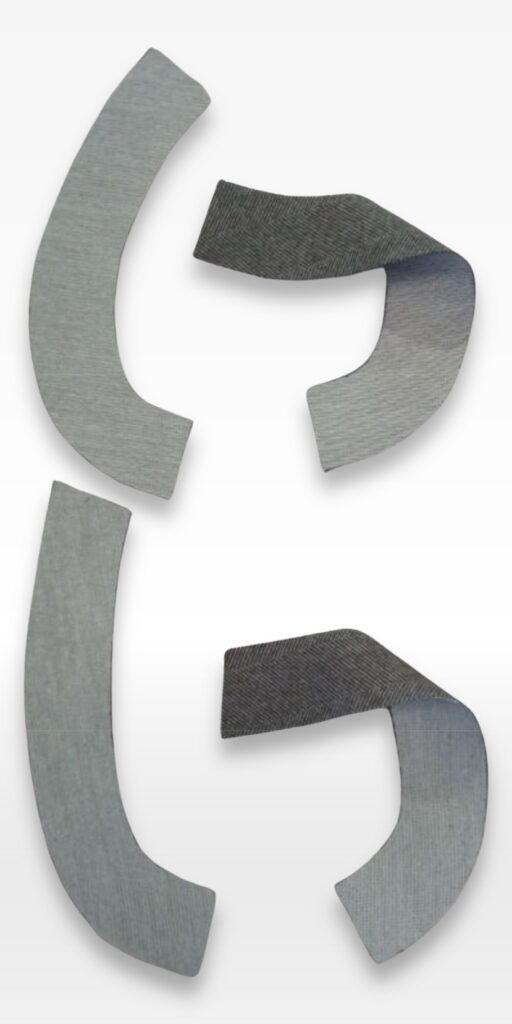
Place the front and back armhole facings right sides together, align at the shoulder seams, pin, and stitch. Press the seam allowances open.
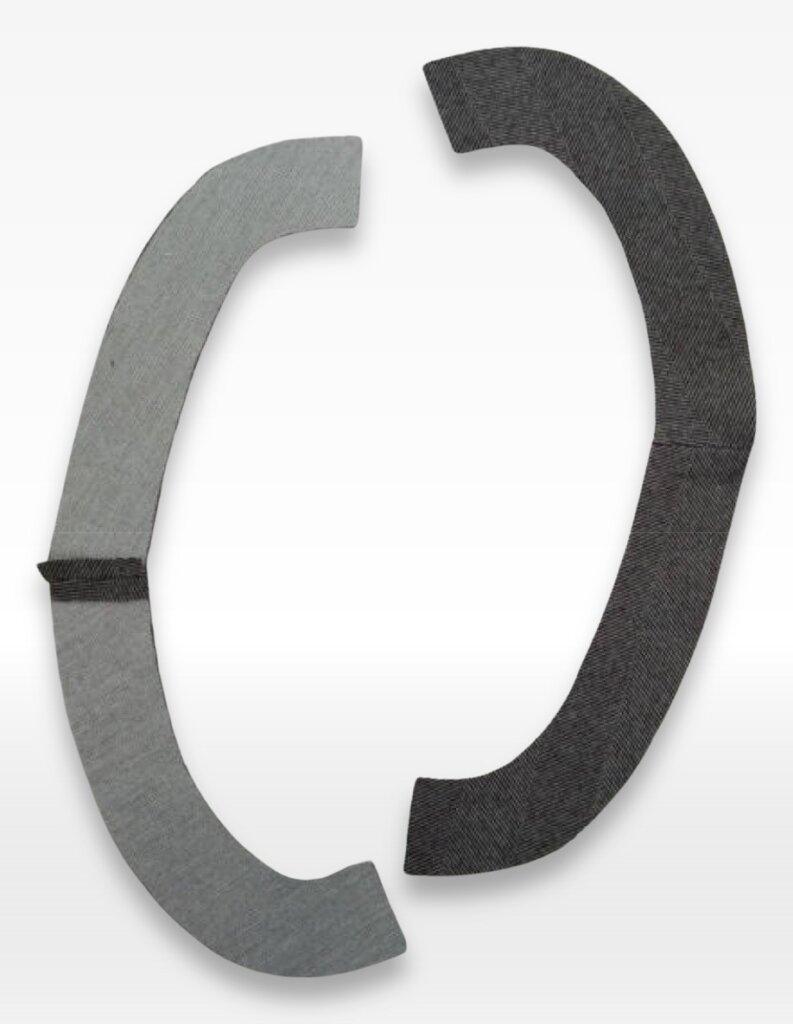
Place the facings on the garment, right sides together, align the edges, pin, and stitch.
Trim the seam allowances with interfacing close to the stitching. Clip the seam allowances in curved areas, stopping 0.2 cm from the stitching.
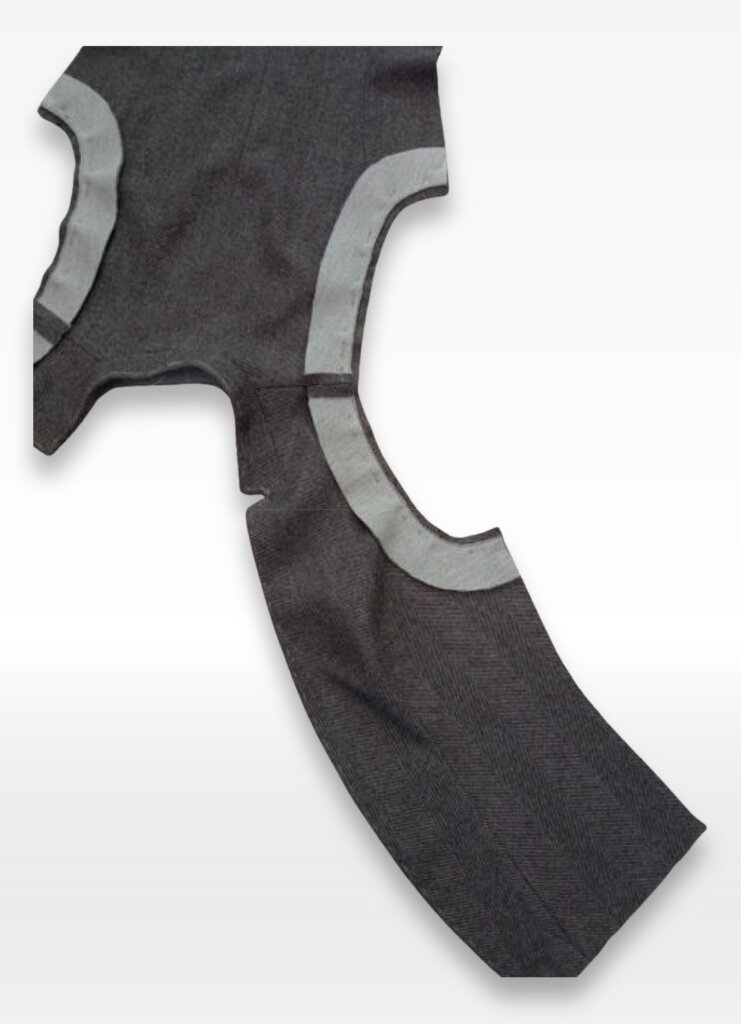
Turn the facings to the inside, baste in place, and press, ensuring the seam edge rolls slightly toward the inside (0.1–0.2 cm).

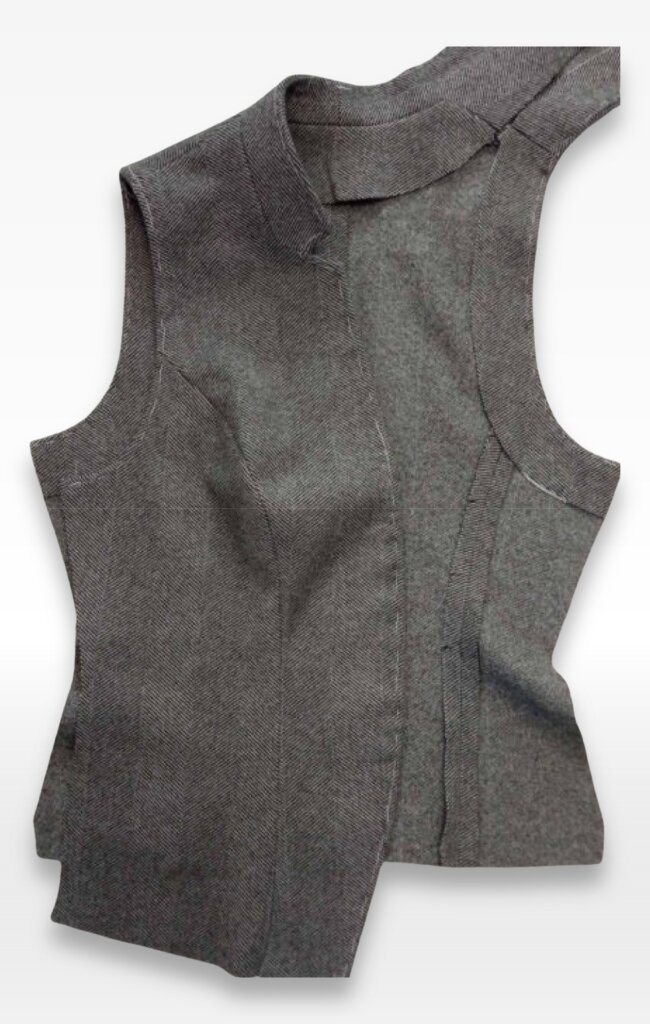
Step 5: Sewing the Lining
Preparing the Lining
Sew the darts in the front lining pieces and press them toward the center.
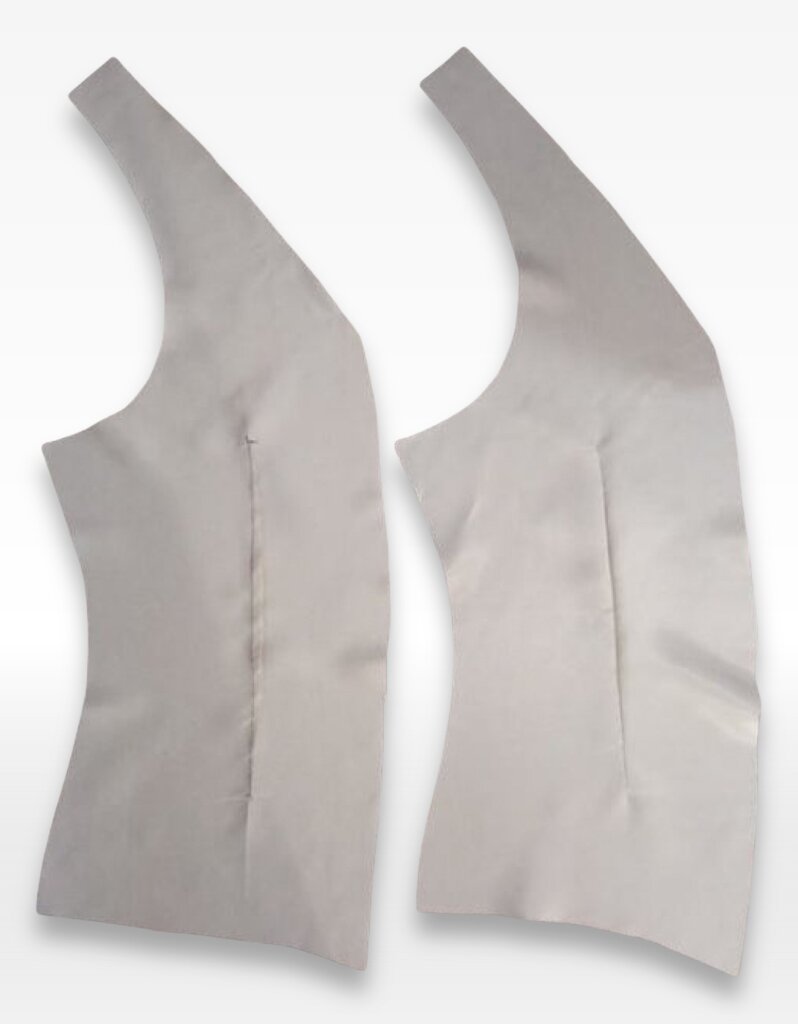
Sew the center back seam of the lining and hand-stitch the fold in place.
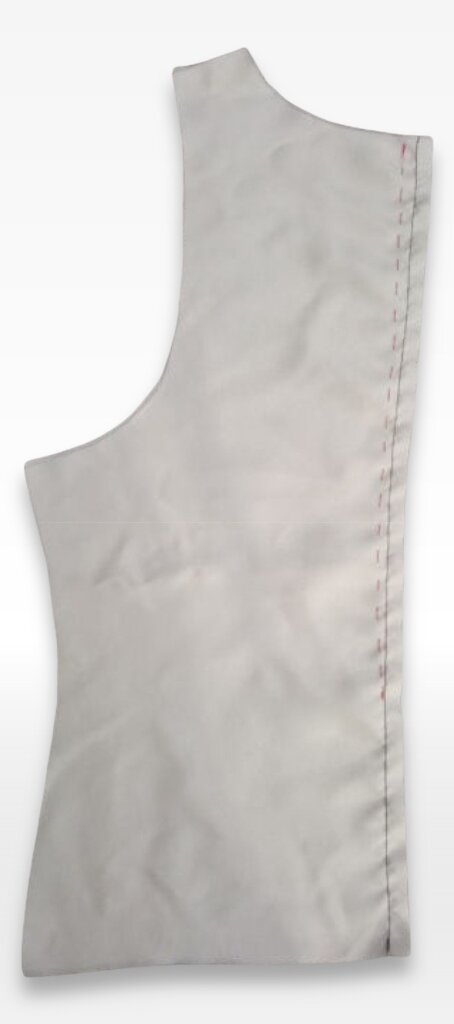
Press the seam allowances of the center back seam.
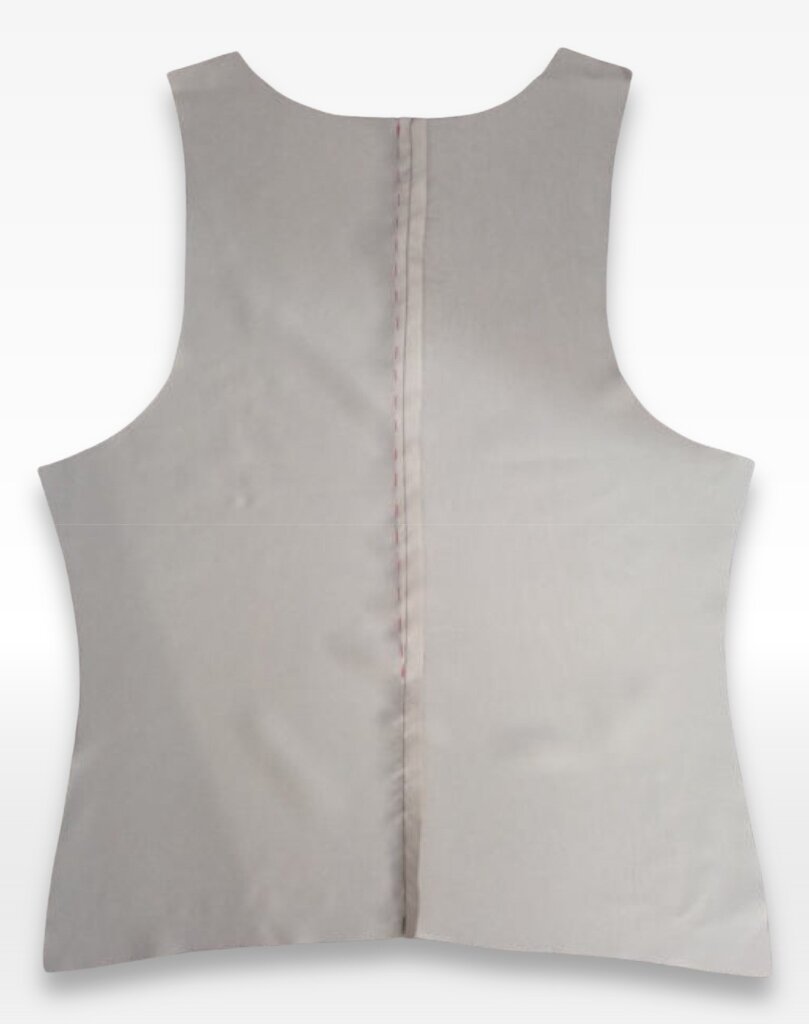
Sew the shoulder seams of the front and back lining pieces and press the seam allowances toward the back.
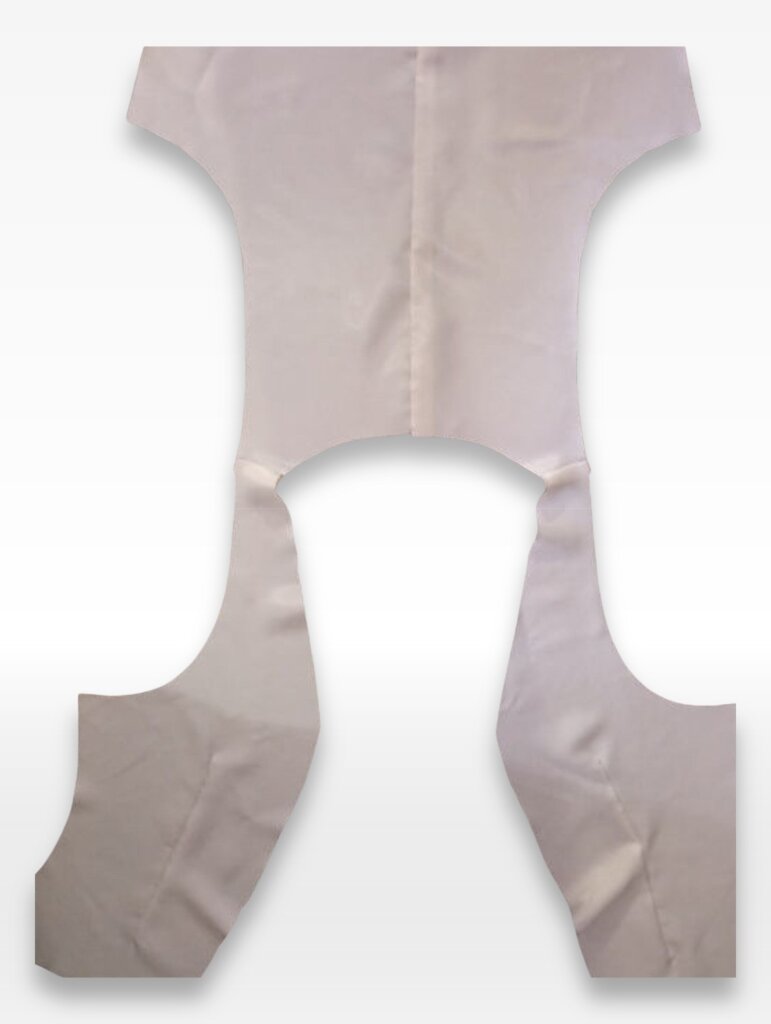
Attaching the Lining to the Garment
Attach the lining to the facings and back neckline.
Press the seam allowances of the stitching toward the lining.
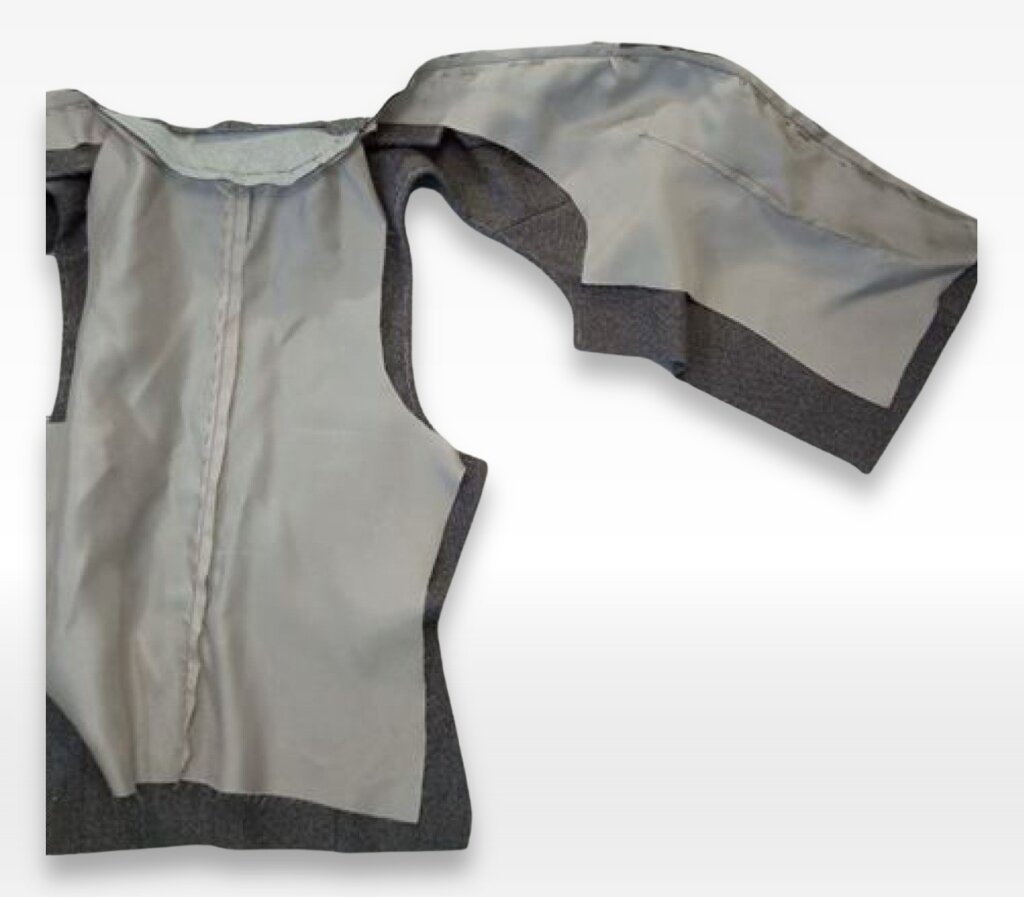
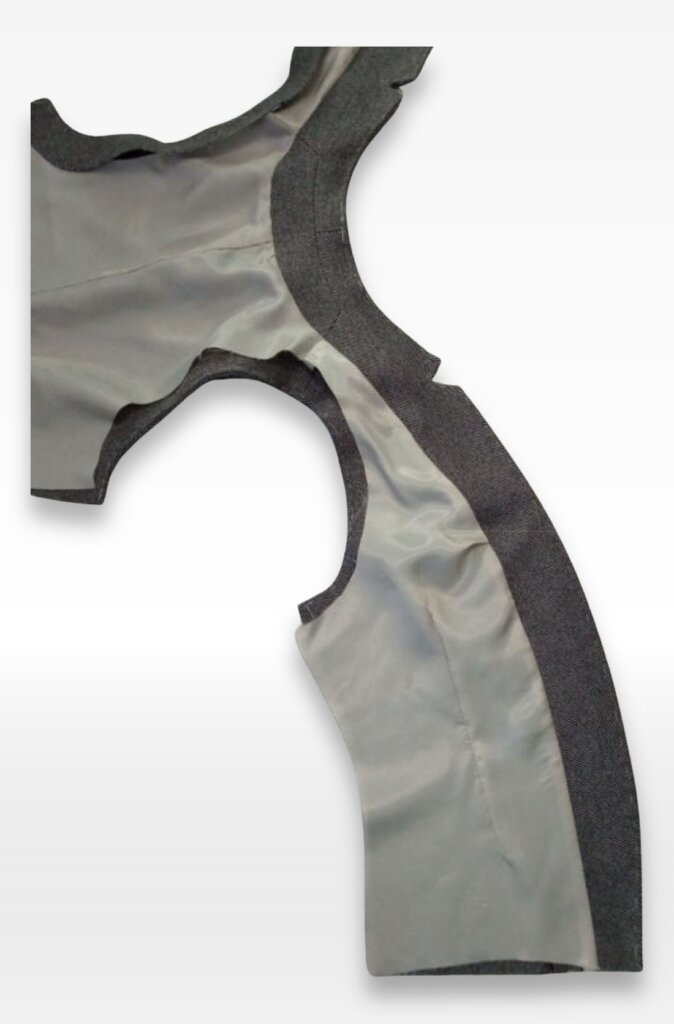
Pin the shoulder seams of the lining to the shoulder seams of the armhole facings.
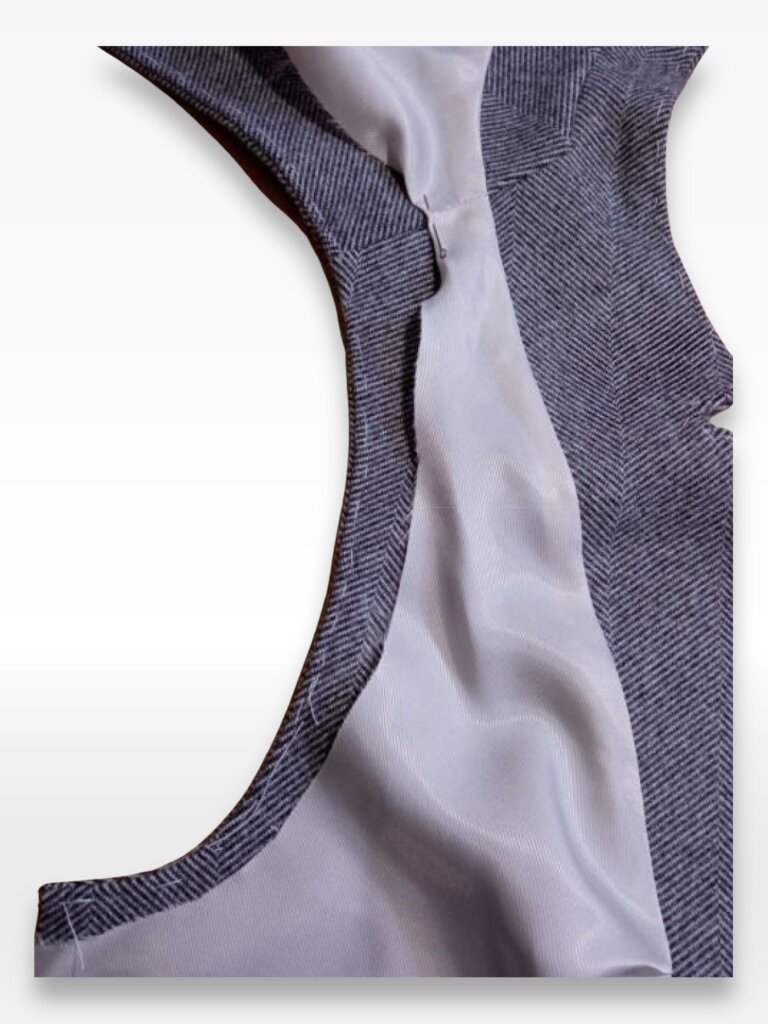
Turn the garment inside out. Stitch the lining to the facing on one side first. Trim the seam allowances in the curved areas, stopping 0.2 cm from the stitching.
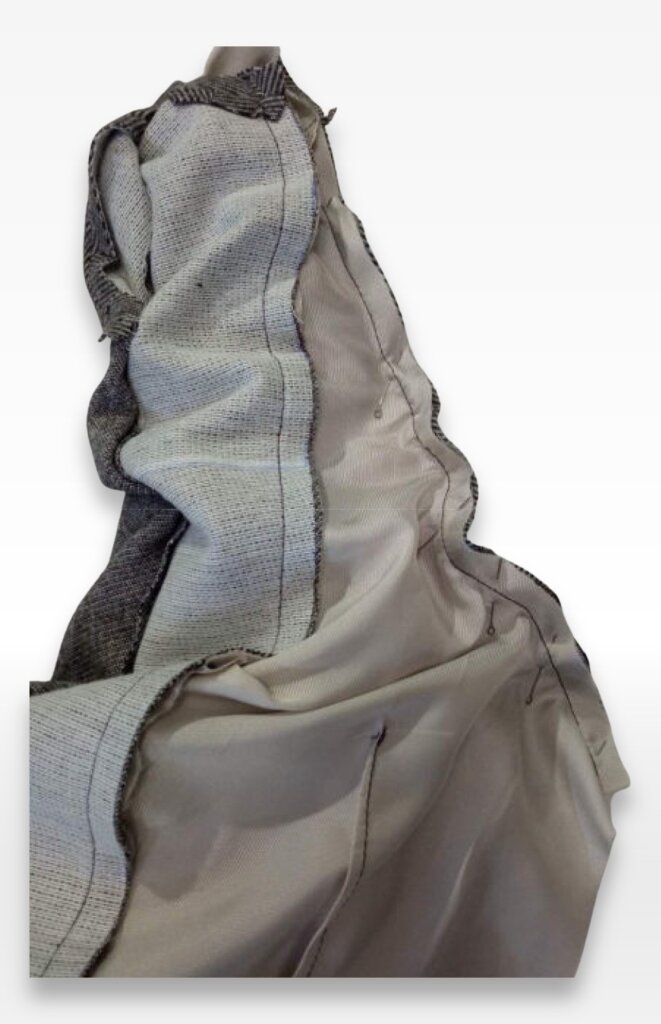
Turn the finished part of the garment right side out.
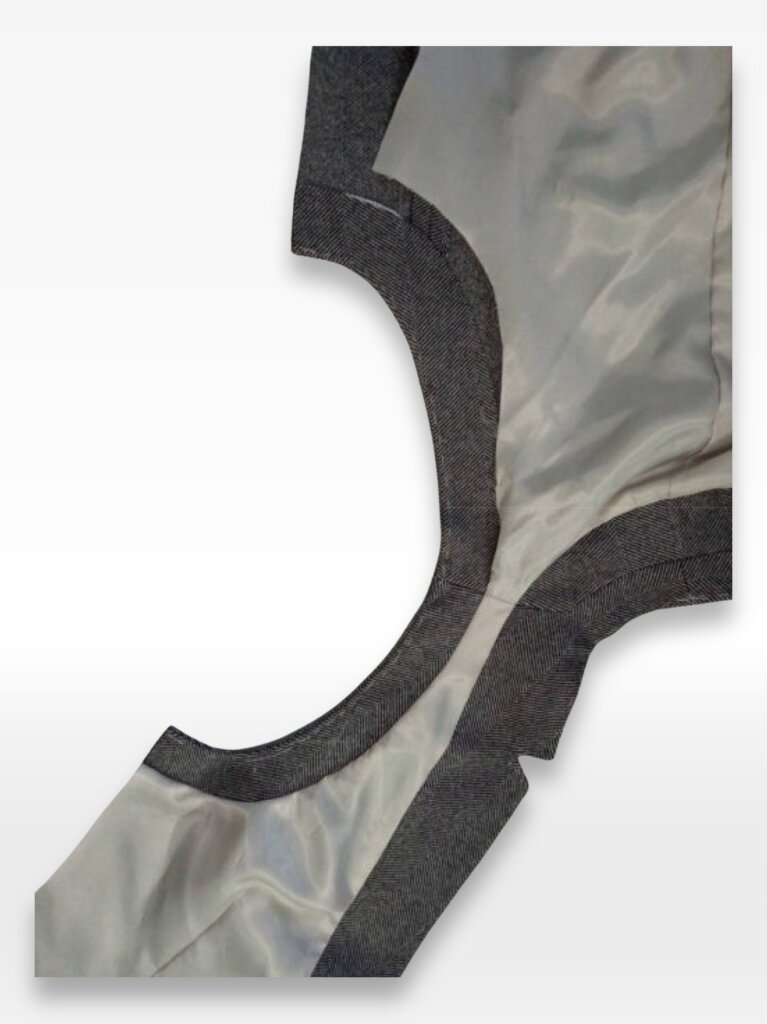
Repeat for the other armhole.
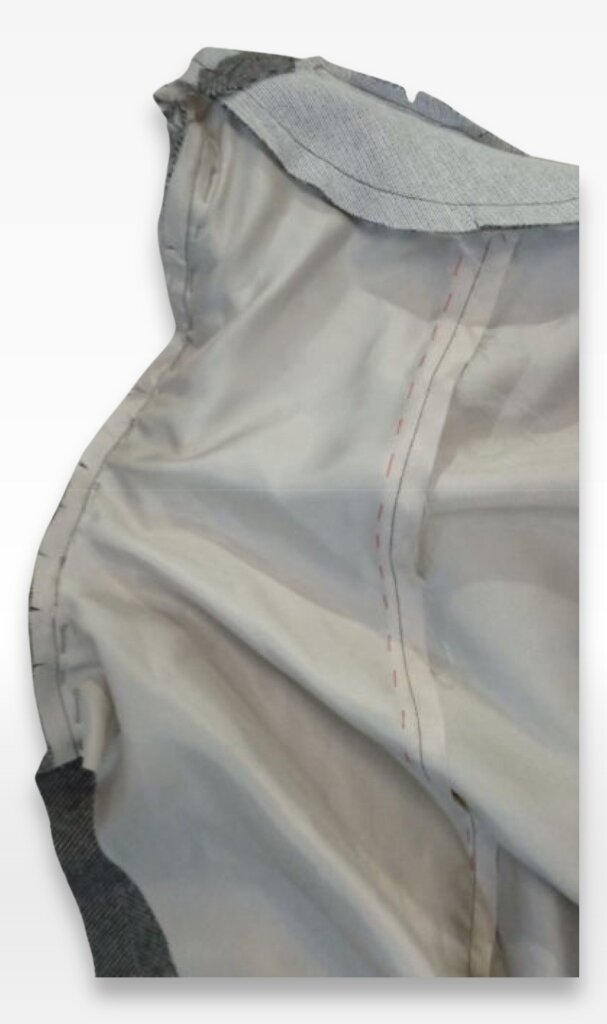
Press the armhole lining.
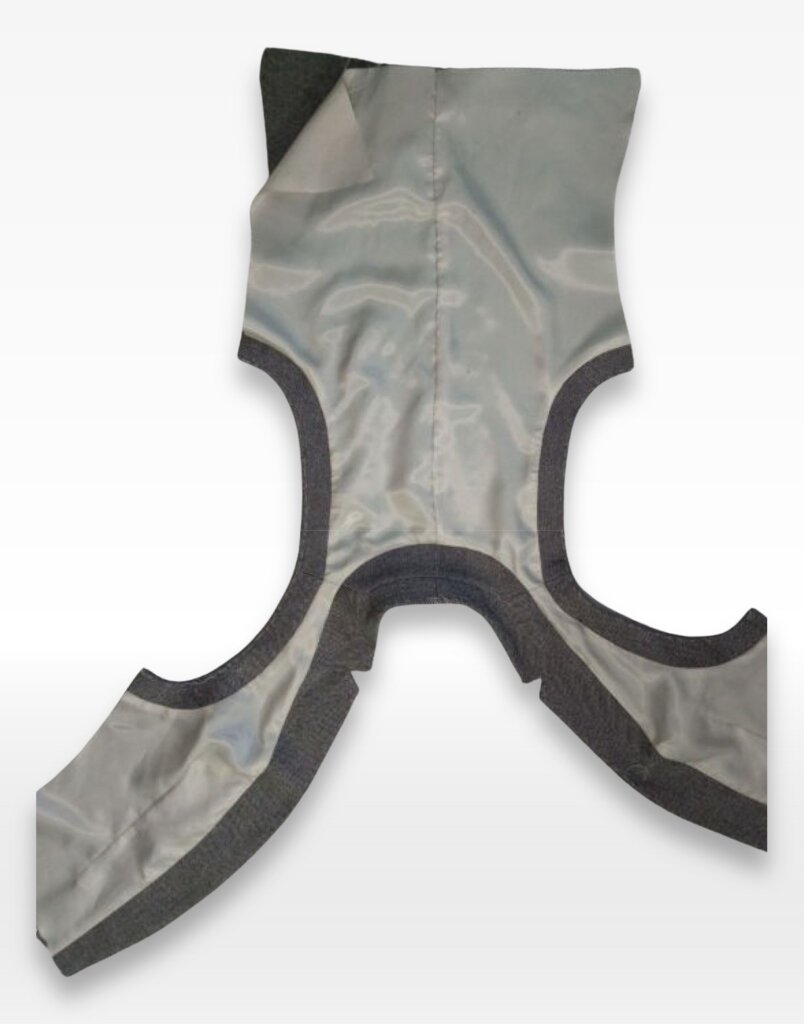
Step 6: Sewing the Side Seams and Hem
Joining the Outer Fabric and Lining
Sew the side seams of both the outer garment and lining in one continuous stitch.
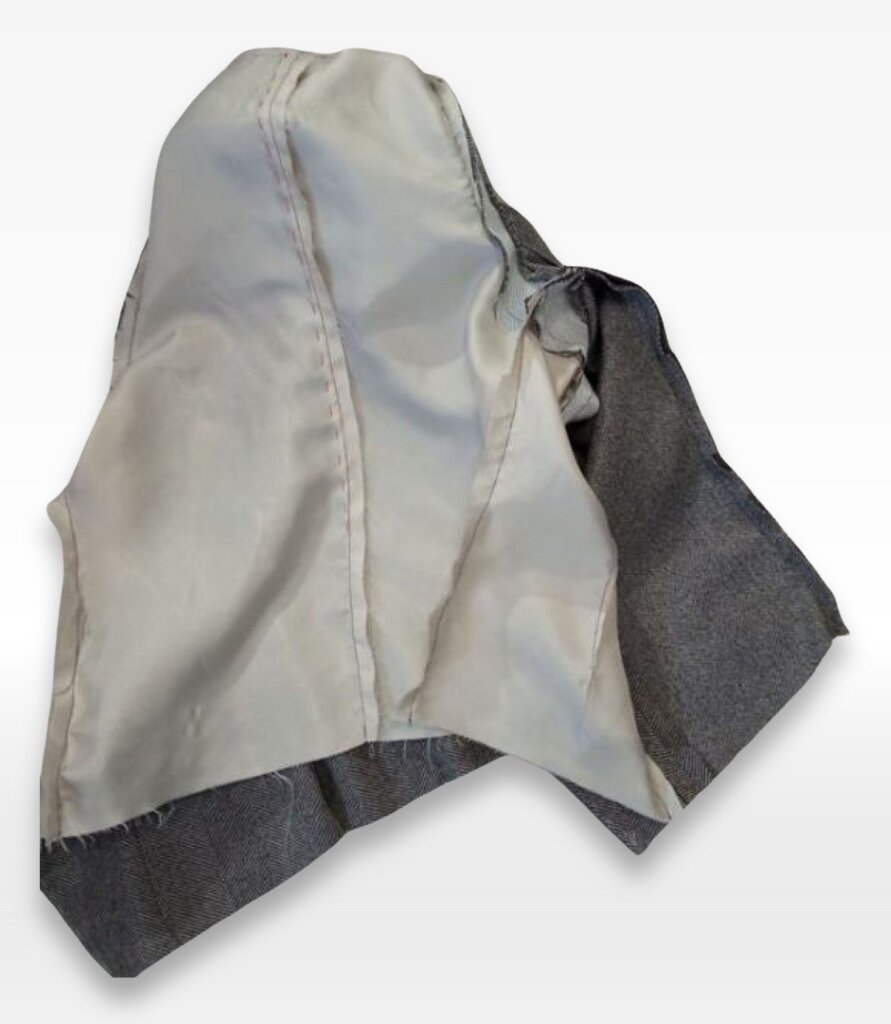
Press the seam allowances of the outer fabric open and press the lining seam allowances flat.
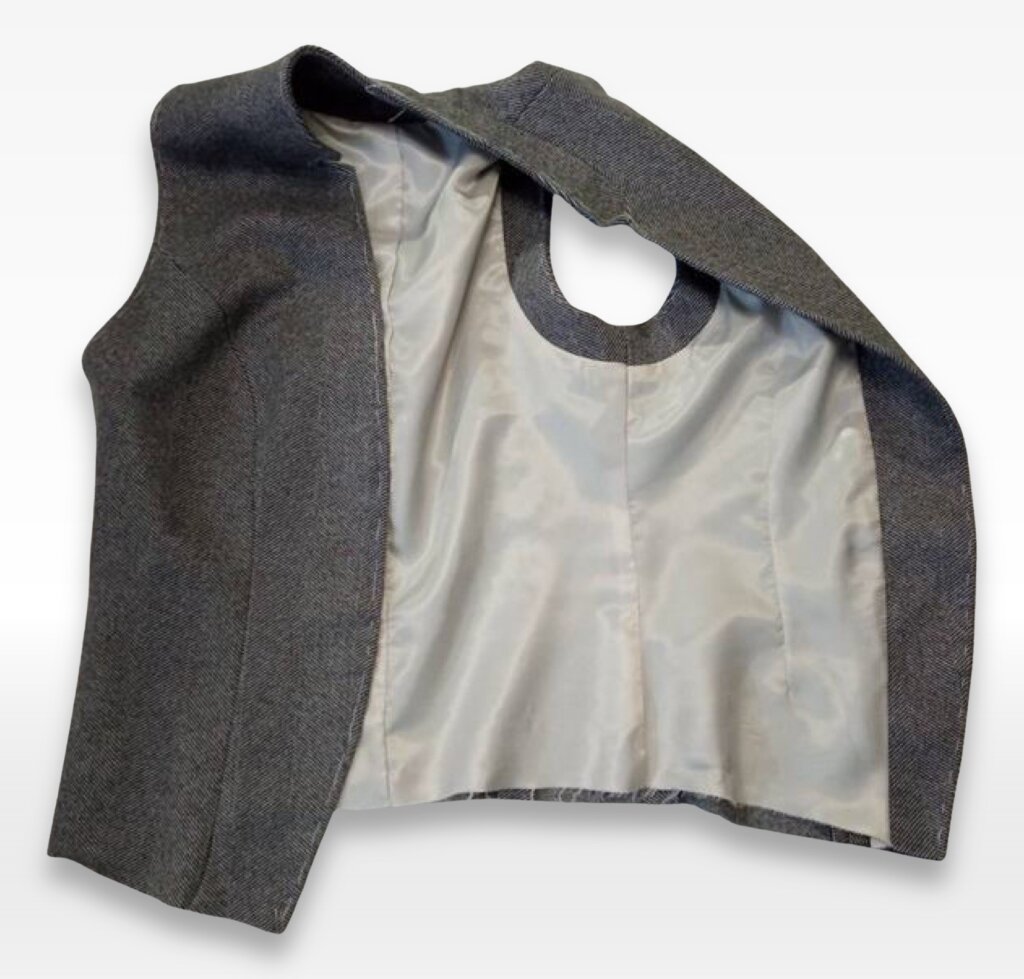
Finishing the Hem
Stabilize the hemline.
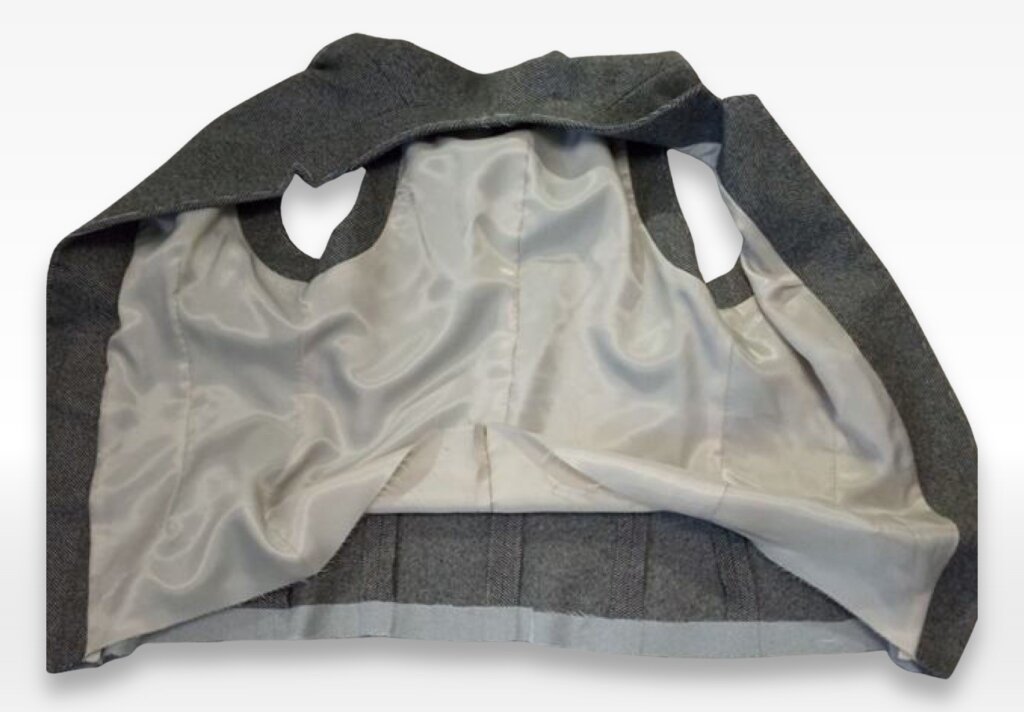
Turn up the hem allowance toward the inside and baste in place.
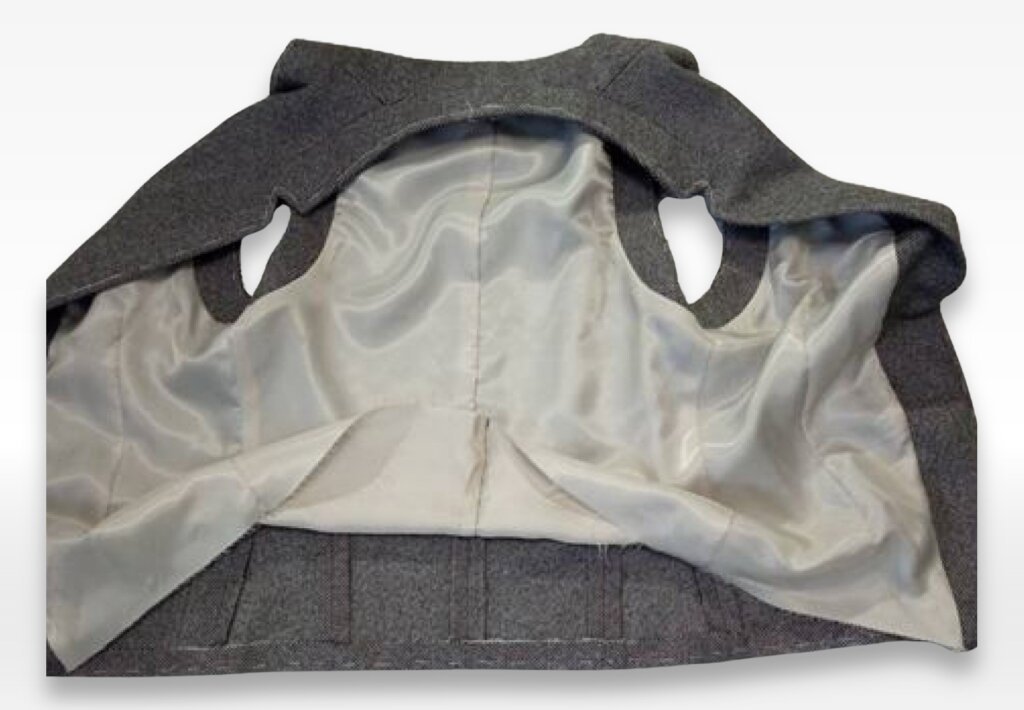
Sew the outer fabric and lining together along the hemline, leaving a small opening in the seam for turning.
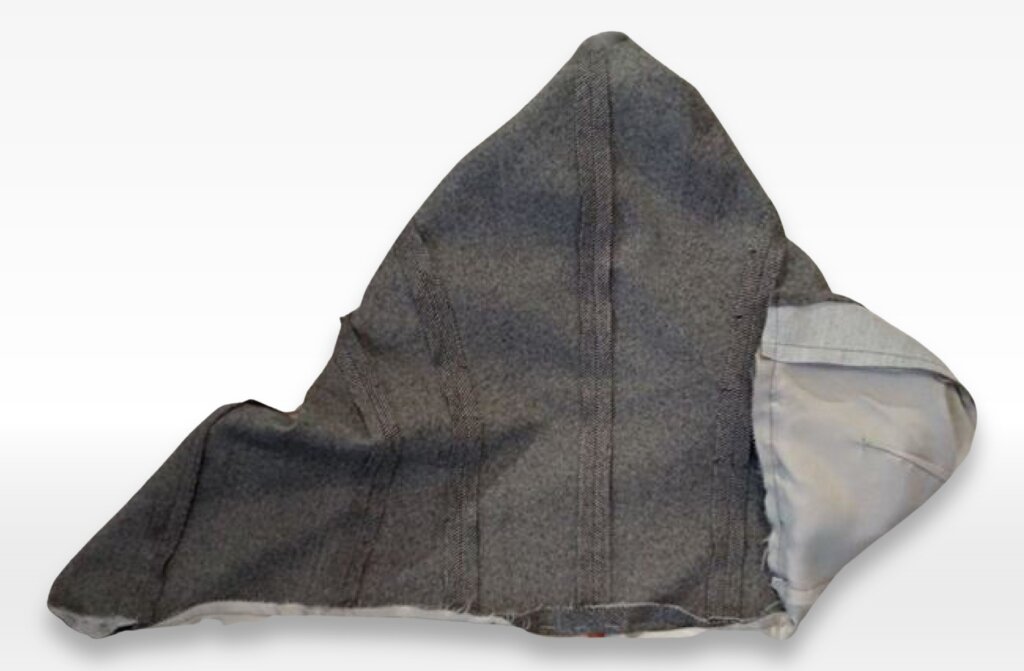
Secure the hemline with hand blind stitches.
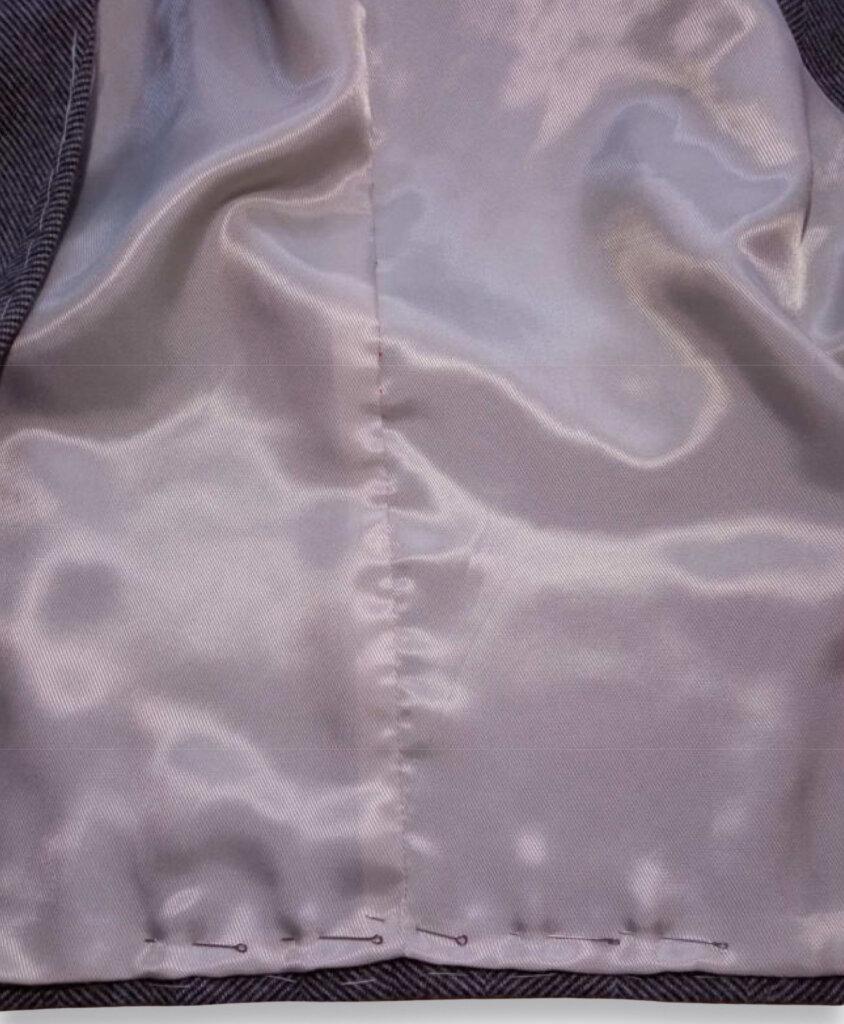
Turn the garment right side out and smooth out the shape. Press the hem and press the lining fold at the bottom to allow ease of movement.
Pin or baste the turning opening closed.
Hand-stitch it closed with blind stitches.
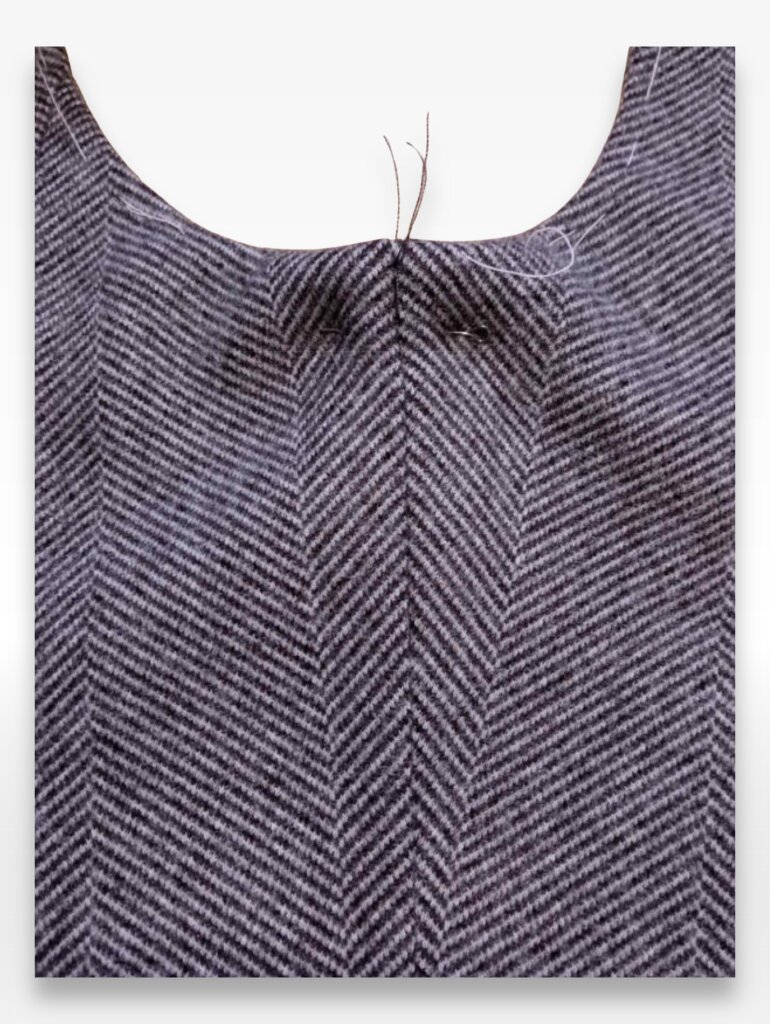
Step 7: Final Touches
Secure the armhole facings in place with a few small tacks at the side seams.
Remove the basting stitches and give the garment a final press.
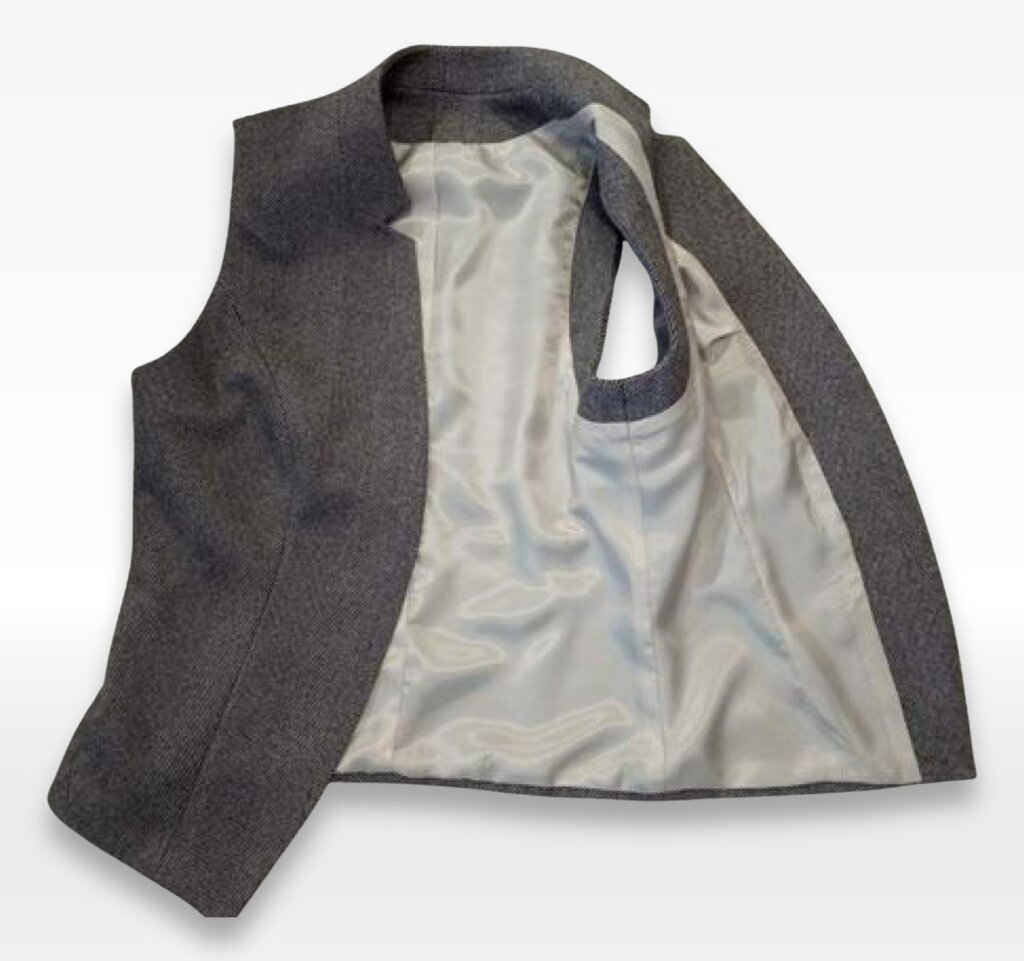
Mark and baste the buttonholes on the right side of the garment. Mark and sew the buttons onto the left side.
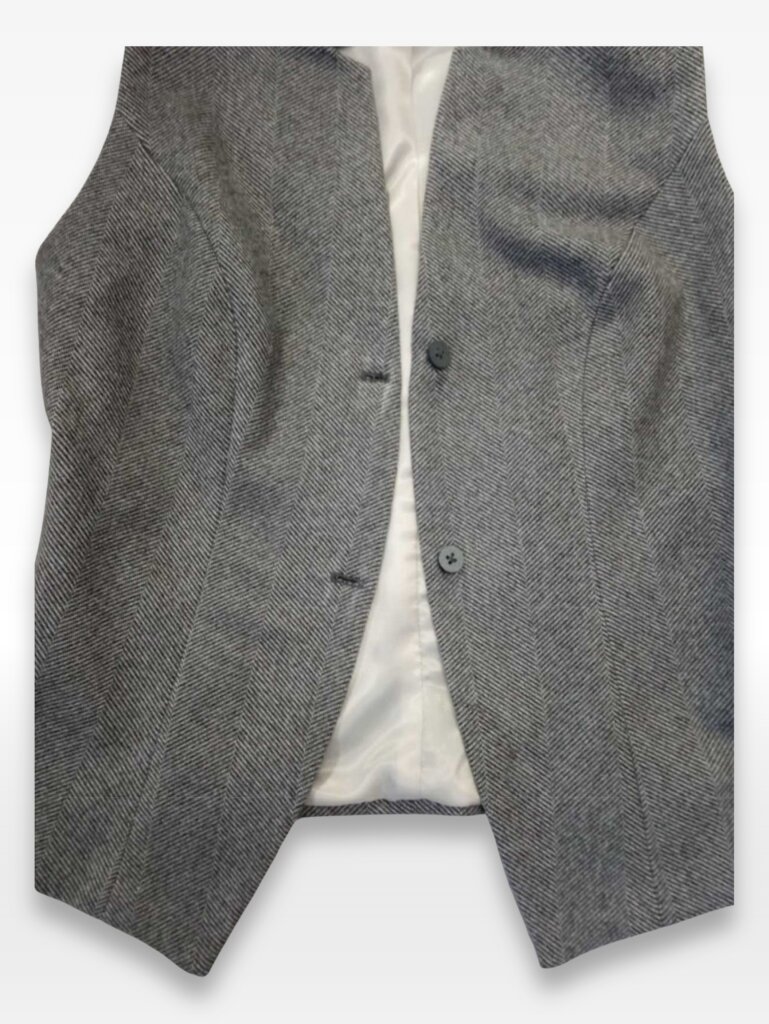
Give the finished garment a final press.
Bringing It All Together
And that’s a wrap! You just made a vest from scratch, and it looks amazing. Feels pretty good, right? Before you call it done, hit it with one last press. Crisp seams make all the difference. Double-check those buttonholes, trim any stray threads, and try it on. If anything feels a little off, no big deal—that’s how you learn. Jot down any small tweaks for next time, and you’ll keep getting better. Now, time to wear it your way. Layer it over a button-up for a sharp, put-together look, or keep it easy with a simple tee. Either way, it’s made by you—so it’s already better than anything off the rack. So, what’s next on your sewing list?
FAQ – Your Vest Sewing Questions, Answered!
How do I make my vest look professionally finished?
Ironing is your best friend—seriously. Press every single seam as you go, and use steam to help shape the fabric. If you want to go the extra mile, hand-stitching the lining in place gives it a flawless, high-end touch.
Any hacks for sewing buttonholes without stress?
Buttonholes can be a pain, but a little prep work saves a lot of frustration. Always test on scrap fabric first to fine-tune your machine settings. And if your fabric frays, a dab of fray-check works wonders. Slow and steady wins the race here!
Do I really need a lining?
Technically? No. But if you want a polished inside and a vest that holds its shape better, lining is the way to go. If you skip it, be sure to finish your seams neatly—bias tape, serging, or pinking shears all work.
What if the vest doesn’t fit quite right?
No worries—fit is easy to tweak! Before committing to your final seams, baste everything together and try it on. Want it snugger? Take in the side seams a little. Need more room? Let them out. A few tiny adjustments can make a huge difference.
Can I swap out the buttons for something else?
No rules here—buttons are great, but they’re not your only option. If you want something easier or just a different vibe, snaps, hooks, or even a zipper can totally work. Just match your closure to your fabric. Thicker materials? Go for something sturdy. Lighter fabrics? Hidden snaps keep things sleek. It’s all about what works for your style!
Which fabrics work best for this vest?
You’ll want something that holds its shape without being stiff. Suiting fabrics, stretch denim, and micro corduroy with Lycra are all great options. Avoid anything too flimsy unless you’re after a super relaxed look.
Do I need a serger?
Nope! A serger is nice but totally optional. If you don’t have one, a zigzag stitch, pinking shears, or bias-bound seams will do the trick.
Can I customize this vest pattern?
100%! This vest is a great base for customization. You can lengthen it for a sleek, longline version, adjust the neckline, or even add welt pockets if you’re feeling fancy. Make it yours!
How do I get my lapels looking crisp and sharp?
Lapels are all about structure—if they’re floppy, the whole vest loses its polished look. First things first, interfacing is non-negotiable. Pick a good quality one that gives support without stiffness. Next, trim and grade those seam allowances so you’re not dealing with extra bulk. Understitching helps keep things flat, and if you’ve never used a tailor’s clapper, now’s the time—it helps set those creases like a dream.


