
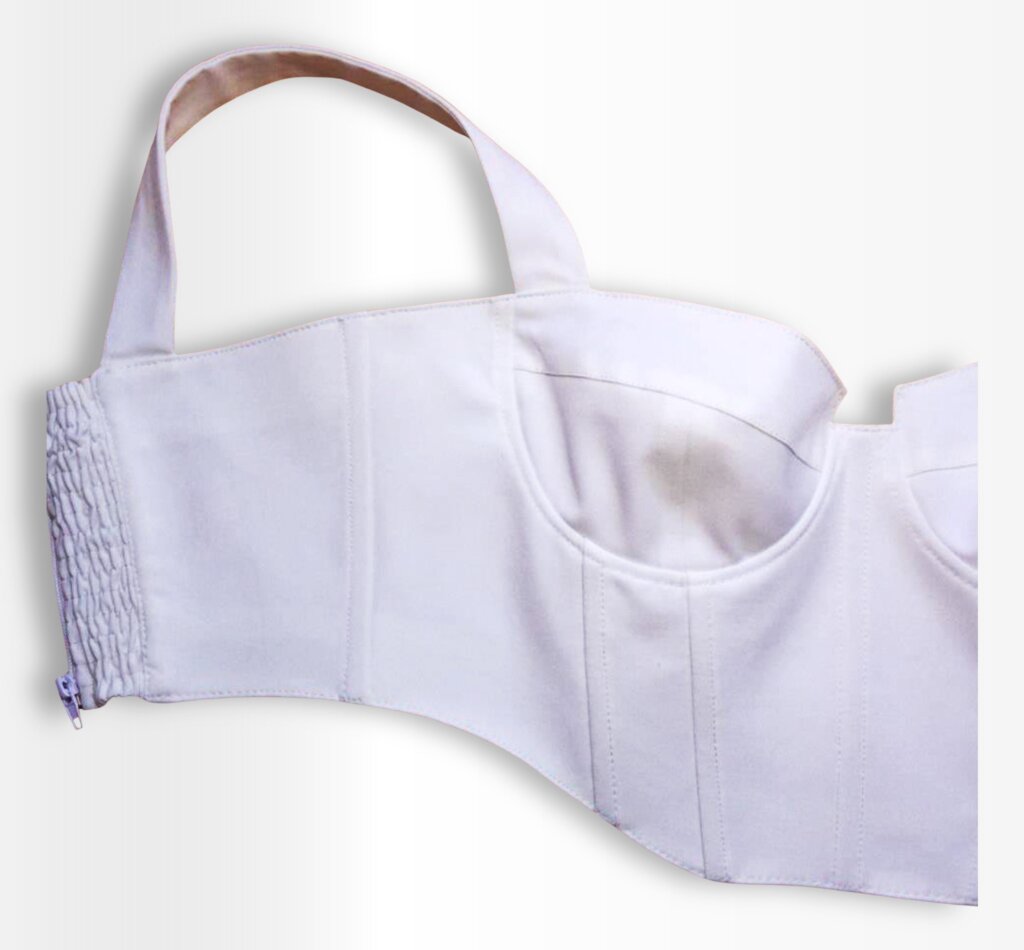
Alright, sewists—ready to make something stunning? The Leilani structured corset pattern is a perfect mix of structure and style, with a close-fitting silhouette, supportive cups, and just the right amount of stretch in the back for comfort. It’s made with a lining, built-in boning for shaping, and diagonal reliefs that give it that sleek, tailored look. Oh, and the best part? A center-back detachable zipper—because a good corset top should be as easy to wear as it is beautiful.
Now, if you’re thinking, This sounds complicated…, don’t stress. I promise it’s totally doable, and I’ll walk you through every step. Will there be a few moments where you second-guess your life choices while wrestling with boning or easing in those cups? Maybe. But trust me, the end result is so worth it.
The front sits just below the waist for that snatched look, while the back sits a little higher—flattering, modern, and totally wearable. The ruching in the back? That’s thanks to elastic thread, which helps mold the top to your body without sacrificing comfort. And let’s not forget the straps, because we love a design that actually stays in place!
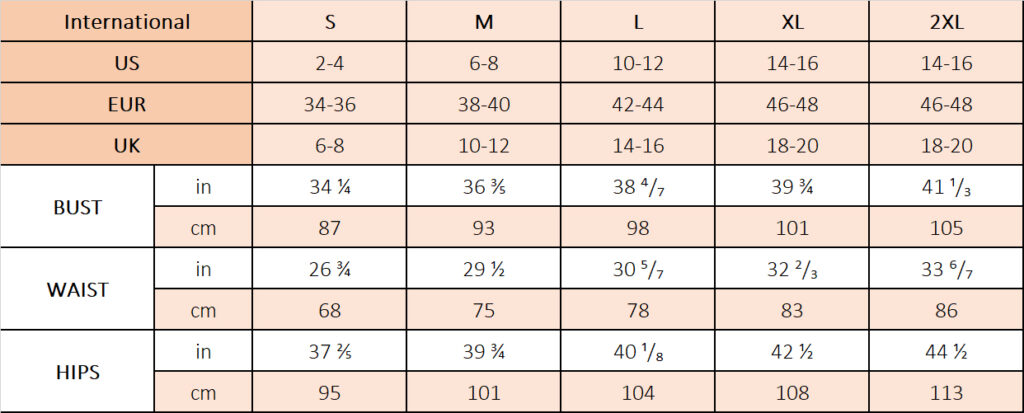
So, grab your fabric, warm up your iron (yep, pressing is your best friend here), and let’s get sewing. This isn’t just about making a corset top—it’s about creating something that fits you perfectly. Let’s do this!
Best Fabrics for Your Corset Top
Choosing the right fabric is everything when making a structured yet comfortable corset top. You need something with enough body to hold its shape but also enough flexibility to move with you—because let’s be honest, no one wants to feel like they’re wrapped in cardboard. Here are my top three picks:
1. Soft Eco-Leather – Sleek, Edgy, and Modern
If you want that high-fashion, straight-off-the-runway look, eco-leather is a killer choice. It’s structured enough to hold the corset shape but still has a bit of give, making it surprisingly comfortable. Plus, it adds a touch of badassery to any outfit. Just be sure to use clips instead of pins (because pinholes = permanent scars) and a teflon foot to help it glide through your machine.
2. Suiting Fabric – Classic, Chic, and Tailored
For a more polished, everyday-wearable vibe, suiting fabrics are chef’s kiss. They have just the right amount of stability, resist wrinkling, and often come in blends that make them both breathable and durable. Look for medium-weight wool blends, gabardine, or crepe suiting—fabrics that give structure but don’t feel stiff. Bonus? They’re usually easy to sew!
3. Soft Faux Suede – Luxe, Cozy, and Unique
If you love texture, soft artificial suede is such a dreamy option. It has a velvety touch, a slight stretch, and a beautifully rich appearance that makes your corset top feel luxe. It also molds well to the body while still holding its shape. Just remember: suede can be a bit tricky to press, so use a press cloth and low heat to avoid marks.
What to Avoid?
Skip anything too flimsy (like chiffon or lightweight satin) and too rigid (like heavy canvas or stiff denim). You want structure, but you also want to be able to breathe and move.
So, what’s your vibe—sleek leather, tailored suiting, or soft suede? Whatever you choose, you’re about to create something seriously stunning. Let’s sew!
Printing Your Pattern
For a hassle-free printing experience, check out our guide: How to Print Your Sewing Patterns the Right Way.
Cutting the Fabric
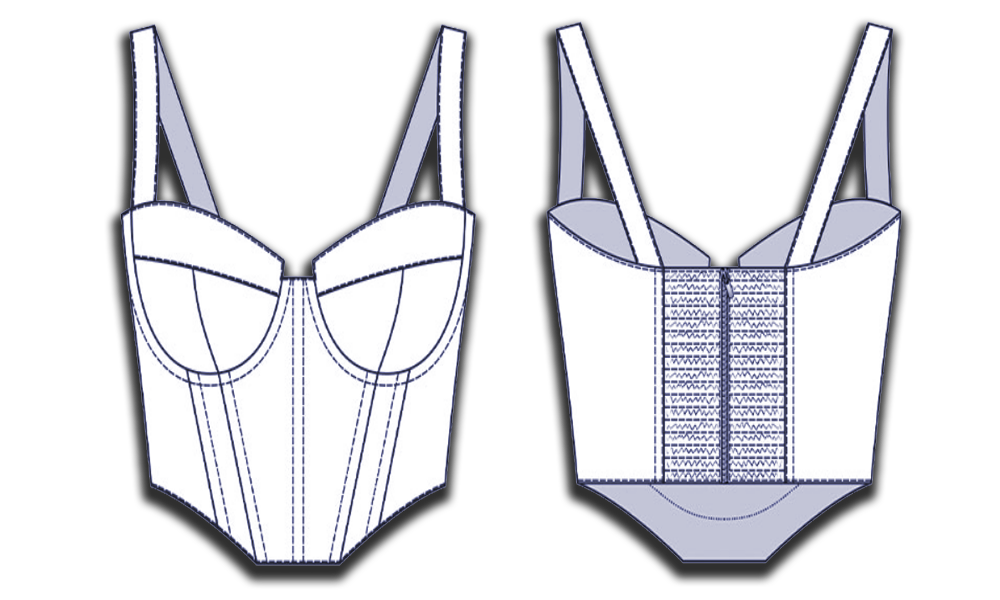
Main Fabric:
- Back (Central Part) – 2 pieces
- Back (Side Part) – 2 pieces
- Cup (Upper Part) – 2 pieces
- Cup (Side Part) – 2 pieces
- Cup (Central Part) – 2 pieces
- Front (Central Part) – 1 piece (cut on fold)
- Front (Center Part) – 2 pieces
- Front (Side Part) – 2 pieces
- Back Facing (Upper Part) – 2 pieces
- Back Facing (Lower Part) – 2 pieces
- Front Facing (Upper Part) – 1 piece (cut on fold)
- Front Facing (Lower Part) – 1 piece (cut on fold)
- Strap – 4 pieces
- Bias Binding for Fastener Finishing – 2 pieces (see sewing instructions)
Lining:
- Back Lining – 2 pieces
- Back Center Part – 2 pieces
- Front Lining – 1 piece (cut on fold)
- Cup (Side Part) – 2 pieces
- Cup (Central Part) – 2 pieces
Interlining:
- Strap – 2 pieces
- Front Facing (Upper Part) – 2 pieces
- Back Facing (Upper Part) – 2 pieces
- Front Facing (Upper Part) – 1 piece (cut on fold)
Seam allowances
All parts of the product have the necessary seam allowances. The bodice sample was sewn from suiting fabric as the main material and cambric as a lining.

Accessories & Tools You’ll Need
- Household sewing machine;
- Iron with or without steam, ironing table or ironing board;
- Machine needles appropriate to the type of fabric (for medium fabrics), pins for
- pinning or small clamps;
- Paper scissors and cutting scissors;
- Ironing pad (net for WTO or cotton fabric scrap).
Additional Materials and Accessories
- Threads for household machine;
- Interlining;
- Elastic thread;
- Lingerie elastic;
- Regilin 4 mm wide;
- Separable zipper;
- Metal underwear bones – 1 pair.
Sewing the Corset Top
STEP 0. Cut all fabric pieces:
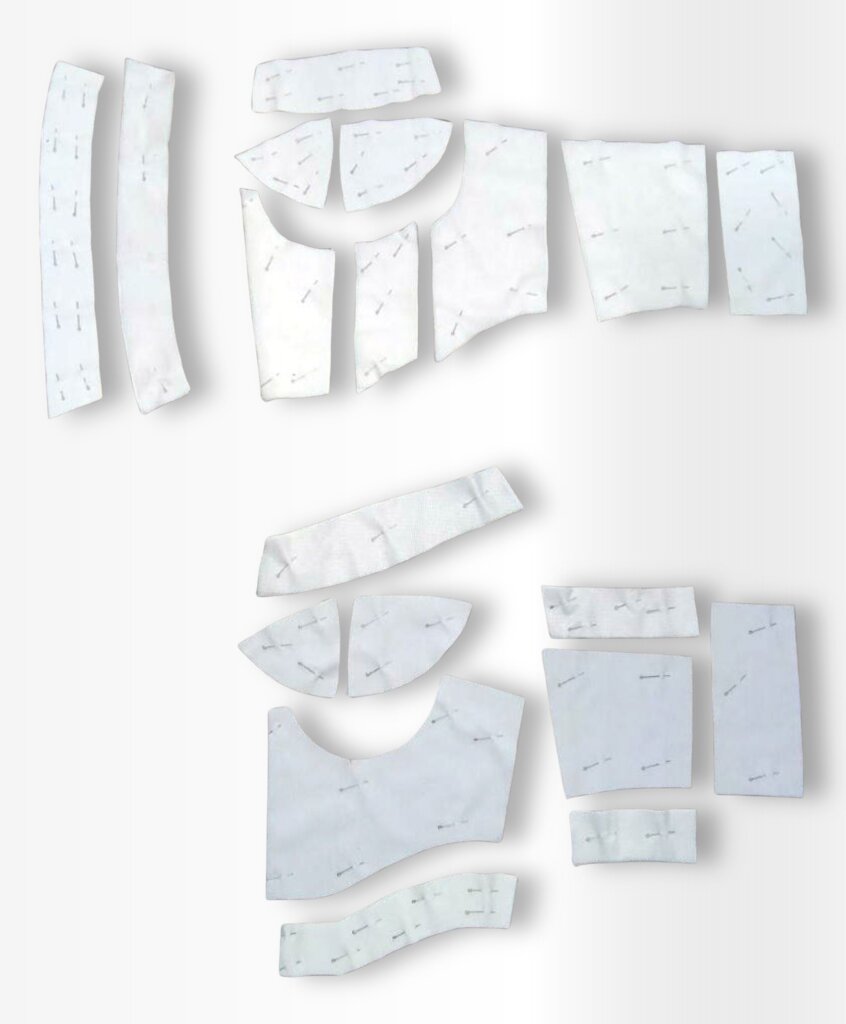
STEP 1. Assemble the cups:
Sew the lower cup pieces together, press the seam allowances open.

Sew the upper cup pieces, pressing the seam allowances upward.
Topstitch close to the seam on the right side of the upper cup, then press.

STEP 2. Assemble the bodice:
Sew the lower bodice pieces together. Press the seam allowances toward the center.
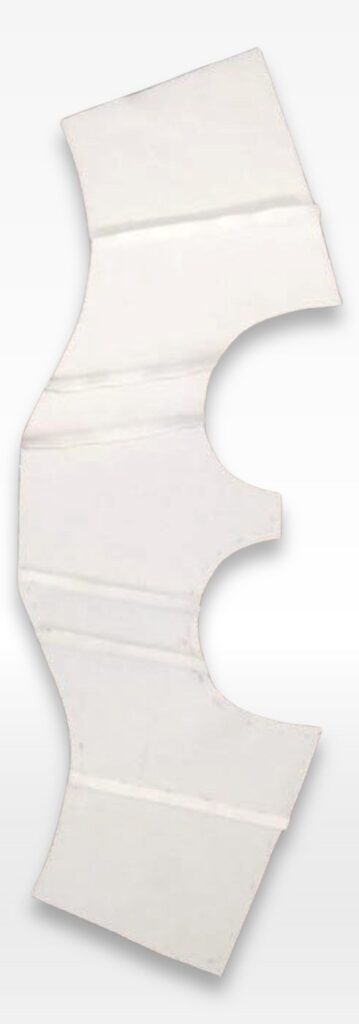
Topstitch along the seams at the width of the boning.
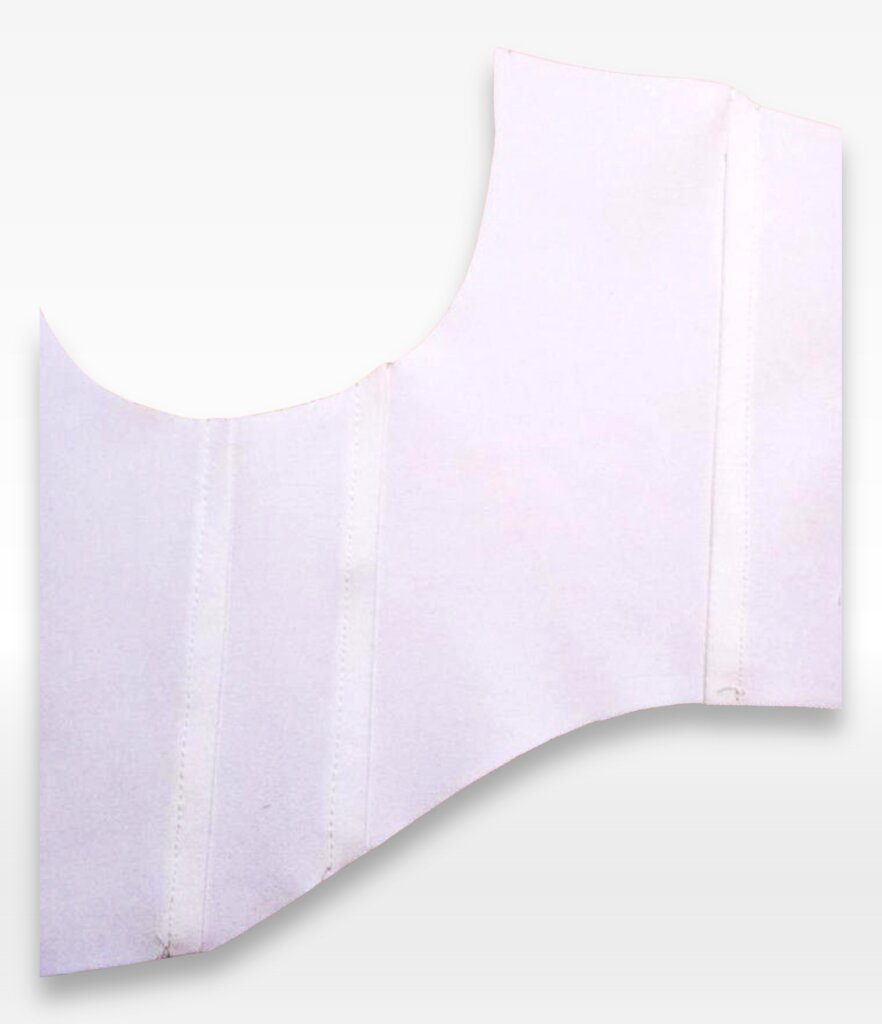
STEP 3. Attach stabilizing tape:
On the inside, sew stabilizing tape under the boning channel at the center front, keeping it 1/4″ (0.5 cm) away from both the upper and lower edges to prevent excess bulk.
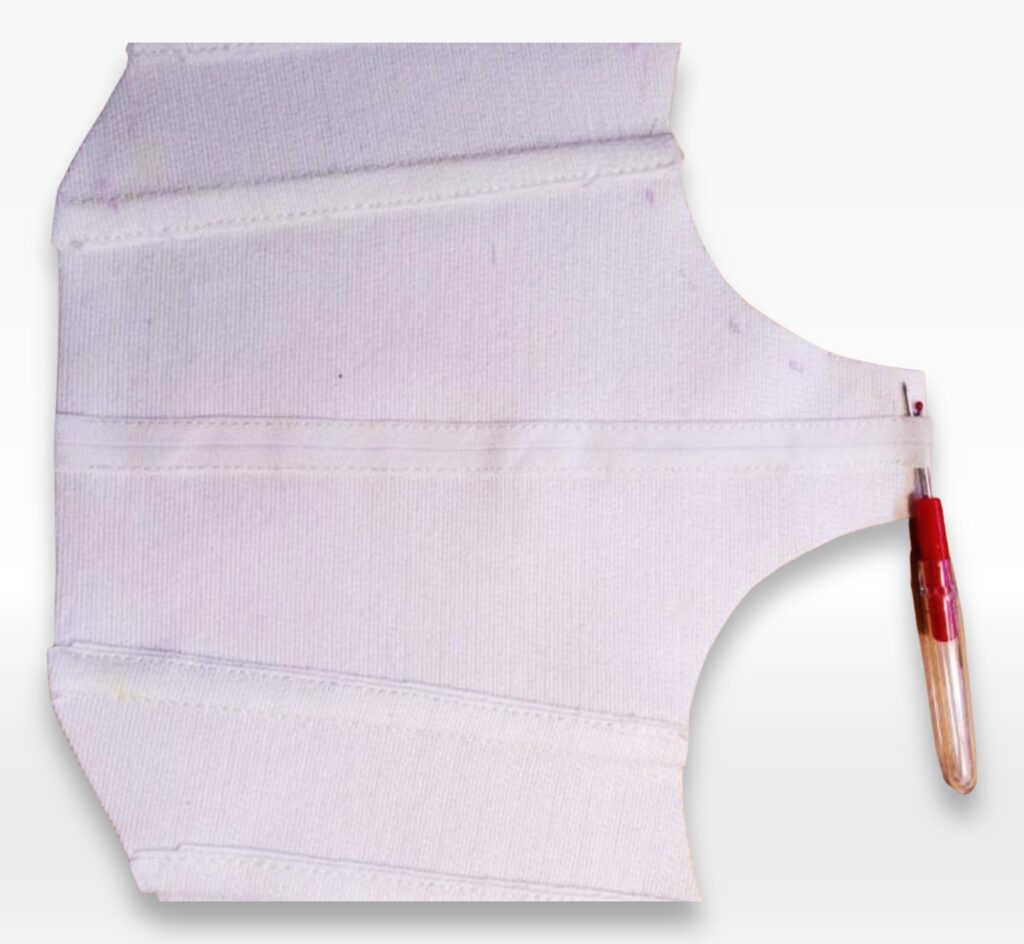
STEP 4. Attach the cups:
Align the cups with the bodice, matching notches, then pin and stitch in place.
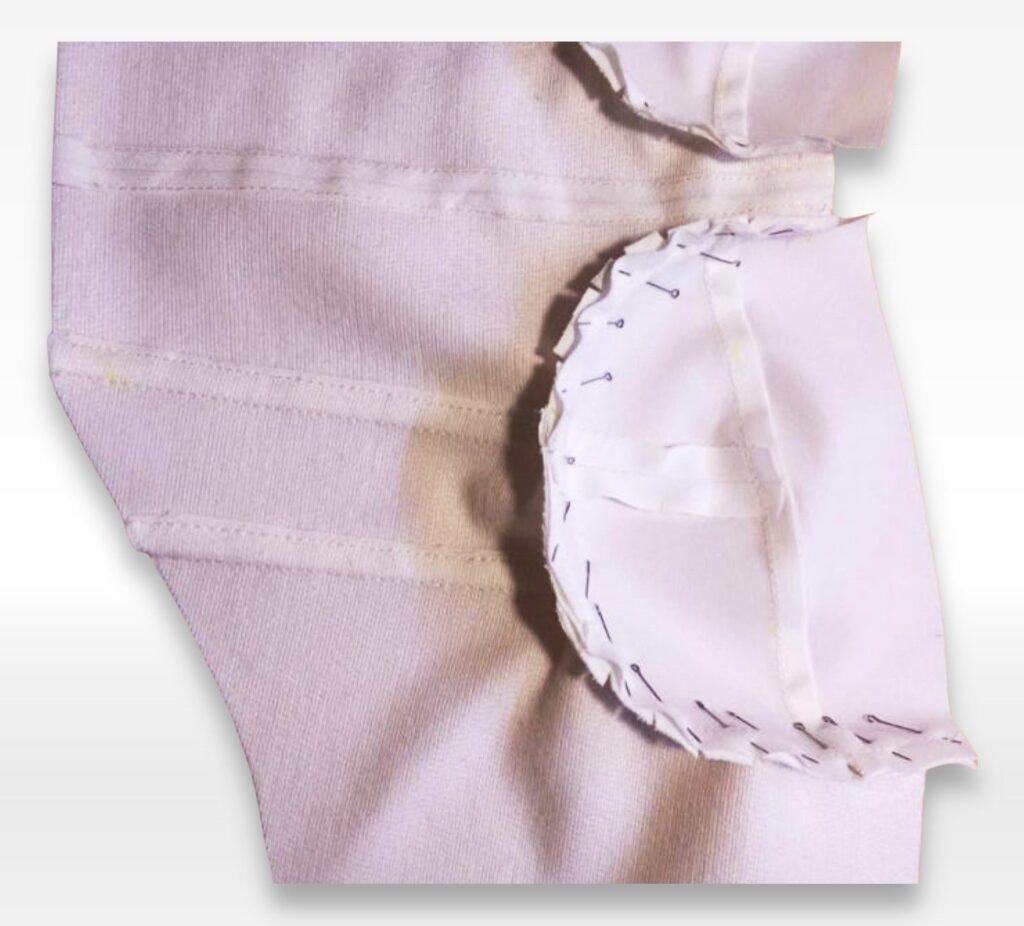
Topstitch 1/4″ (0.5 cm) from the seam. Insert boning into the cup seams.
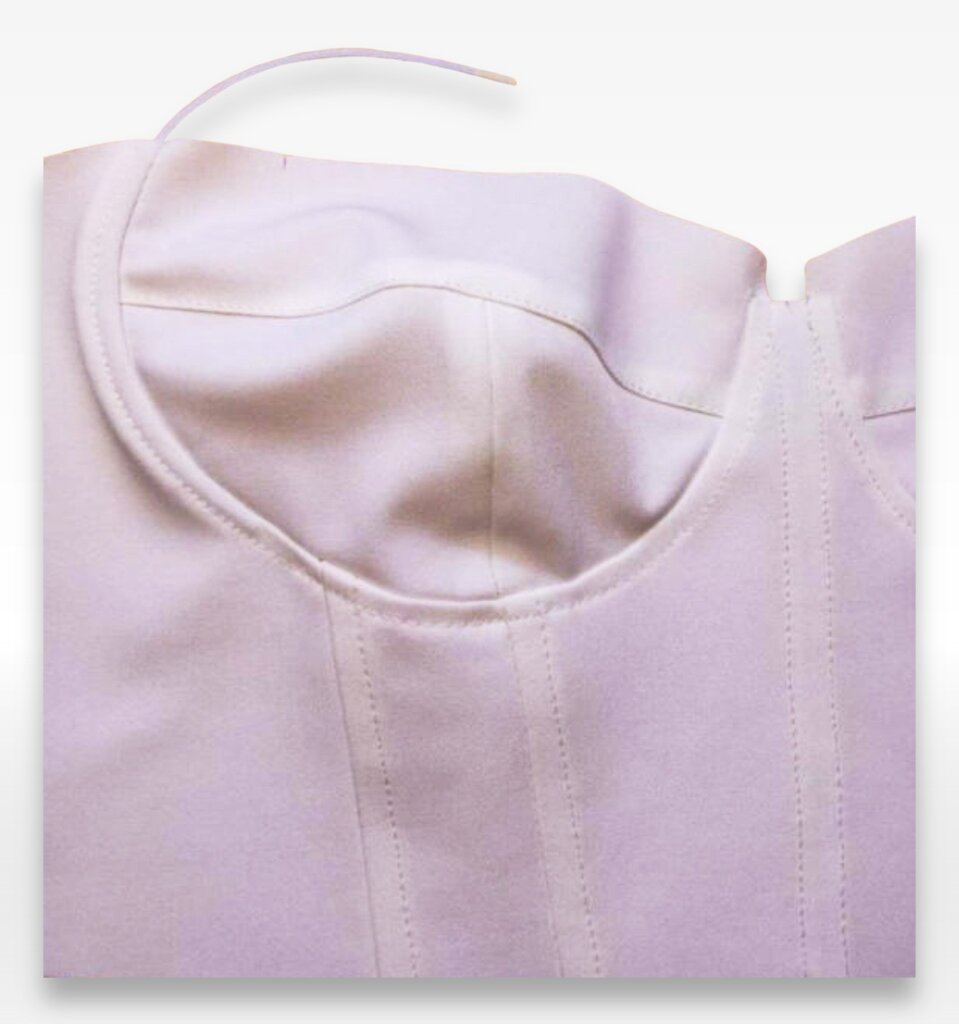
STEP 5. Insert boning (rigilene or plastic boning):
Place boning into the appropriate seams, trimming to avoid interference at the top and bottom edges of the garment.
Heat-seal the edges of the boning to prevent fraying.
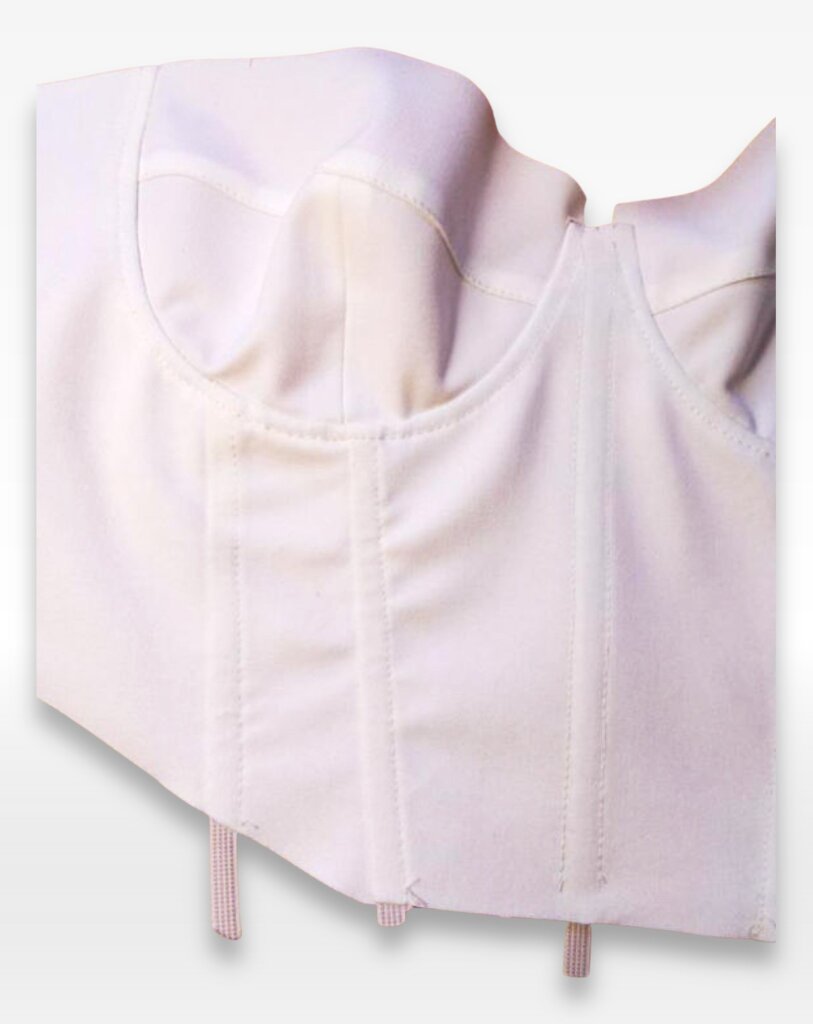
STEP 6. Prepare and sew the straps:
Fuse interfacing to the upper strap pieces.
Trim the seam allowances of the lower straps by 1/8″ (0.2 cm).
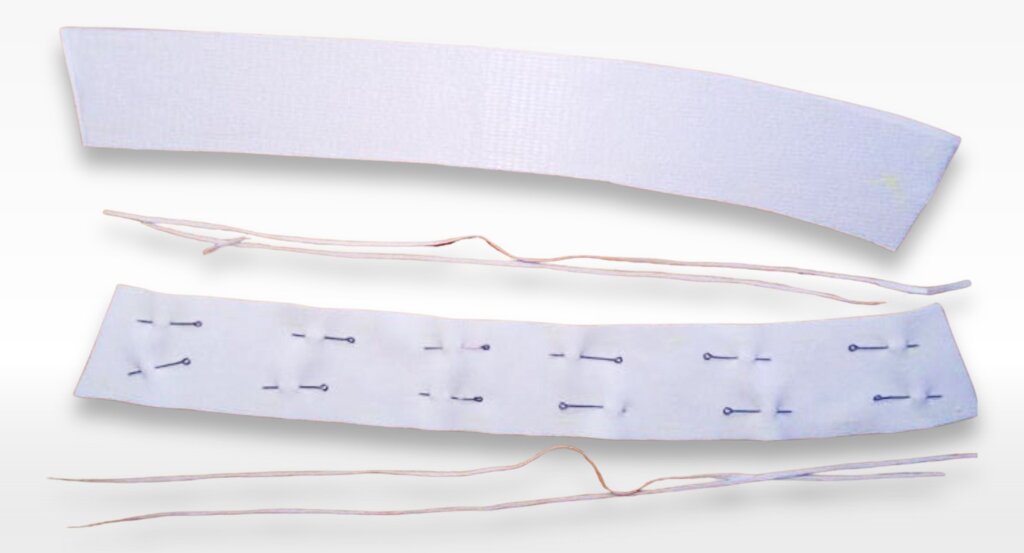
Place upper and lower strap pieces right sides together, pin, and stitch along the edges.
Turn the straps right side out and press.
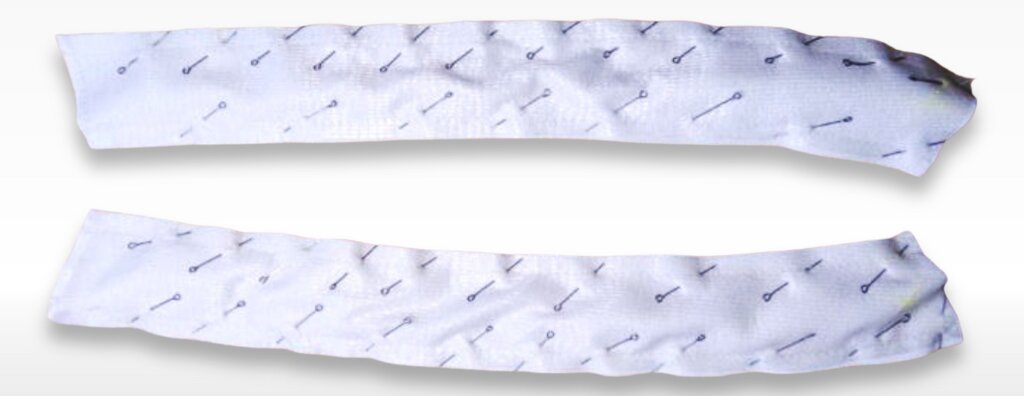
Understitch 1/16″–1/8″ (0.1–0.2 cm) from the seam, directing the seam allowance toward the lower strap.
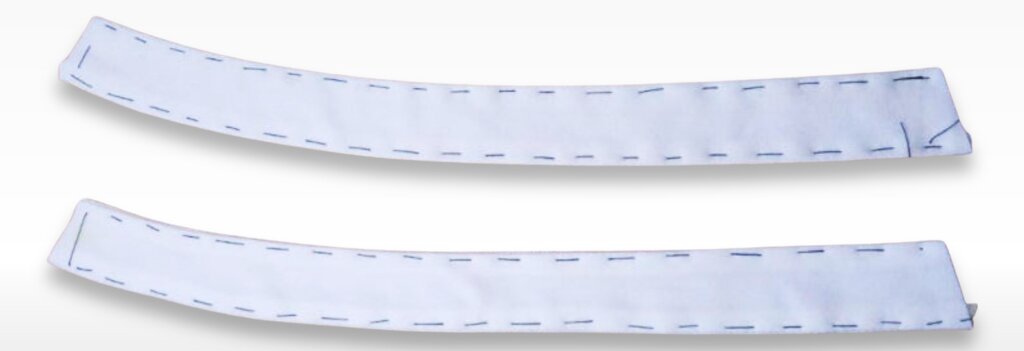
Attach straps to the upper edge of the bodice, ensuring correct alignment.
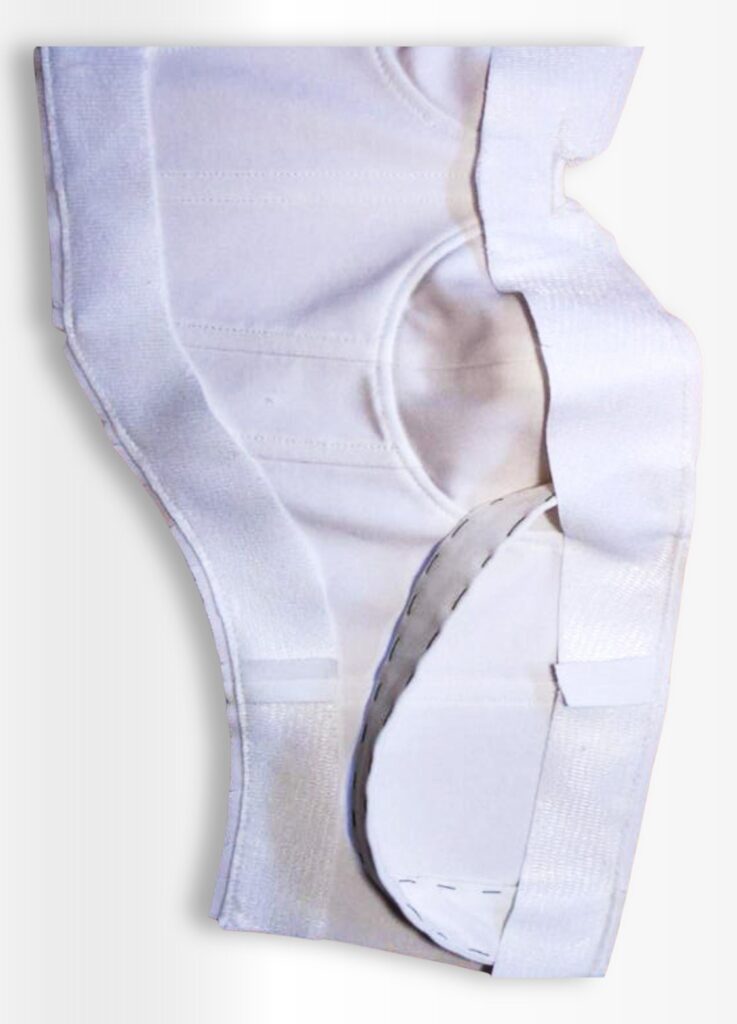
STEP 7. Prepare and attach the facings:
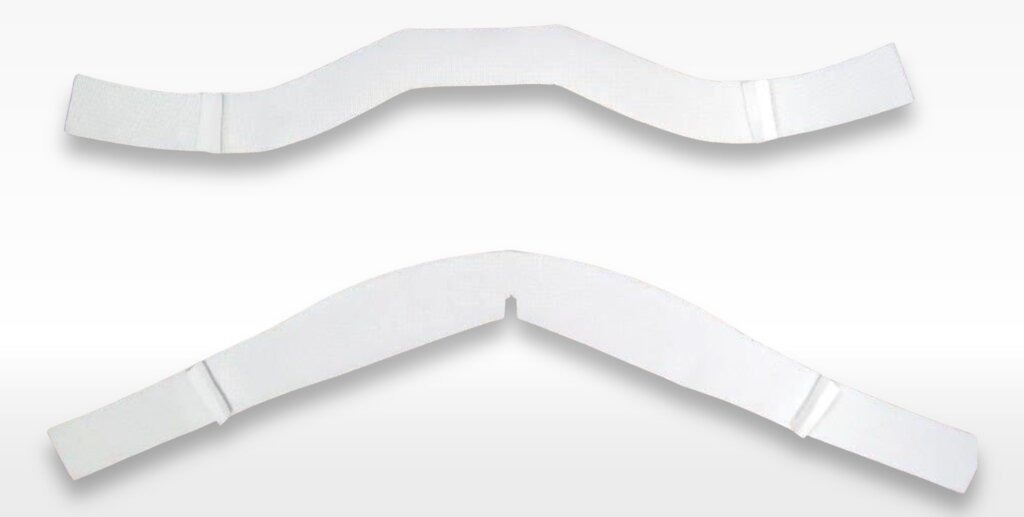
Fuse interfacing to the upper and lower facings, then sew them together as required. Press seam allowances open.
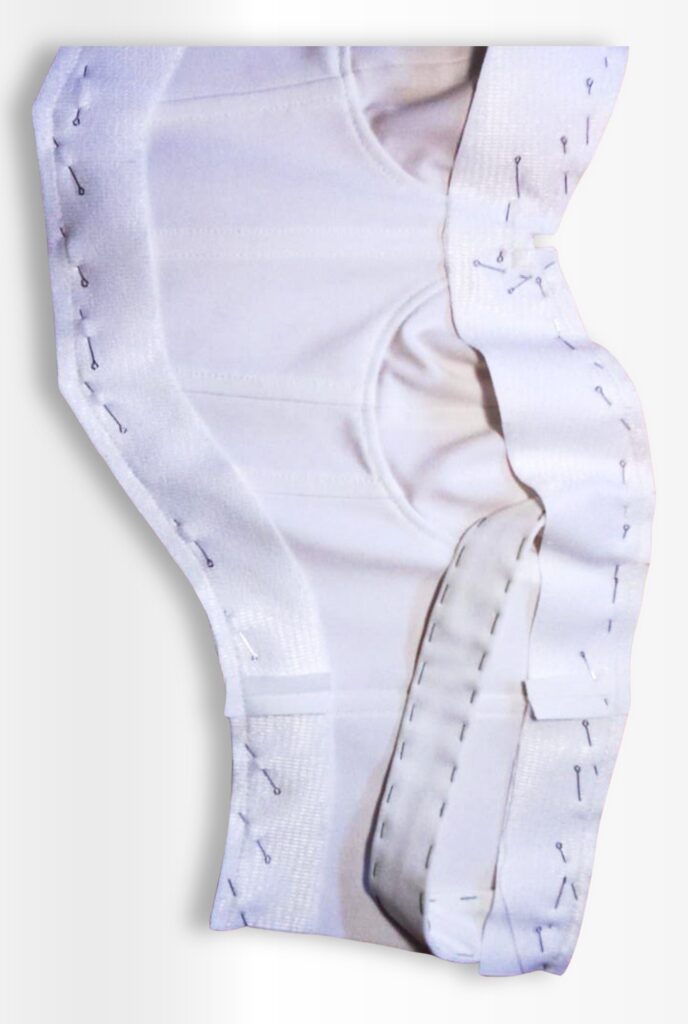
Place the facings right sides together with the garment, aligning edges, then pin and stitch.
Trim seam allowances in curved areas, stopping 1/8″ (0.2 cm) before the stitch line. Clip corners diagonally for a clean finish.
For interfaced areas, trim seam allowances close to the stitch line.
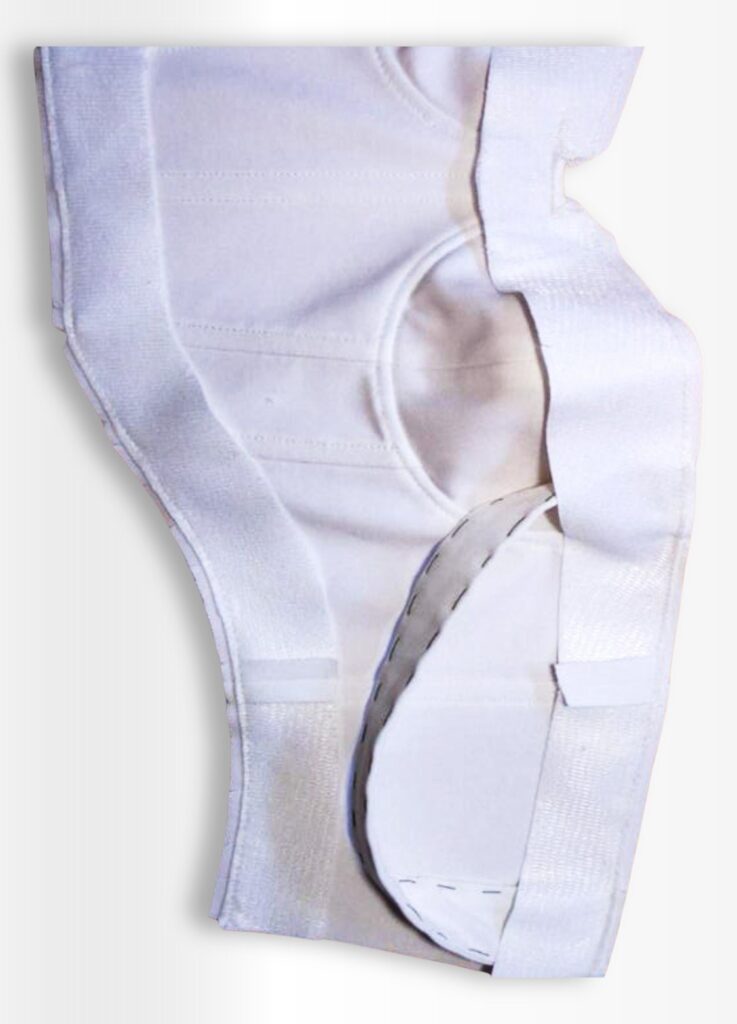
Press seam allowances toward the facing, then understitch along the right side.
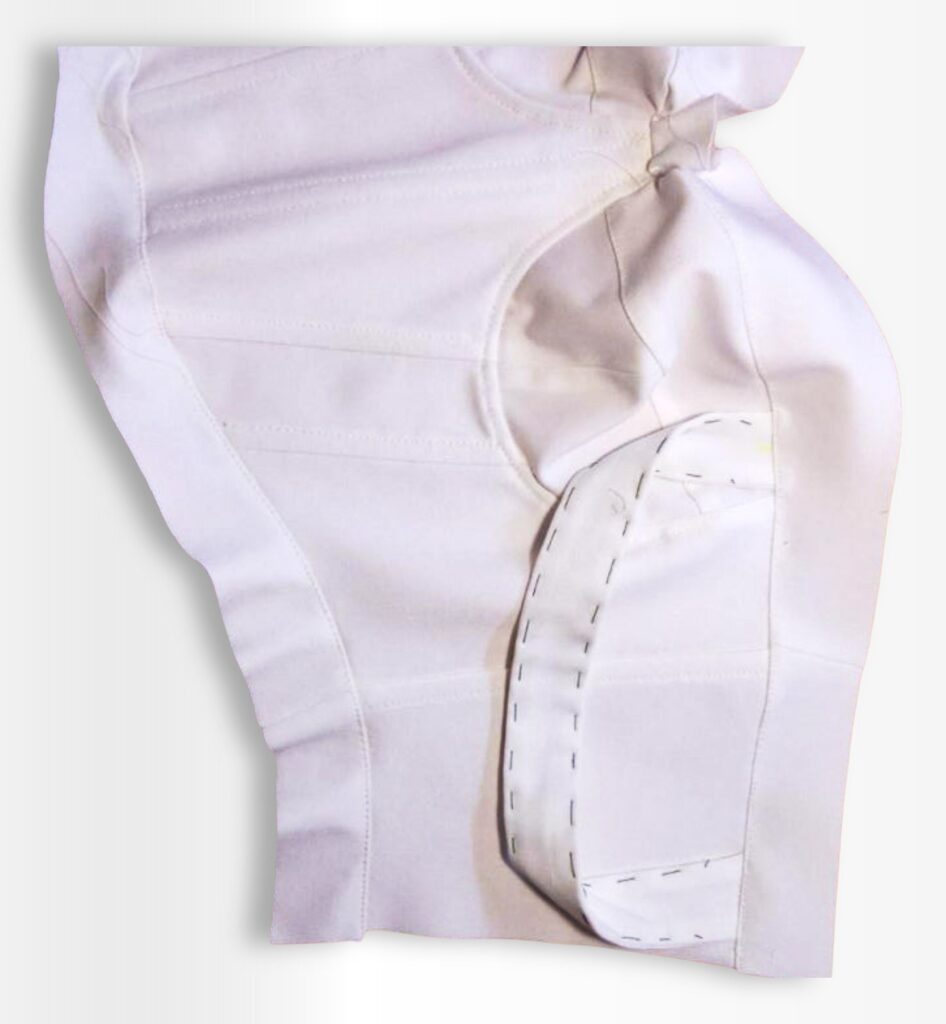
Turn facings to the inside and press, ensuring a smooth edge.
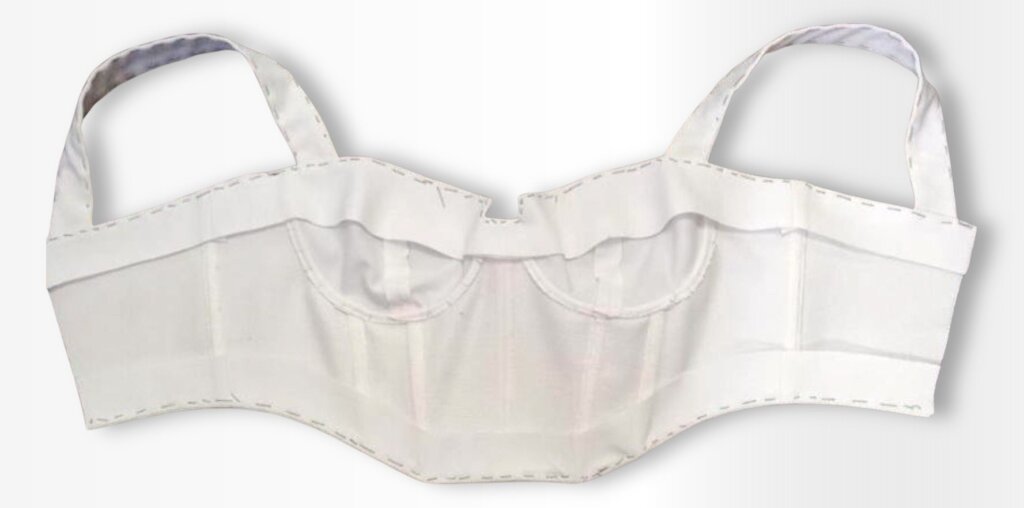
STEP 8. Construct the lining:
Sew the lower cup lining pieces together and press seam allowances toward the center.
Assemble the bodice lining, pressing seams toward the center.
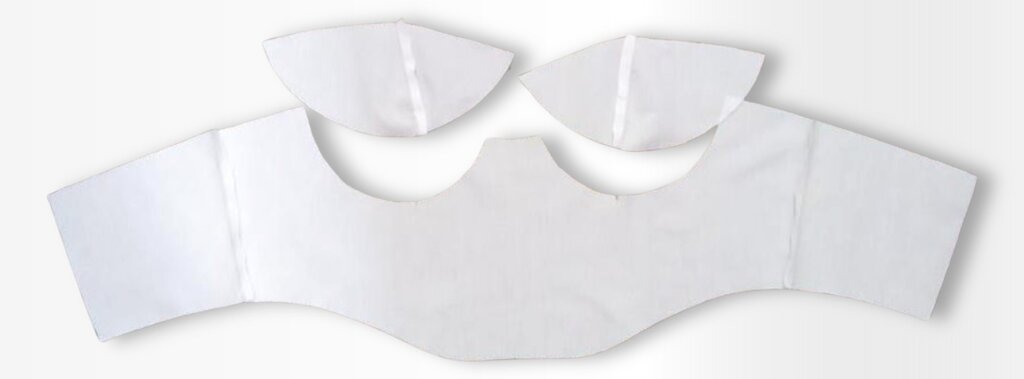
Attach the cups to the lining, pressing the seam allowances downward.
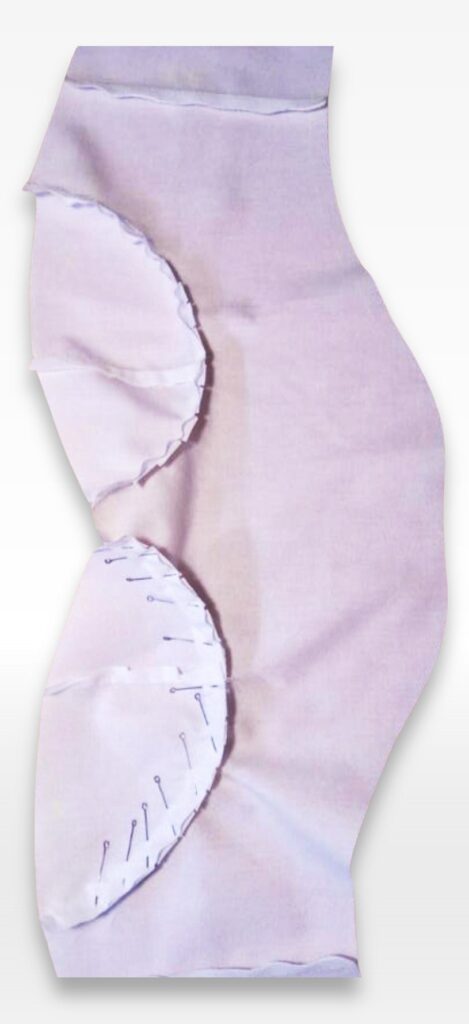
Leave small openings in the lining seams for turning later.
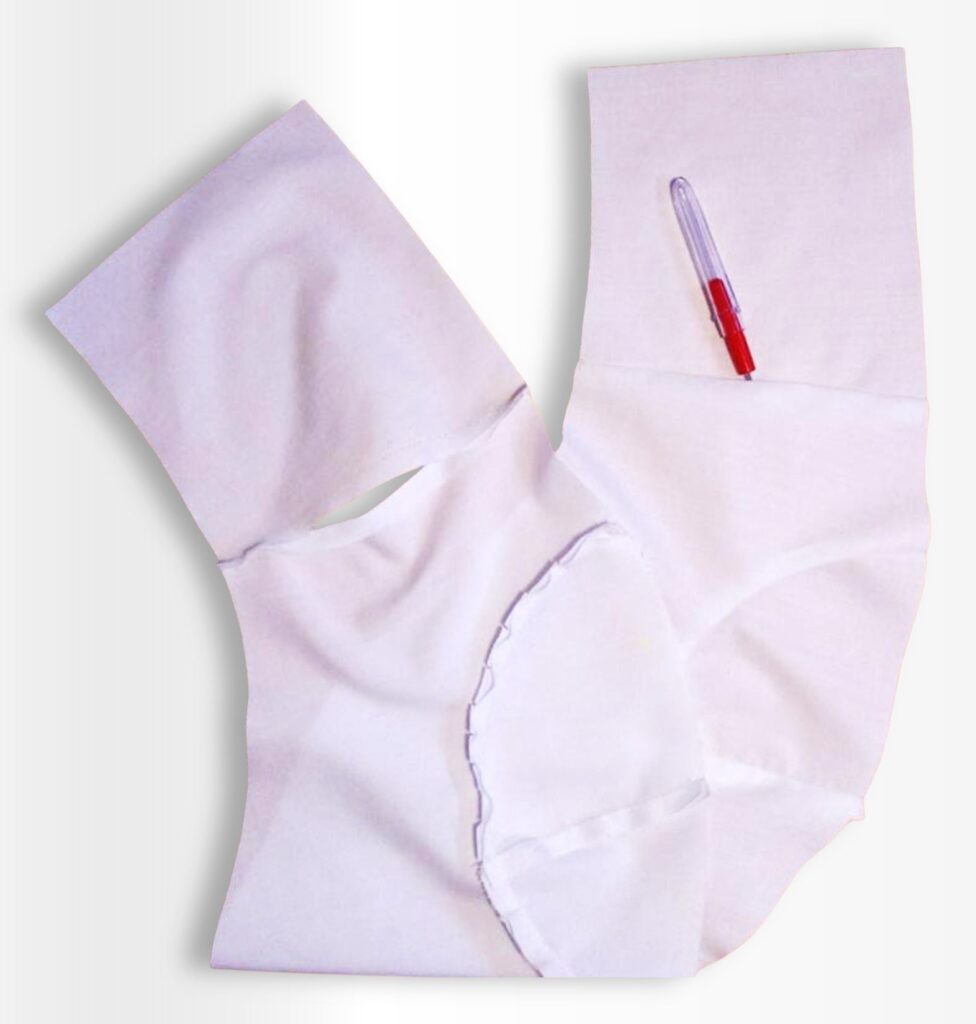
STEP 9. Attach the lining to the garment:
Sew the lining to the top and bottom facings.
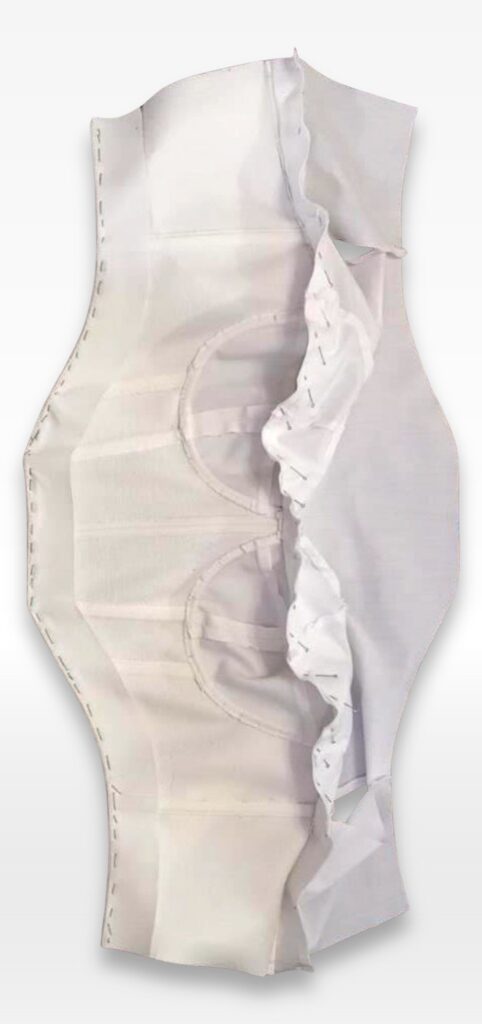
Sew the lining to the facing of the bottom of the garment.
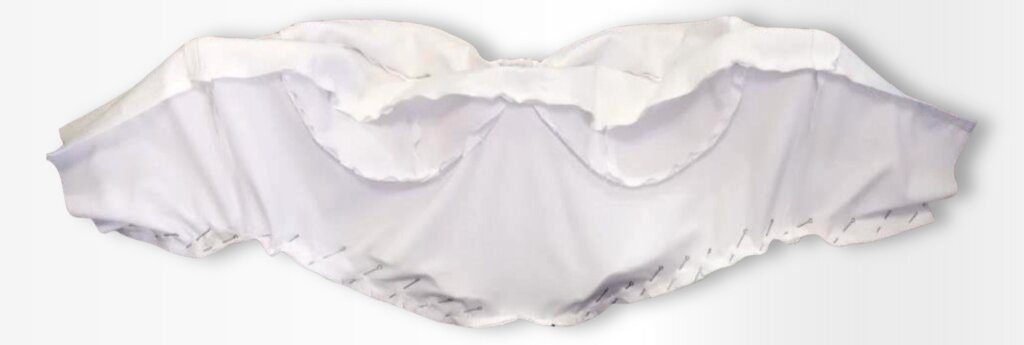
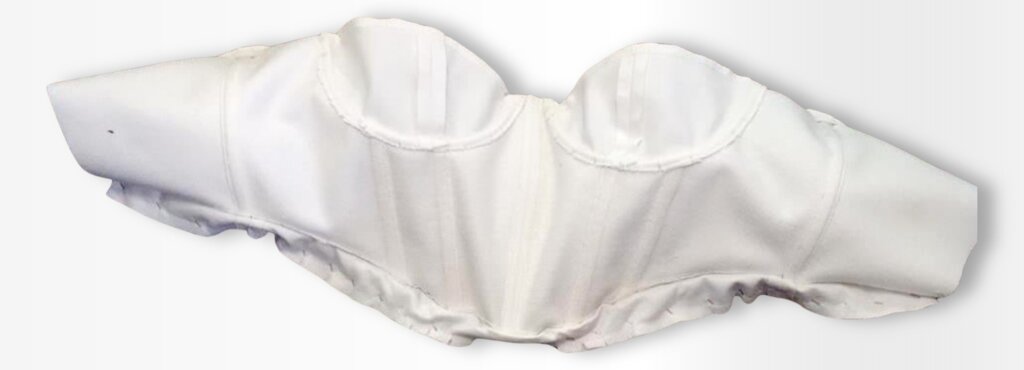
Bend the boning slightly, then turn the garment right side out through the unsewn lining openings.
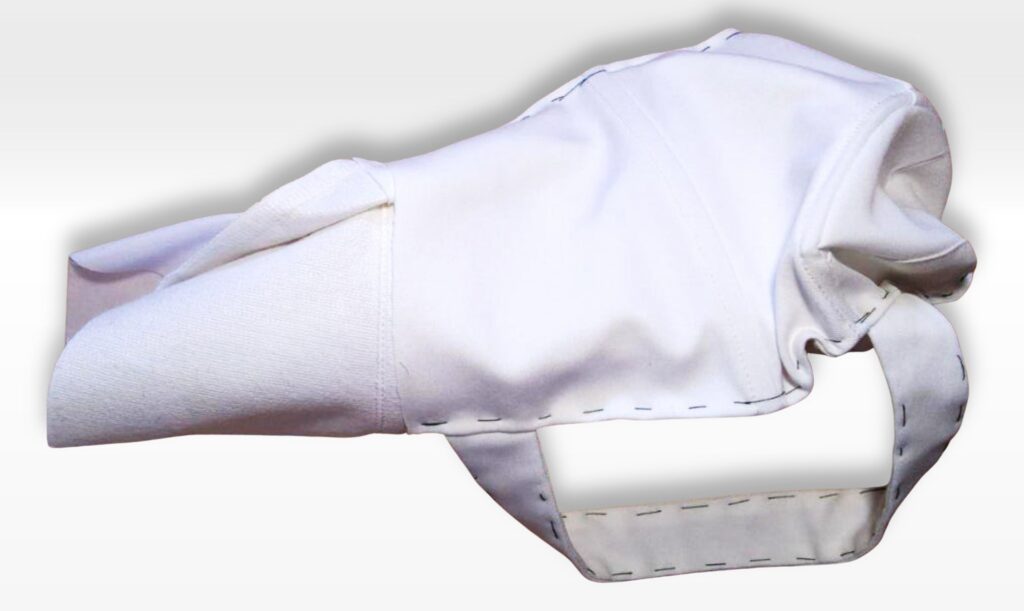
Press the seam allowances toward the lining for a clean finish.
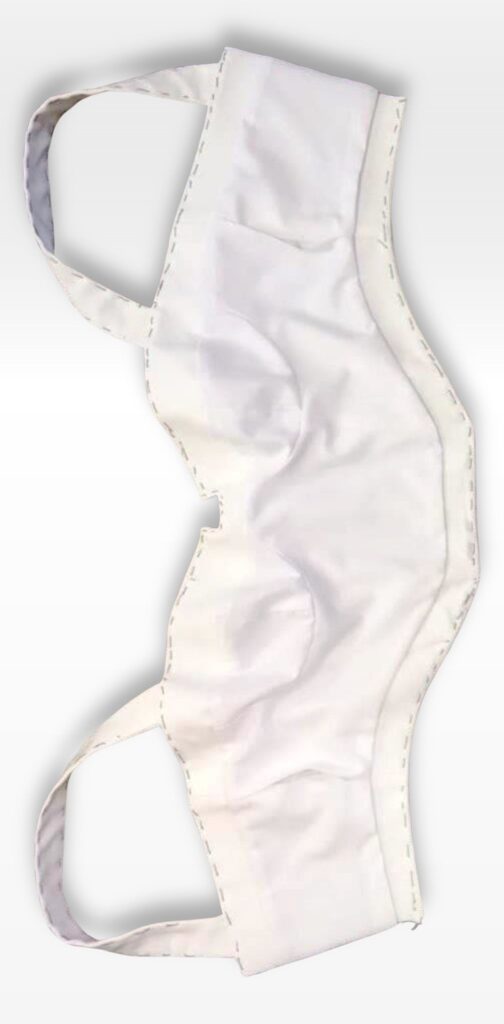
Fold in the raw edges at the lining fastener openings by 3/8″ (0.4 cm) and press.
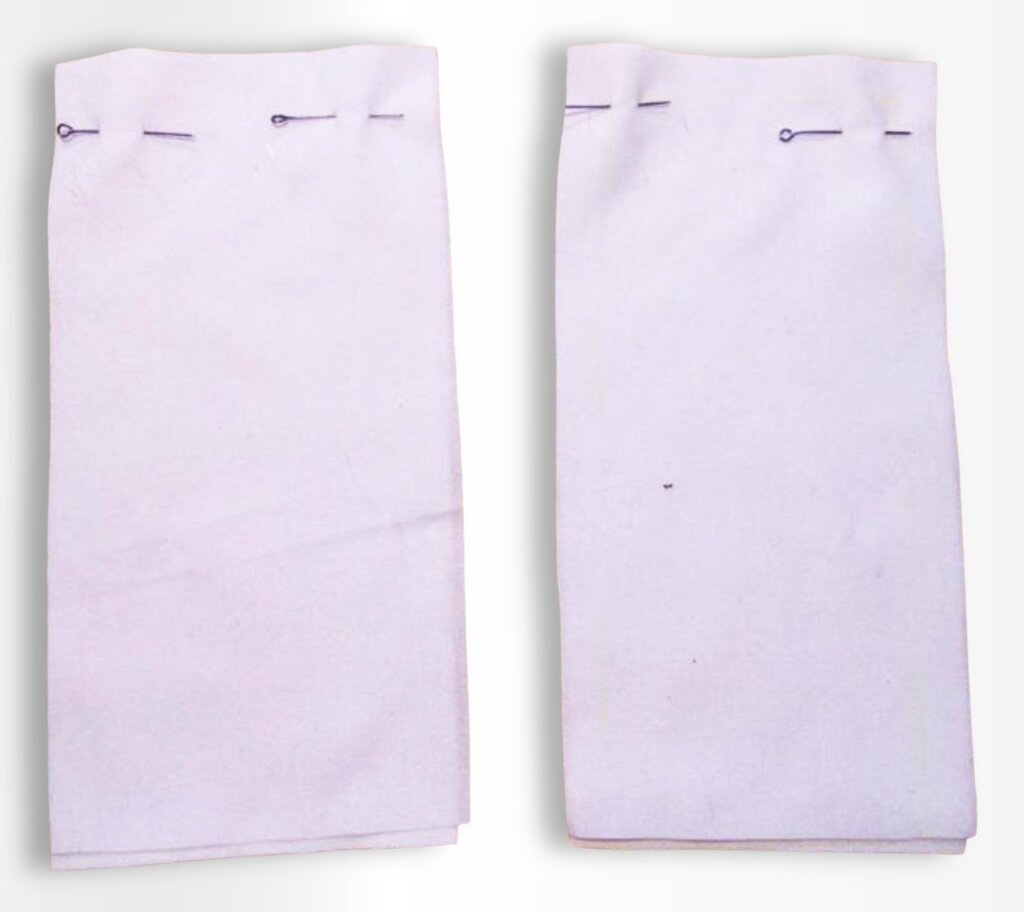
STEP 10. Attach the Fastener and Final Assembly:
Place the main and lining pieces of the fastener right sides together, aligning the short edges. Pin and stitch.
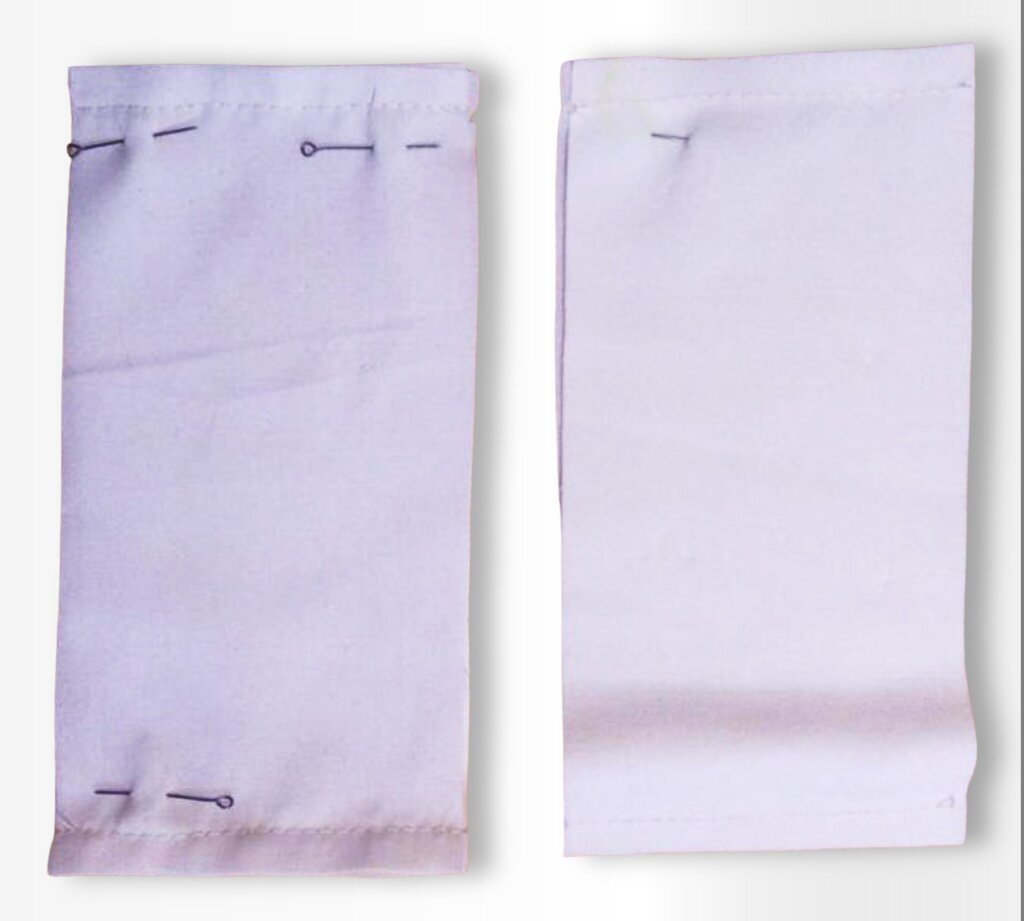
Turn the fastener pieces right side out and press, directing the transition piping from the top toward the lining.
Stitch along the upper and lower edges of the fastener, securing it under the elastic.
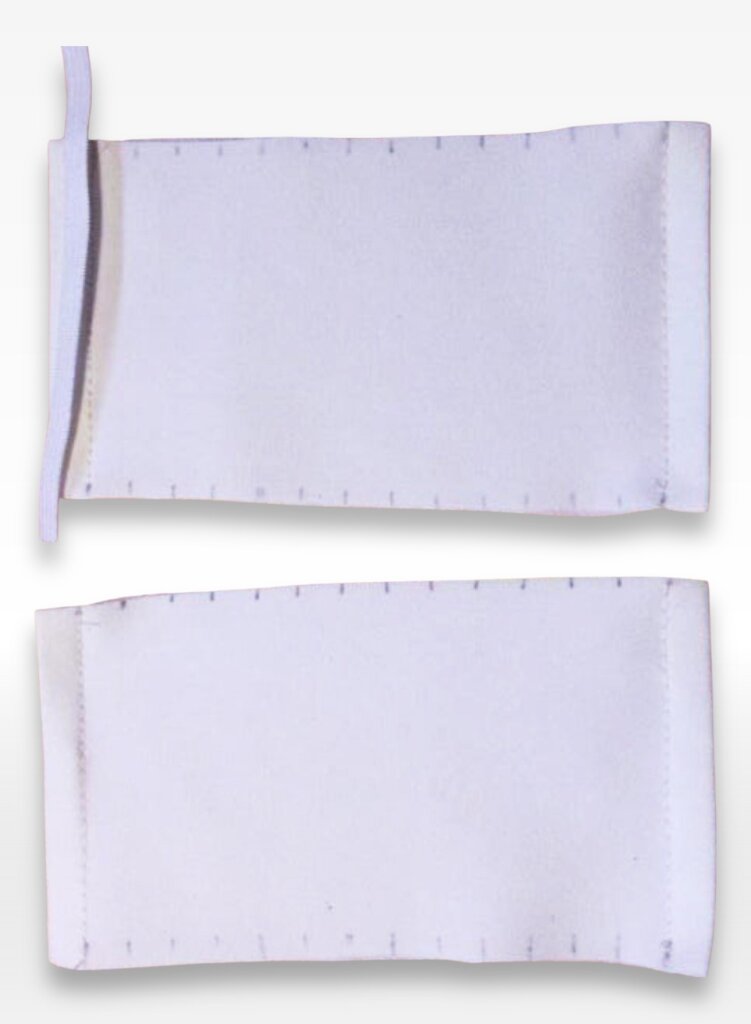
Using the guide markings, stitch the fastener sections with elastic thread.
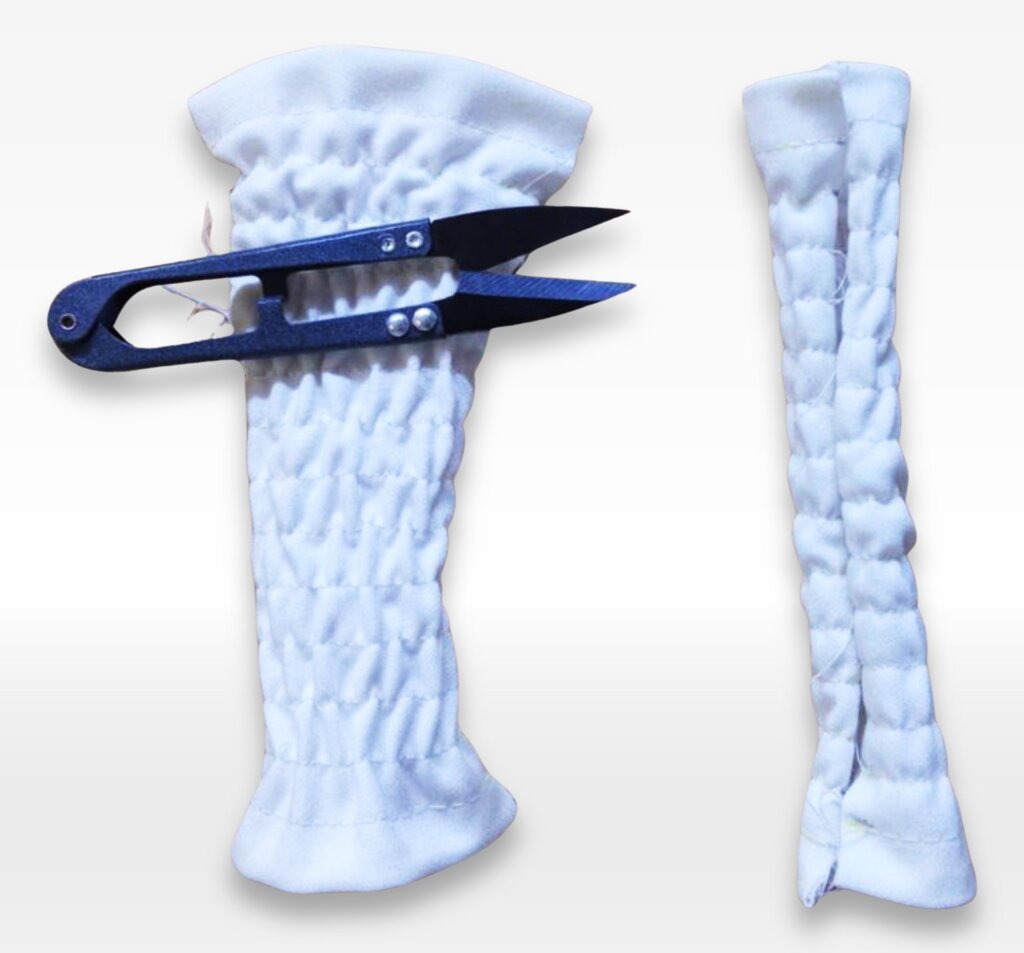
Insert narrow elastic into the drawstring channels of the fastener and secure the ends.
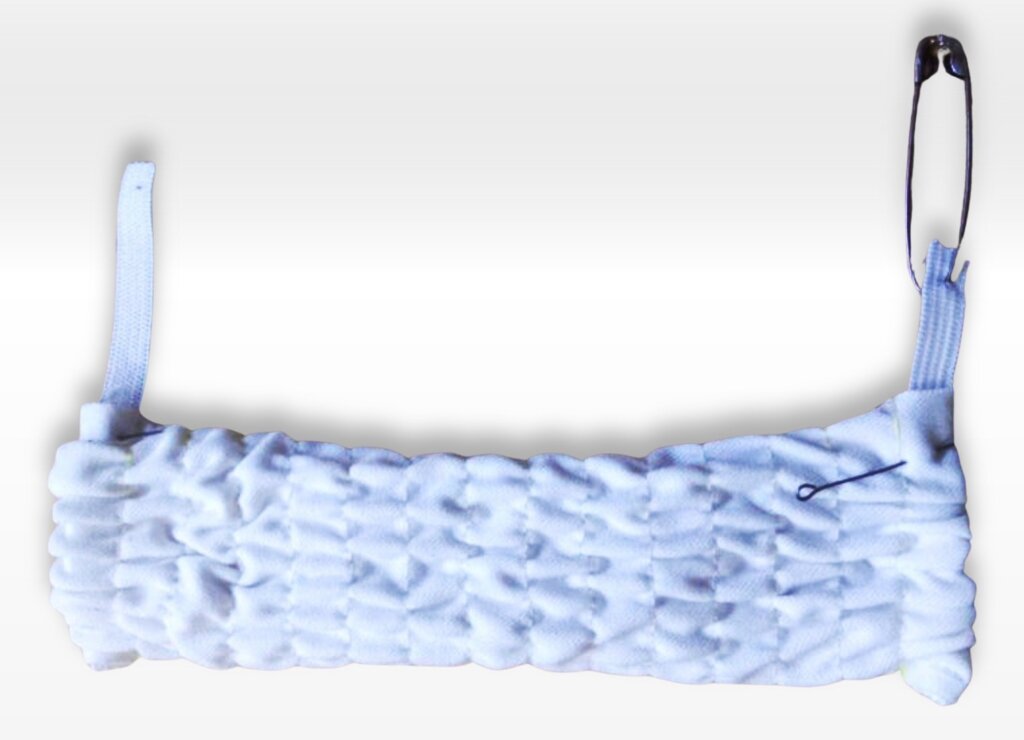
Sew the zipper to the ends of the fastener, ensuring the ends are reinforced for durability.
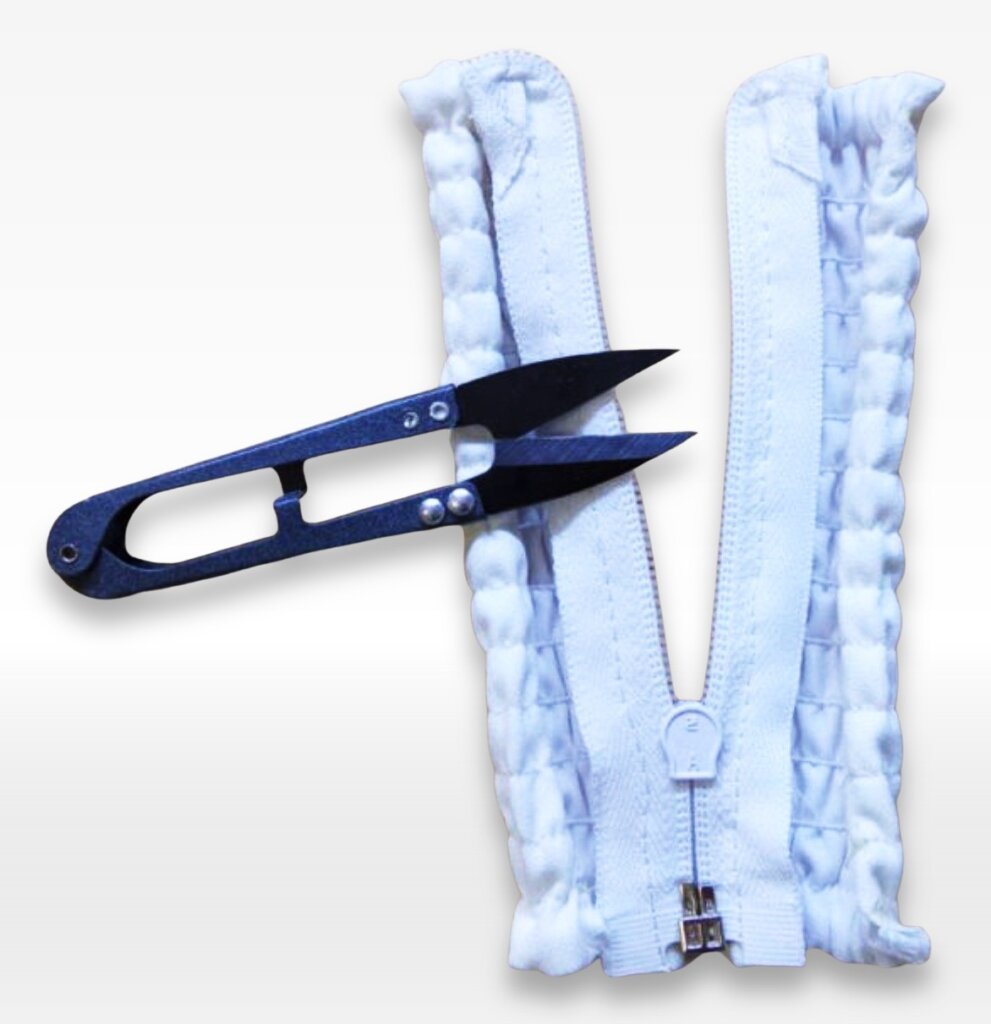
Cut a 1 3/8″ (3.5 cm) wide bias strip. Press it in half lengthwise, wrong sides together. Then fold the raw edges toward the center crease and press again.
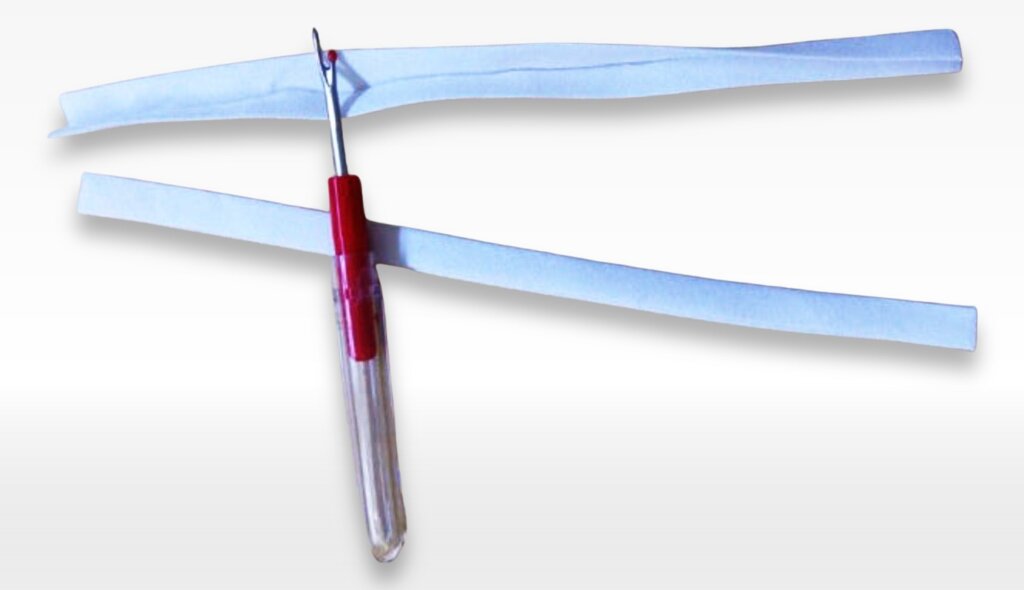
Use the prepared bias strip to finish the seam allowances at the zipper.
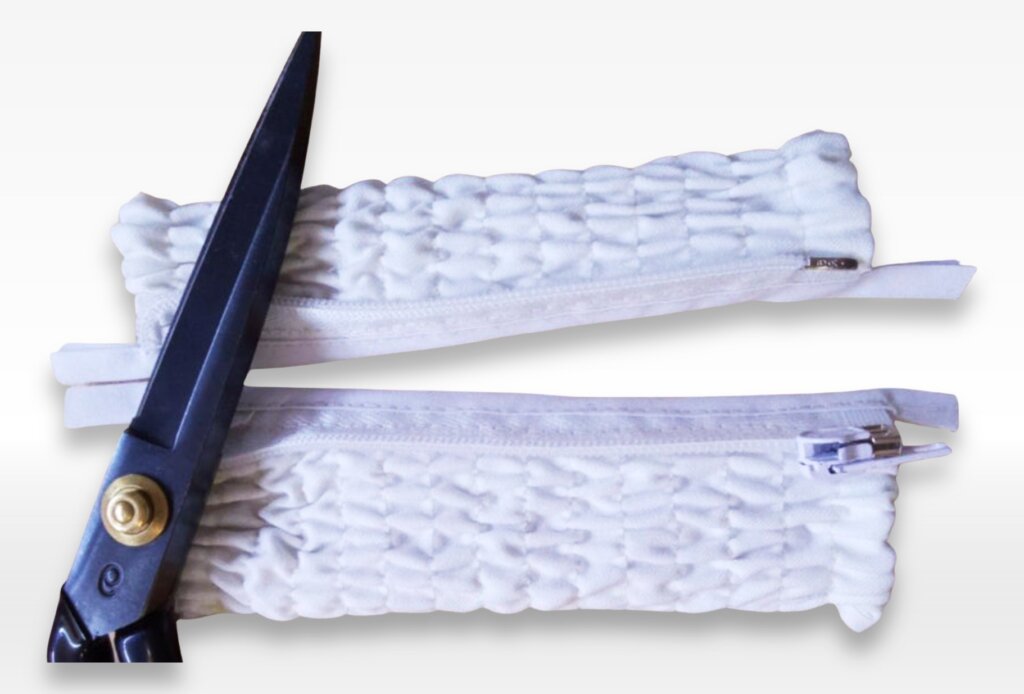
Fold the binding ends to the wrong side and secure them with a stitch.
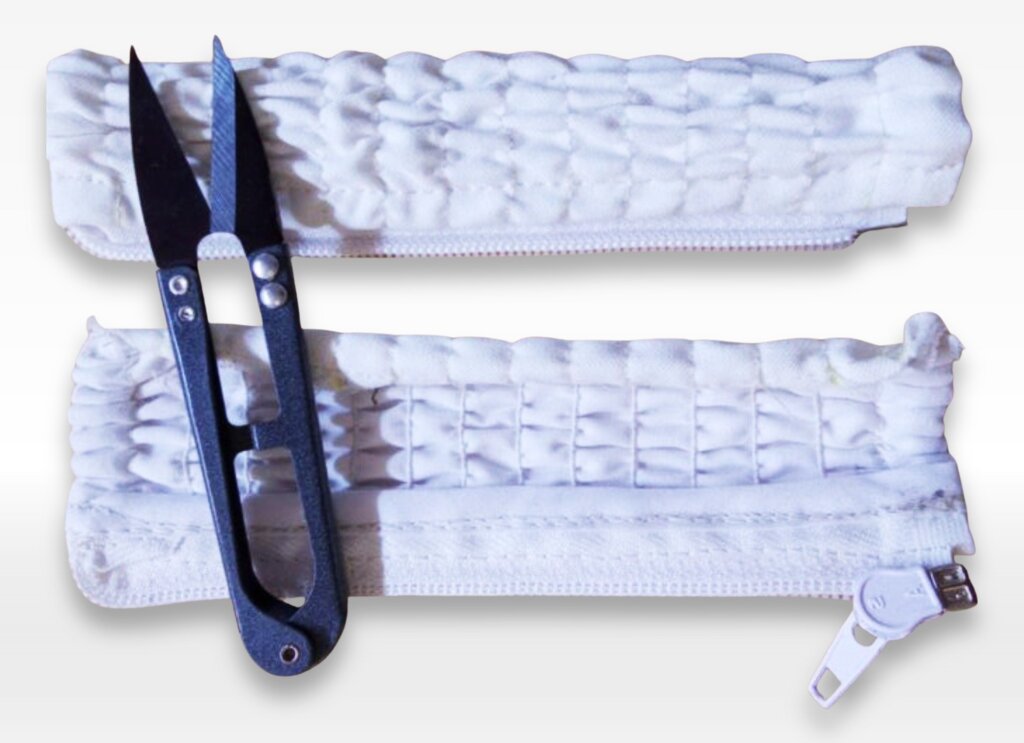
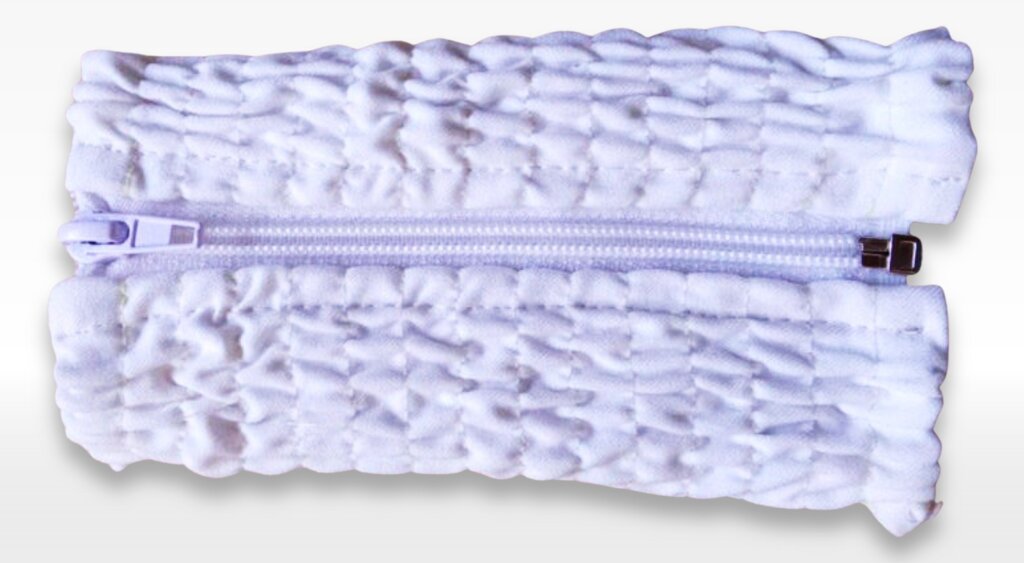
Sew the fastener sections to the front of the garment.
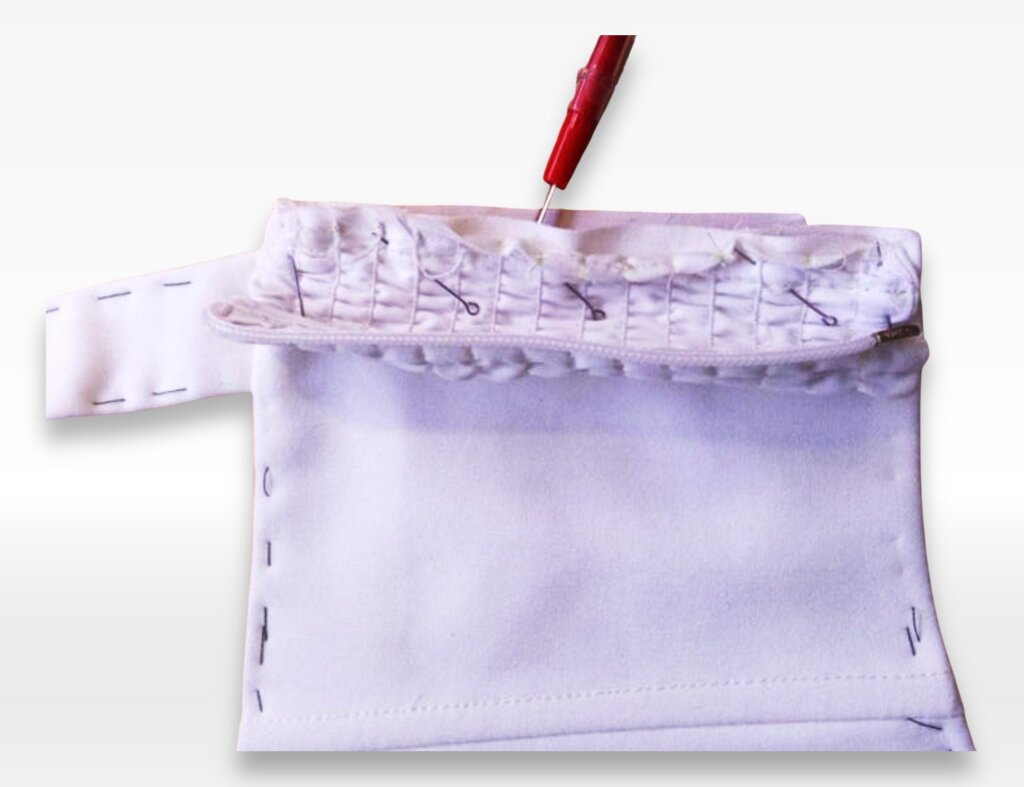
Partially turn the garment inside out through the lining opening. Stitch the lining to the zipper in the seam where the fastener is sewn.
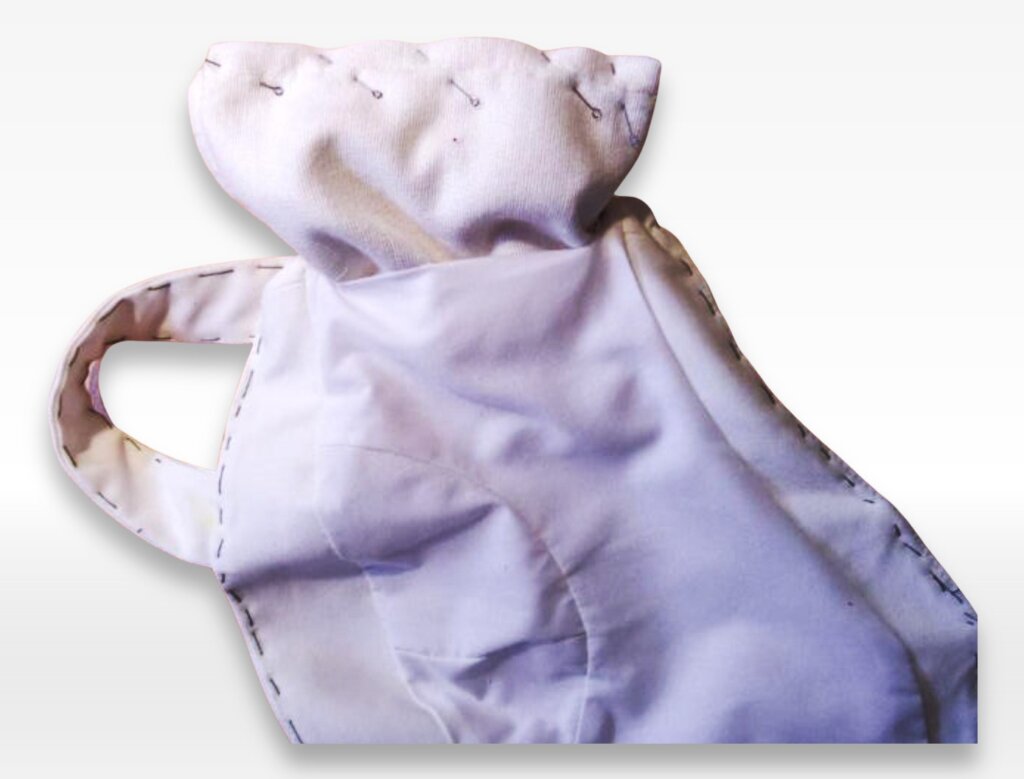
Turn the garment right side out and smooth it into shape.
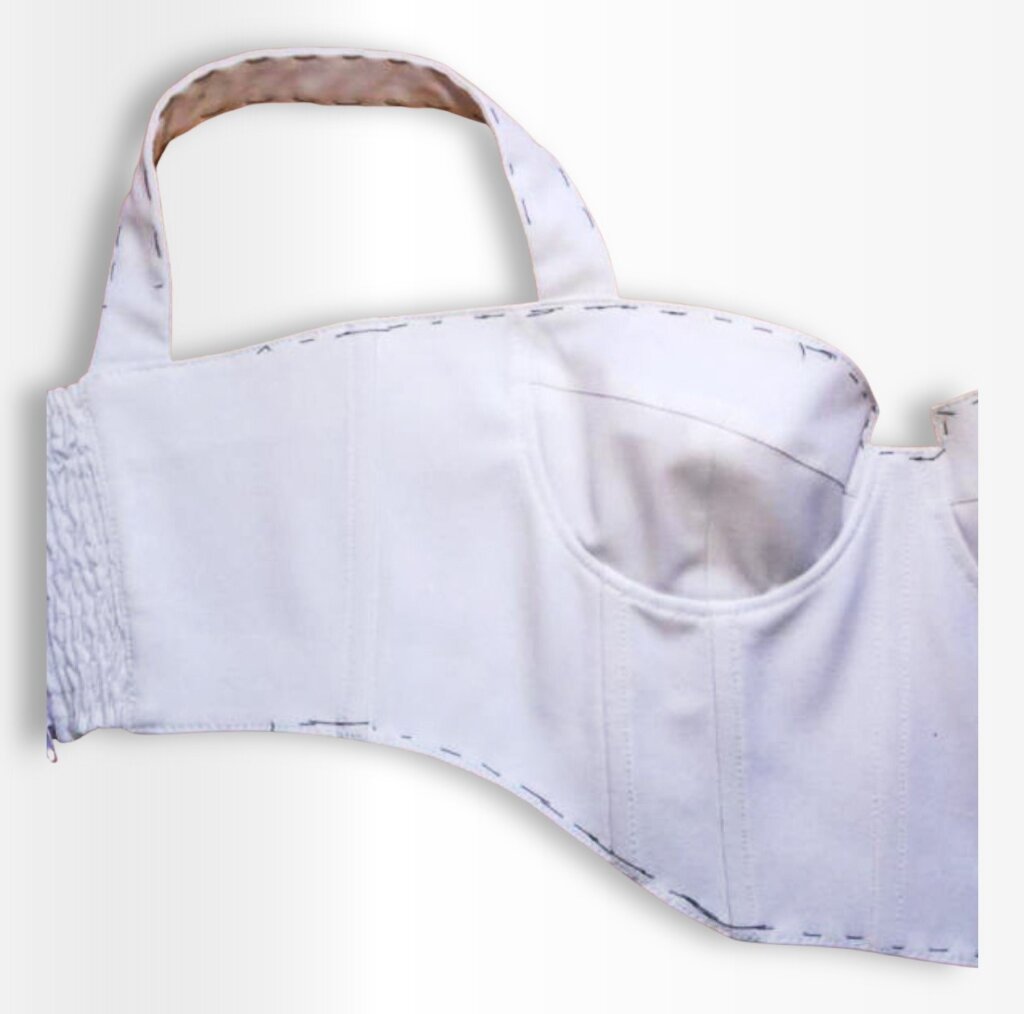
Topstitch along the perimeter for a clean finish.
Sew the remaining lining openings closed along the edge.
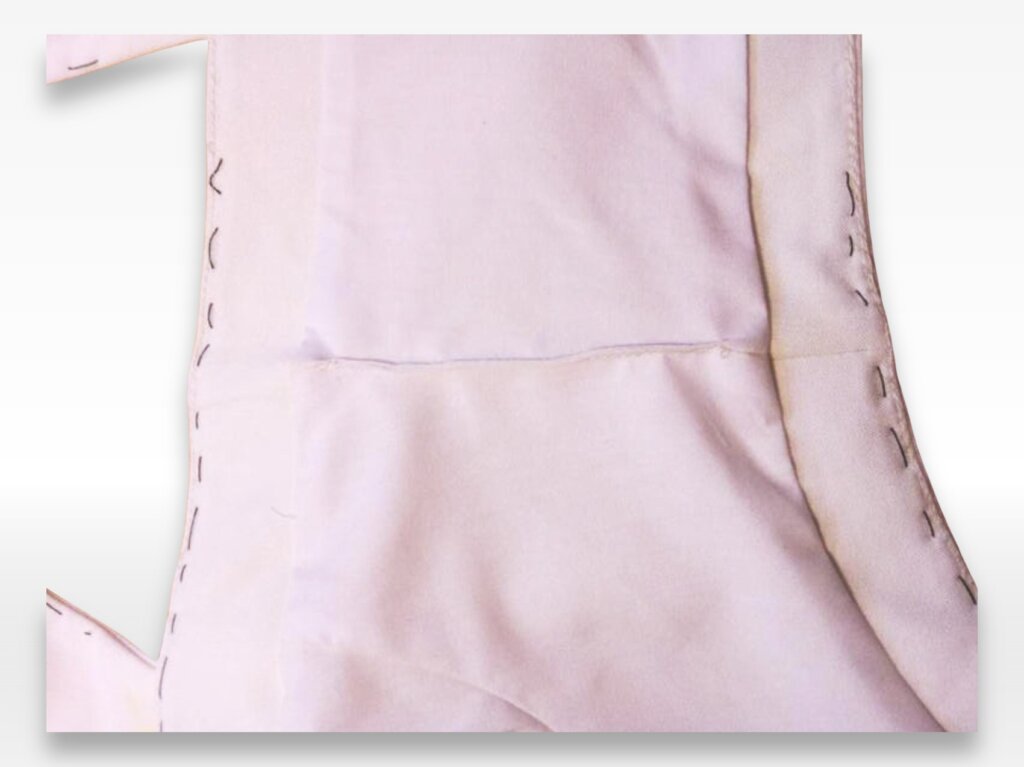
Remove any basting stitches and press the garment thoroughly for a polished look.
And That’s a Wrap—You Did It!
Take a step back and admire your work—because wow, you just made a gorgeous corset top! From precision sewing on those structured cups to finessing that sleek boning, you pulled off a project that’s equal parts technical and stylish. And let’s be real, corset tops aren’t exactly beginner-level, so give yourself some credit.
Maybe you had a few moments of Why did I start this? (been there), or maybe that zipper tested your patience just a little. But look at you now—you powered through, and the result is totally worth it. Whether you made this top for a special occasion, a casual slay, or just to challenge yourself, you now have something uniquely yours—a perfect fit, made by you.
Now for the final, most important step: Wear it with confidence! Pair it with high-waisted jeans, layer it under a blazer, or style it however makes you feel amazing. And don’t forget to give it a good press before heading out—because, as every sewist knows, a well-pressed garment is pure magic.
Oh, and if this was your first corset-style piece? Trust me, it won’t be your last. 😉
FAQ: Let’s Troubleshoot Together
Do I really need boning?
Not necessarily, but it makes a big difference. Boning helps the top hold its shape and prevents it from bunching up. If you’re after a structured, snatched look, don’t skip it. But if you want a softer, more relaxed fit, you can go without—just know the top might not sit as smoothly.
Eco-leather keeps sticking under my presser foot—help!
Yep, that happens. Try using a teflon foot or sandwiching a piece of tissue paper between the fabric and the foot—just tear it away after sewing. And whatever you do, avoid pinning! Use clips instead, because once you poke a hole in leather, it’s there forever.
Can I make this with stretch fabric?
You can, but you’ll need to adjust the pattern. Stick to stable knits or structured stretch wovens (like stretch denim) and consider skipping the boning since the fabric already has flexibility.
How do I get a smooth, rounded cup shape?
Pressing is your best friend! A tailor’s ham works wonders for shaping curves. Also, topstitching along the cup seams reinforces the shape and keeps them looking crisp instead of floppy.
My zipper is wavy! What went wrong?
Wavy zippers usually mean the fabric stretched while sewing. To avoid this, use fusible interfacing along the zipper seam, and sew with a walking foot or a longer stitch length to keep things smooth.


